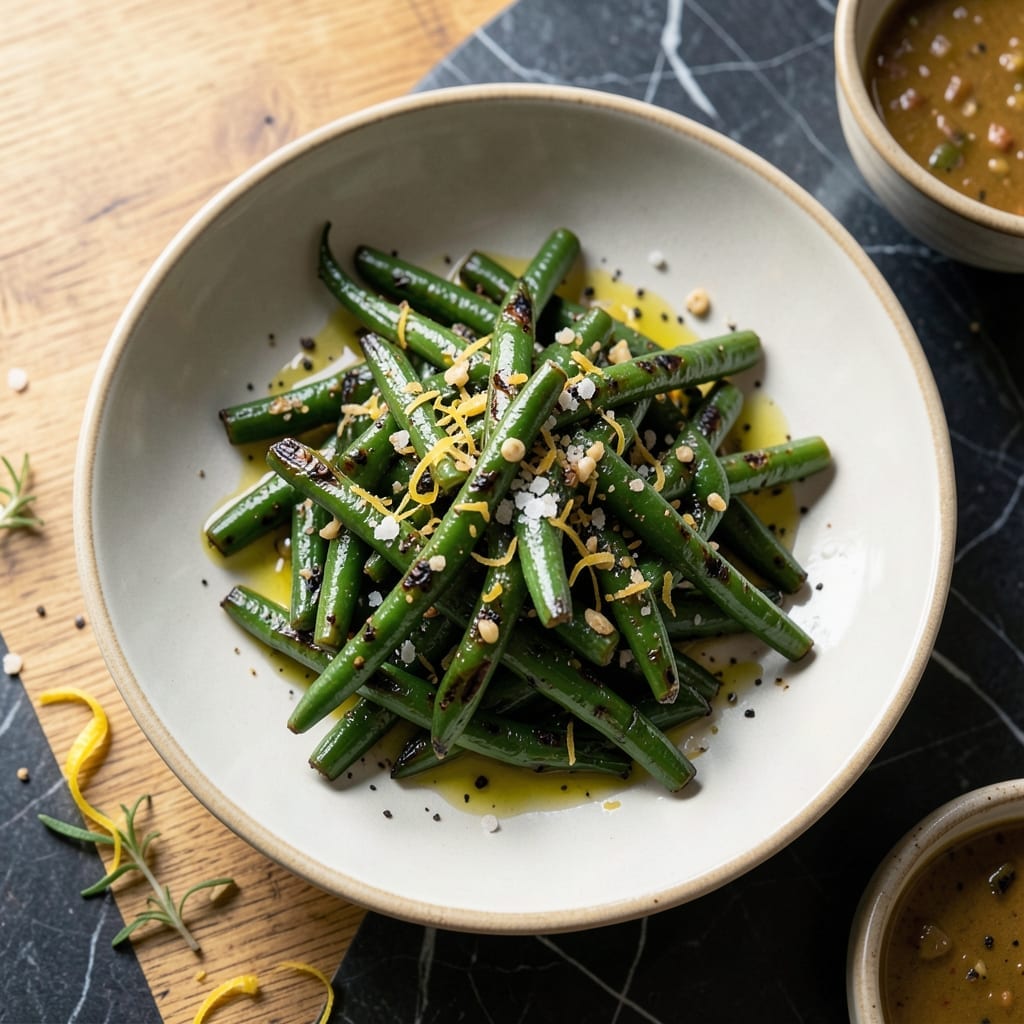
Fire-kissed green beans with a garlic punch—this is how you turn a simple vegetable into a showstopper. The grill adds a smoky depth that pairs perfectly with the aromatic garlic, while the charred edges bring texture that roasting just can’t match.
Fresh green beans hold up beautifully to high heat, and a quick toss with olive oil, salt, and crushed garlic before grilling ensures every bite is packed with flavor. The process is straightforward, but the result is anything but ordinary.
You’ll end up with tender-crisp beans that have just the right amount of char, all infused with that unmistakable garlic aroma. It’s a side dish that steals the spotlight without overpowering the main course.
Vegan, simple, and undeniably delicious—this method works for any summer cookout or weeknight dinner.
Ingredients for Grilled Garlic Green Beans
Fresh green beans, bold garlic, and smoky grill flavors come together here.
| Ingredient | Amount | Notes |
|---|---|---|
| Fresh Green Beans 🌱 | 1 ½ lb | Trimmed, washed, dried thoroughly |
| Extra-Virgin Olive Oil 🫒 | 3 tbsp | High quality for grilling |
| Garlic Cloves 🧄 | 6 cloves | Crushed, not minced |
| Sea Salt 🧂 | 1 tsp | Flaky variety preferred |
| Black Pepper 🌶️ | ½ tsp | Freshly cracked for best flavor |
| Lemon Zest 🍋 | 1 tsp | From 1 medium lemon |
| Lemon Juice 🍋 | 1 tbsp | Freshly squeezed |
| Smoked Paprika 🌶️ | ¼ tsp | Optional for extra smokiness |
| Red Pepper Flakes 🔥 | ¼ tsp | Adjust to taste for heat |
| Fresh Parsley 🌿 | 2 tbsp | Chopped, for garnish |
[recipe_ingredient_scaler]
The green beans are everything here. Farmers market or Trader Joe’s have the freshest, crispest pods—avoid the sad, bendy ones in the grocery store. Look for vibrant green color and no brown spots. The garlic? Fresh heads only (the jarred stuff tastes like regret). I grab mine from Whole Foods when they’re on sale, but any market with good turnover works.
Out of fresh garlic? Garlic powder at one-third the amount works in a pinch, but fresh is better. No lemons? Lime zest and juice swap in perfectly. Want more heat? Double the red pepper flakes. The smoked paprika is optional but highly recommended—it amplifies that grill char. And if you’re grilling indoors, a cast-iron grill pan gets you 90% of the way there.
Leftovers keep 3-4 days in the fridge, but they’re best eaten same-day (the char softens). Doesn’t freeze well—just make fresh. Prep the beans and garlic mixture ahead, but don’t toss until right before grilling (or they’ll steam instead of char).
Why You’ll Love This Recipe
- One Pan Wonder: I toss the green beans with olive oil, garlic, salt, and pepper, then grill—no extra bowls, no fuss.
- Garlicky Crunch: That sizzled garlic clove flavor clinging to every blistered bean? I could eat the whole batch myself.
- Weeknight Side: Honestly, it pairs with chicken, steak, or even a fried egg on toast in under 15 minutes flat.
- Budget Stretch: A pound of fresh green beans costs pennies and feeds four, with leftovers that reheat beautifully for lunch the next day.
Step-by-Step Instructions for Grilled Garlic Green Beans
Here’s the method I use to get perfectly charred beans with bold garlic flavor every time.
Step 1: Prepare the Green Beans and Grill Setup
Start by trimming the 1.5 lb Fresh Green Beans and drying them thoroughly with a clean towel. Any moisture will cause steaming instead of charring on the grill. I use a large rimmed baking sheet to hold them while I prep the rest.
Preheat your grill to medium-high heat (about 400°F). You want it hot enough to create those beautiful grill marks without burning the garlic. Clean and oil the grates well—this prevents sticking and ensures even cooking.
Step 2: Season and Toss with Olive Oil and Aromatics
In a large bowl, combine the dried green beans with the 3 tbsp Extra-Virgin Olive Oil. Toss until every bean is lightly coated. Add the 6 cloves Garlic Cloves (crushed but left whole), 1 tsp Sea Salt, 0.5 tsp Black Pepper, 0.25 tsp Smoked Paprika, and 0.25 tsp Red Pepper Flakes.
Toss everything together gently but thoroughly. The crushed garlic will infuse the oil with its aroma as the beans cook, creating that signature garlic punch. Be careful not to break the garlic cloves too much—whole pieces are easier to remove if someone prefers to avoid them.
Step 3: Grill to Charred Perfection
Spread the seasoned green beans on the preheated grill in a single layer. Cook for 6-8 minutes, stirring and turning occasionally with long tongs, until the beans develop deep char marks and are tender-crisp. You’ll hear a satisfying sizzle when they hit the grill—that’s the sound of flavor developing.
Watch closely toward the end of cooking. The beans are done when they’re blistered in spots but still have a slight bite. If the garlic starts to darken too quickly, move the beans to a cooler part of the grill or remove the garlic pieces early.
Step 4: Finish with Lemon and Parsley
Transfer the grilled green beans to a serving platter. Immediately sprinkle with the 1 tsp Lemon Zest and 1 tbsp Lemon Juice. The heat from the beans will release the citrus oils, brightening all the flavors.
Garnish with the 2 tbsp Fresh Parsley just before serving. The parsley adds a fresh, herbal note that balances the smoky char and bold garlic. Serve while hot—the flavors are most vibrant right off the grill.
Pro Tips For Making Grilled Garlic Green Beans
- Pre-Blanch the Beans: Toss fresh green beans in boiling water for 2-3 minutes before grilling—this softens them just enough so they char without turning leathery.
- Slice Garlic Thin: Cut garlic cloves into paper-thin slices instead of mincing so they crisp up on the grill without burning to bitter bits.
- Skip the Overcrowding: Spread beans in a single layer on the grill grate, or they’ll steam instead of sear—I learned this the hard way with soggy, pale batches.
- Oil the Grate First: Dip a folded paper towel in olive oil and rub it over the hot grates right before adding the beans to prevent sticking and get those perfect grill marks.
Flavor Customization for This Recipe
Spicy Heat Boost
For those who love heat, increase the Red Pepper Flakes to ½ tsp or add ¼ tsp cayenne pepper. I sometimes sprinkle crushed chili crisp over the top right before serving for texture and extra fire. The smoky char balances the heat beautifully. 🔥
Citrus Variations
Swap the lemon for lime zest and juice—it adds a brighter, more tropical note. Or try orange zest with a pinch of ground cumin for a Moroccan-inspired twist. The Fresh Green Beans hold up well to these bold citrus flavors.
Herb Infusions
Mix in 1 tsp dried oregano or thyme with the olive oil before grilling. For fresh herbs, toss in 1 tbsp chopped rosemary or dill after grilling. I forage wild rosemary near the coast for an earthy depth.
Umami Richness
Add 1 tsp soy sauce or tamari to the olive oil for a savory depth. A sprinkle of nutritional yeast after grilling gives a cheesy, nutty flavor. These work especially well if you’re serving the beans as a main dish.
Sweet and Spicy
Drizzle with 1 tsp honey or maple syrup right after grilling, then toss. The sweetness caramelizes slightly and pairs perfectly with the smoky char. Finish with a pinch of flaky sea salt for contrast.
This is my go-to when I want to surprise guests with unexpected flavors. 💛
Nutrition Facts
Frequently Asked Questions
Should I use fresh or frozen green beans?
Always use fresh green beans for grilling. Frozen ones release too much moisture and won’t char properly. Look for firm, bright green pods at your market.
How do I prevent the garlic from burning?
Use whole crushed cloves and monitor them closely. If they darken too fast, move beans to a cooler grill spot or remove garlic early. 400°F is ideal for even cooking.
Can I make these ahead of time?
Prep beans and seasoning mix ahead, but don’t toss until grilling. Cooked beans keep 3-4 days in the fridge but lose crispness. Serve immediately for best texture.
What’s the best way to serve these?
Transfer to a platter and finish with lemon zest, juice, and parsley. Pairs well with grilled proteins or as a vegan main. Serve hot for maximum flavor impact.

Trained in classic French technique but raised on slow-cooked ribs and spicy rubs, she blends culinary skill with smoke and soul.
- Recipe for Boneless Pork Chops in Cast Iron Skillet: Sear and Baste to Juicy Perfection - October 3, 2026
- Recipe for Boneless Cross Rib Roast: Slow-Roasted Beef with Herb Crust - October 3, 2026
- Hamburgers in Sauce Recipe Crock Pot: Slow-Cooked Savory Delight - October 3, 2026