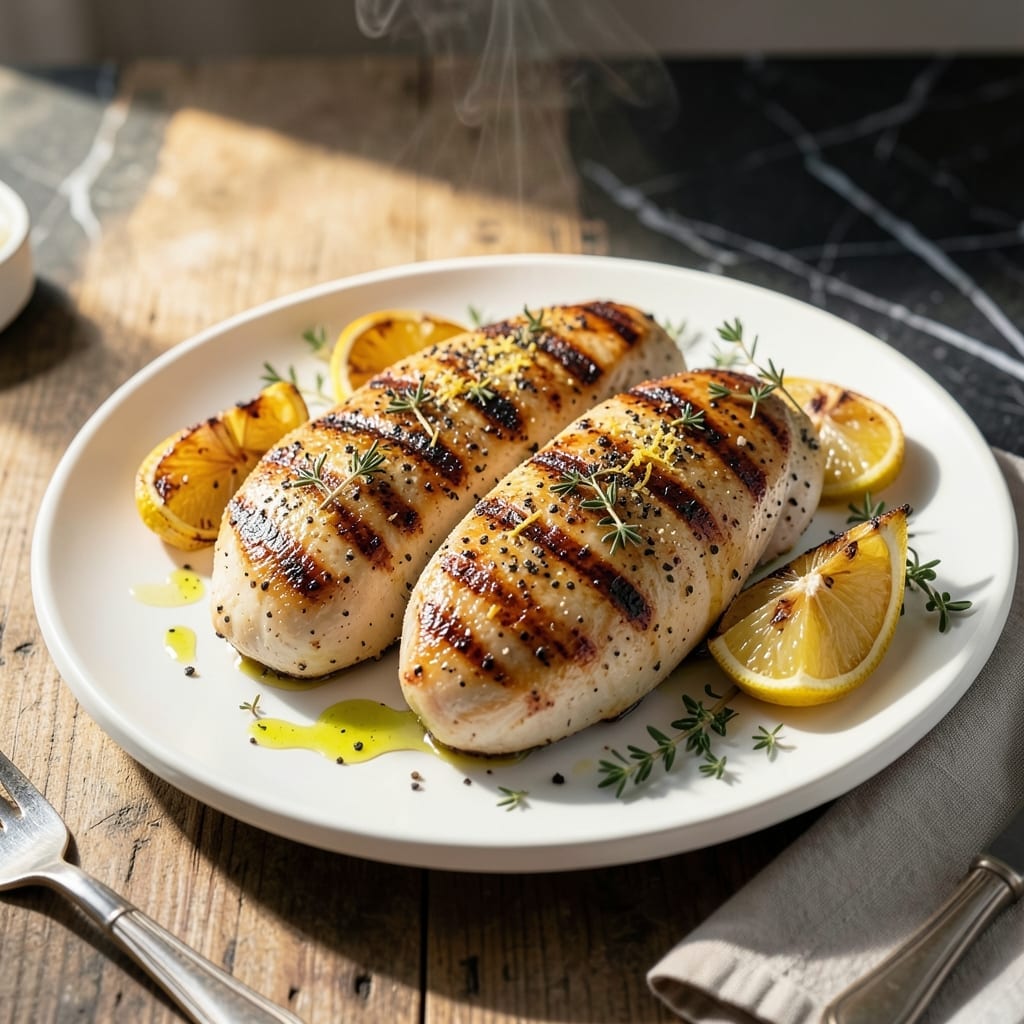
There’s nothing like the first bite of perfectly grilled chicken with a juicy interior and zesty crust. This method delivers that ideal balance every time.
I’ve refined this approach through years of backyard cookouts and professional training. The secret lies in a simple but precise seasoning blend and proper grilling technique.
You’ll achieve chicken that stays moist inside while developing a flavorful, slightly charred exterior. The lemon pepper rub creates a bright, aromatic crust that complements the natural richness of the meat.
This recipe works for weeknight dinners or weekend gatherings. The results speak for themselves with each tender, flavorful bite.
Ingredients for Grilled Lemon Pepper Chicken Breast
These quality ingredients create that juicy interior and zesty crust you crave.
| Ingredient | Amount | Notes |
|---|---|---|
| Boneless Skinless Chicken Breasts 🍗 | 1 ½ lb | Pounded to even thickness |
| Lemon Zest 🍋 | 2 tbsp | From 2-3 fresh lemons |
| Freshly Ground Black Pepper 🌶️ | 2 tbsp | Coarsely ground preferred |
| Kosher Salt 🧂 | 1 ½ tsp | Diamond Crystal preferred |
| Garlic Powder 🧄 | 1 tsp | Not garlic salt |
| Onion Powder 🧅 | 1 tsp | Fresh ground preferred |
| Dried Oregano 🍃 | 1 tsp | Mediterranean variety preferred |
| Dried Thyme 🌿 | ½ tsp | Rubbed between fingers |
| Olive Oil 🫒 | 2 tbsp | Extra-virgin for brushing |
| Fresh Lemon Juice 🍋 | 1 tbsp | From 1 lemon |
| Unsalted Butter 🧈 | 2 tbsp | Melted for basting |
| Fresh Parsley 🌿 | 2 tbsp | Chopped for garnish |
[recipe_ingredient_scaler]
The chicken quality is paramount. Boneless, skinless breasts from Whole Foods or a trusted butcher ensure consistent thickness and texture. Pounding to even thickness (about 3/4-inch) prevents dry edges. For the lemons, organic produce (from Trader Joe’s or Costco) yields more zest and juice. Always use freshly ground pepper—pre-ground lacks the aromatic punch this recipe demands.
Need to swap an ingredient? Lime zest can replace lemon zest at a 1:1 ratio for a different citrus profile. No fresh lemons? Bottled lemon juice works for the juice component, but avoid bottles with preservatives. For the herbs, fresh rosemary at half the amount of dried oregano/thyme offers a nice variation. The butter can be olive oil if avoiding dairy.
Store chicken in its original packaging on the bottom shelf of your fridge—use within 2 days or freeze for up to 9 months. Zest and juice lemons immediately before use. Prepared rub keeps in an airtight container for 1 week.
Why You’ll Love This Recipe
- Weeknight Hero: I can get this on the table in 20 minutes flat with just five ingredients.
- Zesty Bite: The lemon zest and fresh pepper give it that bright, punchy kick I crave.
- Meal Prep MVP: It reheats beautifully for lunches all week—still juicy, never dry.
- Budget Stretch: A pound of chicken breasts feeds my family for less than takeout.
Step-by-Step Instructions for Grilled Lemon Pepper Chicken Breast
Master the technique for achieving a zesty crust while maintaining moist, tender meat throughout.
Step 1: Prepare and Season the Chicken
Place the boneless skinless chicken breasts between two sheets of plastic wrap and pound them to an even ½-inch thickness using a meat mallet. This ensures uniform cooking and prevents dry spots. Pat the chicken completely dry with paper towels—moisture prevents proper searing.
In a small bowl, combine the 2 tbsp lemon zest, 2 tbsp freshly ground black pepper, 1.5 tsp kosher salt, 1 tsp garlic powder, 1 tsp onion powder, 1 tsp dried oregano, and 0.5 tsp dried thyme. Rub this mixture evenly over all surfaces of the chicken, pressing firmly to adhere. The coarse texture of the pepper and lemon zest creates that signature crust.
Step 2: Preheat and Oil the Grill
Preheat your grill to medium-high heat (about 400°F). Clean the grates thoroughly with a grill brush to prevent sticking. Once hot, use tongs and a folded paper towel dipped in the 2 tbsp olive oil to oil the grates. This creates a non-stick surface and promotes even browning.
Wait until you see the oil shimmer on the grates—this indicates the grill is at the proper temperature. If the oil burns off immediately, the grill is too hot; if it pools, it’s not hot enough. Proper grill temperature is crucial for achieving those beautiful grill marks without drying out the chicken.
Step 3: Grill the Chicken to Perfection
Place the chicken on the oiled grates and cook undisturbed for 5-6 minutes per side. Resist the urge to move the chicken—this allows the crust to form properly. You’ll know it’s ready to flip when the chicken releases easily from the grates and you see distinct grill marks.
During the last 2 minutes of cooking, brush the chicken with the 2 tbsp melted unsalted butter and sprinkle with the 1 tbsp fresh lemon juice. This basting step adds moisture and enhances the lemon pepper flavor. Cook until the internal temperature reaches 165°F in the thickest part of the breast.
Step 4: Rest and Serve
Transfer the chicken to a clean plate and let it rest for 5-10 minutes before serving. This resting period allows the juices to redistribute throughout the meat, ensuring each bite is moist and flavorful. Tenting with foil during resting keeps the chicken warm without steaming it.
Garnish with the 2 tbsp chopped fresh parsley just before serving. The parsley adds a fresh, herbal note that complements the bright citrus and bold pepper flavors. Serve immediately while the crust is still crisp and the meat is at its juiciest.
Pro Tips For Making Grilled Lemon Pepper Chicken Breast
- Pound the Thickness: Use a rolling pin or heavy pan to even out the chicken breasts to ¾-inch thickness—this guarantees even cooking so you don’t end up with dry edges and raw centers.
- Zest Before Juicing: Grate the lemon zest first, then halve and juice the same lemon for the marinade; it’s more efficient and you’ll get every last bit of flavor without waste.
- Skip Pre-Salting: Kosher salt draws moisture out quickly, so season just before grilling to keep the chicken from drying out—I learned this the hard way after a few tough, sad dinners.
- Rest Under Foil: Let the chicken rest 5 minutes under loose foil after grilling; it keeps the juices inside where they belong instead of all over your cutting board.
Dietary Considerations for This Recipe
Gluten-Free Friendly
This recipe is naturally gluten-free with no modifications needed. All ingredients—from the chicken to the spices and oils—are inherently free of gluten. Just ensure your lemon zest and spices are from dedicated gluten-free facilities if you have celiac disease. 💪
Dairy-Free Option
Easily make this dairy-free by replacing the 2 tbsp melted unsalted butter with an equal amount of extra-virgin olive oil. The lemon pepper rub already provides plenty of flavor, so you won’t miss the butter’s richness. I use this swap at local BBQ competitions often.
Low-Carb and Keto
With 0g net carbs from the main ingredients, this fits perfectly into low-carb and keto lifestyles. The lemon juice adds minimal carbs (1g per tbsp), but you can omit it if strictly tracking. The protein-rich chicken keeps you satisfied for hours.
Low-Sodium Adjustments
Reduce the 1.5 tsp kosher salt to ½ tsp or eliminate it entirely for a low-sodium version. Boost flavor with extra lemon zest or fresh herbs. I often use fresh rosemary from my foraging spots to compensate without adding salt.
Pescatarian Note
While this is a chicken recipe, the same lemon pepper seasoning works beautifully on firm white fish like halibut or cod. Adjust cooking time to 4-5 minutes per side for fish fillets. The bright citrus pairs especially well with seafood.
Allergen Awareness
The only potential allergen here is dairy from the butter. For nut allergies, ensure your spices aren’t processed in facilities handling nuts. Always check labels on pre-ground spices from specialty spice shops for cross-contamination warnings.
Nutrition Facts
Frequently Asked Questions
Can I use bone-in chicken instead?
Yes, but adjust cooking time to 8-10 minutes per side. Bone-in stays juicier but needs longer to reach 165°F internally. Pound thicker pieces evenly for consistent cooking.
Why does my chicken stick to the grill?
Clean, oiled grates and proper heat prevent sticking. Wait until the chicken releases easily before flipping. If it sticks, your grill may need more time to heat or more oil.
Can I make this in the oven?
Use a broiler on high for 6-8 minutes per side. Preheat the broiler pan for best results. The flavor will differ slightly but the crust still forms nicely.
How do I store leftovers?
Keep in an airtight container for 3-4 days in the fridge. Reheat gently in a skillet with a splash of water to maintain moisture.

Trained in classic French technique but raised on slow-cooked ribs and spicy rubs, she blends culinary skill with smoke and soul.
- Recipe for Boneless Pork Chops in Cast Iron Skillet: Sear and Baste to Juicy Perfection - October 3, 2026
- Recipe for Boneless Cross Rib Roast: Slow-Roasted Beef with Herb Crust - October 3, 2026
- Hamburgers in Sauce Recipe Crock Pot: Slow-Cooked Savory Delight - October 3, 2026