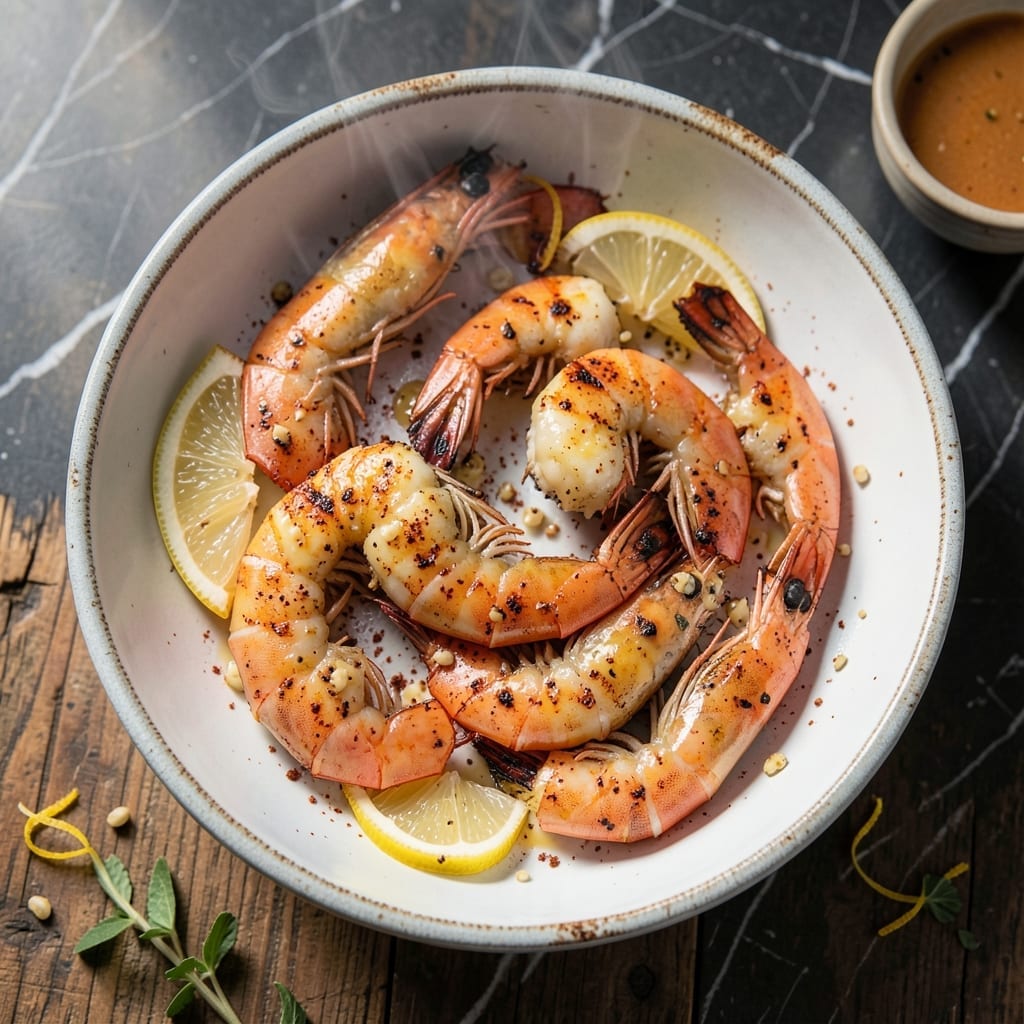
There’s nothing like the aroma of shrimp hitting a hot grill—it transports me back to coastal cookouts. This method delivers smoky, garlic-butter flavor with minimal effort.
I’ve refined this technique over years of pitmaster experience, ensuring the shrimp cook evenly while absorbing the bold seasoning. The peel stays on for protection, locking in moisture and flavor.
The result is juicy, tender shrimp with a charred exterior, ready to be peeled and devoured. Each bite carries the essence of open-flame cooking.
Perfect for gatherings or a quick weeknight meal. The grill does most of the work.
Ingredients for Grilled Peel and Eat Shrimp
Fresh shrimp, bold seasonings, and a hot grill create this coastal classic with minimal effort.
| Ingredient | Amount | Notes |
|---|---|---|
| Large Shrimp 🍤 | 2 lb | Shell-on, deveined, tails left on |
| Unsalted Butter 🧈 | ½ cup | Melted for basting |
| Garlic Cloves 🧄 | 6 cloves | Minced for garlic butter |
| Fresh Lemon 🍋 | 1 whole | Cut into wedges for serving |
| Smoked Paprika 🌶️ | 1 tbsp | For smoky depth |
| Kosher Salt 🧂 | 1 ½ tsp | Diamond Crystal preferred |
| Freshly Ground Black Pepper 🌶️ | 1 tsp | Coarse grind for texture |
| Cayenne Pepper 🔥 | ¼ tsp | Adjust for heat preference |
| Dried Oregano 🌿 | 1 tsp | Mediterranean variety preferred |
| Fresh Parsley 🌿 | ¼ cup | Chopped, for garnish |
| Olive Oil 🫒 | 2 tbsp | For brushing grill and shrimp |
| Old Bay Seasoning 🌶️ | 1 tbsp | Classic seafood seasoning |
[recipe_ingredient_scaler]
The shrimp are the foundation—wild-caught Gulf or Pacific are ideal for their sweetness and firm texture. Look for 16-20 count per pound; larger shrimp hold up better to grilling. Most seafood counters will devein them for you if you ask. For the butter, Plugrá or Kerrygold provide superior richness. The garlic should be fresh; jarred minced lacks the necessary punch for this application.
No Old Bay? Combine paprika, salt, black pepper, and celery salt for a close approximation. Want more heat? Add a pinch of red pepper flakes to the seasoning mix. Fresh parsley can be swapped with cilantro for a brighter note. If using frozen shrimp, thaw completely in cold water and pat very dry to prevent steaming on the grill.
Store raw shrimp on ice or in the coldest part of your fridge—use within 24 hours for optimal freshness. The seasoned butter can be made ahead and stored in the fridge for up to 5 days. Grilled shrimp are best served immediately but reheat well in a skillet for 2-3 minutes.
Why You’ll Love This Recipe
- 20-Minute Meal: I can have these shrimp on the table faster than it takes to decide what to order for takeout.
- Garlic Butter Bliss: The melted butter, garlic, and smoked paprika create a sauce so good I end up licking my fingers.
- Backyard Star: Honestly, it’s my go-to for summer cookouts—guests always gather around the grill for seconds.
- Leftovers? Rare: Between us, there’s never any left, but if there were, they’d taste just as good cold the next day.
Step-by-Step Instructions for Grilled Peel and Eat Shrimp
Master the technique for perfectly charred, flavor-packed shrimp with this professional approach.
Step 1: Prepare the Shrimp and Seasoning Blend
Pat the 2 lb large shrimp completely dry with paper towels to ensure proper searing. In a small bowl, combine the 1 tbsp smoked paprika, 1.5 tsp kosher salt, 1 tsp freshly ground black pepper, 0.25 tsp cayenne pepper, and 1 tsp dried oregano. This blend delivers smoky depth with balanced heat.
Toss the shrimp with 2 tbsp olive oil and the seasoning mixture until evenly coated. The oil helps the spices adhere while preventing sticking on the grill. I always use Diamond Crystal kosher salt for its clean flavor and consistent texture.
Step 2: Create the Garlic Butter Basting Sauce
In a small saucepan, melt the 0.5 cup unsalted butter over low heat. Add the 6 cloves minced garlic cloves and cook for 1-2 minutes until fragrant but not browned. Browning garlic can make it bitter, so watch it closely.
Remove from heat and stir in the 1 tbsp Old Bay seasoning. This classic seafood seasoning enhances the shrimp’s natural sweetness. Keep the garlic butter warm but not boiling—you’ll use it to baste the shrimp as they grill.
Step 3: Grill the Shrimp to Perfection
Preheat your grill to medium-high heat (about 400°F). Brush the grates with olive oil to prevent sticking. Arrange the shrimp in a single layer on the grill, leaving space between each piece for even cooking.
Cook for 2-3 minutes per side until the shrimp turn opaque pink with visible grill marks. Baste with the garlic butter during the last 30 seconds of cooking on each side. The shrimp are done when they curl into a C shape and the tails turn bright red.
Step 4: Finish and Serve
Transfer the grilled shrimp to a serving platter. Drizzle with any remaining garlic butter and sprinkle with 0.25 cup chopped fresh parsley. The parsley adds freshness and color contrast.
Serve immediately with 1 whole fresh lemon cut into wedges on the side. The acid from the lemon brightens the rich, smoky flavors. The shrimp should peel easily, revealing tender, juicy meat beneath the charred shells.
Pro Tips For Making Grilled Peel And Eat Shrimp
- Skewer the Shrimp: Thread them on soaked wooden skewers before grilling—keeps them from falling through the grates and makes flipping a breeze.
- Butter the Shells: Brush melted butter directly onto the shells, not just the meat, so every bite carries that garlic-smoked paprika flavor.
- Skip Wet Shrimp: Pat the shrimp completely dry before skewering; I learned this the hard way—water on the grill causes steam, not sear.
- Pull at 120°F: Use a meat thermometer and take them off at 120°F; they’ll coast to 125°F while resting, perfect and juicy.
Wine and Beer Pairings for This Recipe
Crisp White Wines
A chilled Sauvignon Blanc from New Zealand cuts through the garlic-butter richness beautifully. I love how its citrus notes complement the lemon. Cloudy Bay or Kim Crawford are my go-tos for this pairing. 🍷
Light Beers
A crisp pilsner like Samuel Adams Noble Pils refreshes your palate between each smoky, buttery bite. The light malt and floral hops won’t overpower the shrimp’s delicate flavor.
Rosé Options
Try a dry Provence rosé with its subtle berry notes and mineral finish. Whispering Angel or Miraval work perfectly. The wine’s acidity balances the richness without competing.
Wheat Beers
A German hefeweizen like Weihenstephaner adds a fun contrast with its banana and clove notes. The effervescence cleanses your palate, making each shrimp taste like the first. ✨
Sparkling Choices
For celebrations, Prosecco or Cava bring bubbles that enhance the grilled flavors. The light body and citrus notes make them ideal for seafood. I always keep a bottle of La Marca Prosecco on hand.
Nutrition Facts
Frequently Asked Questions
Should I leave the tails on when grilling?
Yes, leave tails on for easier handling and presentation. They also help protect the meat from overcooking. Just ensure tails are clean and free of any sharp edges.
How can I prevent shrimp from sticking to the grill?
Clean and oil the grates thoroughly before cooking. Use tongs to arrange shrimp in a single layer, and avoid moving them until ready to flip. A hot grill (400°F) also helps prevent sticking.
Can I use frozen shrimp for this recipe?
Thaw frozen shrimp completely in cold water first, then pat very dry before seasoning. This removes excess moisture that could cause steaming instead of grilling.
What if my shrimp cook unevenly?
Sort shrimp by size before grilling. Larger ones may need 30 seconds more per side. Also, avoid overcrowding the grill to ensure even heat distribution.

Trained in classic French technique but raised on slow-cooked ribs and spicy rubs, she blends culinary skill with smoke and soul.
- Recipe for Boneless Pork Chops in Cast Iron Skillet: Sear and Baste to Juicy Perfection - October 3, 2026
- Recipe for Boneless Cross Rib Roast: Slow-Roasted Beef with Herb Crust - October 3, 2026
- Hamburgers in Sauce Recipe Crock Pot: Slow-Cooked Savory Delight - October 3, 2026