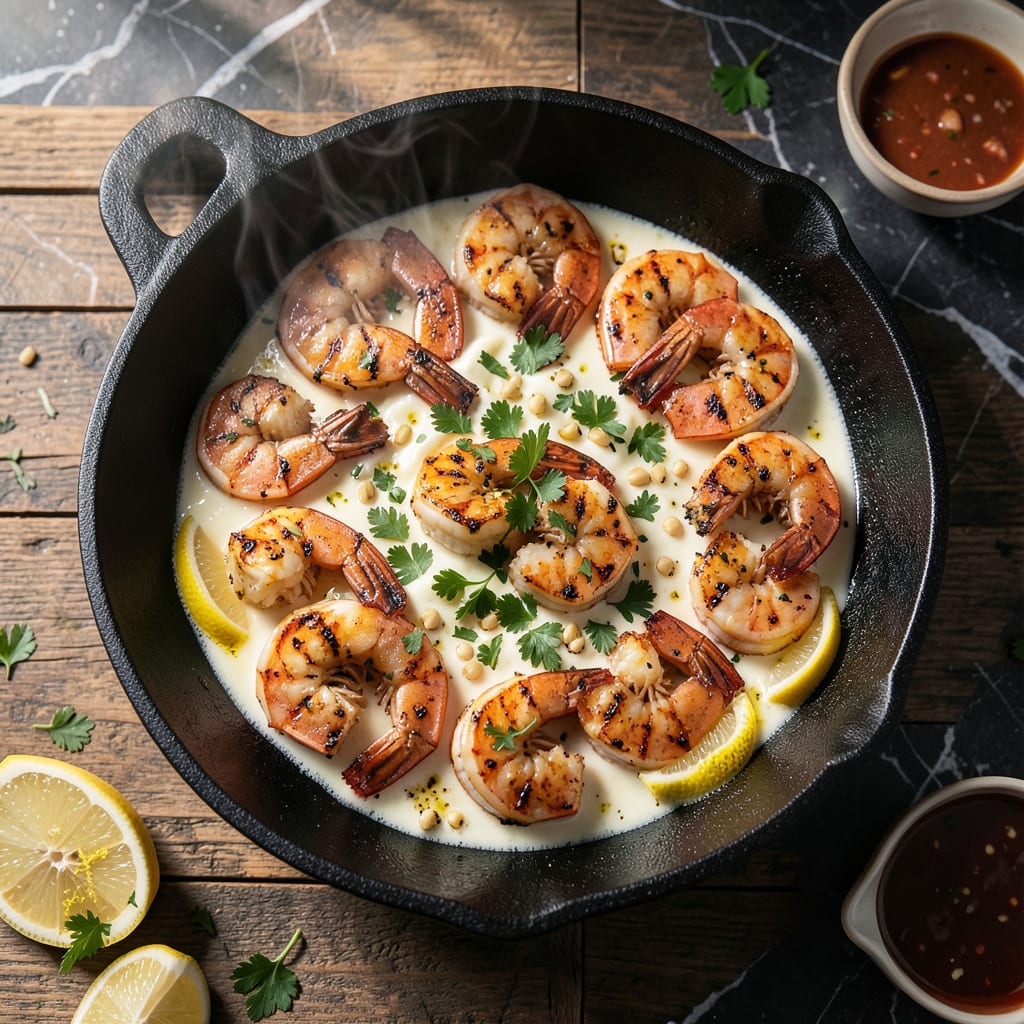
Achieve restaurant-quality shrimp without a grill using this proven stovetop method. High heat and precise timing create beautifully caramelized, tender shrimp in just minutes.
This technique delivers perfectly seared results every time, with minimal equipment. The key is patience—let the pan get screaming hot before adding your shrimp to ensure that coveted golden crust.
Ingredients for Grilled Shrimp Recipe on Stove
Achieve restaurant-quality pan-seared shrimp with these essential ingredients for perfect caramelization and tenderness.
| Ingredient | Amount | Notes |
|---|---|---|
| Large Shrimp 🍤 | 1 ½ lb | Peeled, deveined, tails on |
| Olive Oil 🫒 | 3 tbsp | Divided, high smoke point |
| Unsalted Butter 🧈 | 2 tbsp | Cold, cubed for basting |
| Garlic Cloves 🧄 | 4 cloves | Minced for aromatic base |
| Fresh Lemon 🍋 | 1 whole | Zested and juiced |
| Fresh Parsley 🌿 | ¼ cup | Chopped, for garnish |
| Kosher Salt 🧂 | 1 ½ tsp | Diamond Crystal preferred |
| Freshly Ground Black Pepper 🌶️ | ¾ tsp | Coarse grind recommended |
| Smoked Paprika 🌶️ | ½ tsp | Adds depth of flavor |
| Cayenne Pepper 🔥 | ¼ tsp | Optional for heat |
| Red Pepper Flakes 🌶️ | ½ tsp | Crushed, for garnish |
[recipe_ingredient_scaler]
The shrimp quality is paramount here. Wild-caught Gulf shrimp (16-20 count per pound) deliver the best texture and flavor. Purchase them fresh from a trusted seafood counter—look for firm, translucent flesh and a mild ocean aroma. Whole Foods and local fishmongers typically have superior selections. For the butter, European-style (higher fat content) resists burning better than standard options.
No fresh lemon? Bottled lemon juice at half the amount works in a pinch, though fresh zest is irreplaceable. For garlic, jarred minced at one-third the quantity can substitute, but fresh offers superior aromatic impact. If avoiding dairy, ghee or avocado oil replaces butter effectively. The smoked paprika can be swapped with regular paprika plus a pinch of liquid smoke for similar depth.
Shrimp cook immediately, so prep everything before heating the pan. Leftovers (if any) keep 1-2 days refrigerated—reheat gently to avoid overcooking. The zest and butter mixture can be made ahead and stored 3 days in the fridge. Always bring shrimp to room temperature before cooking for even doneness.
Why You’ll Love This Recipe
- One Pan Magic: I just toss the shrimp with olive oil, garlic, and butter in my skillet—no grill, no fuss.
- Garlic Butter Bliss: The sizzle of garlic in butter with a squeeze of fresh lemon makes these shrimp ridiculously good.
- Weeknight Hero: Honestly, it’s my go-to for busy evenings when I need dinner ready in 15 minutes flat.
- Leftovers Win: Cold shrimp taste spot-on in salads or wraps the next day, so I always make extra.
Step-by-Step Instructions for Grilled Shrimp on Stove
Master the technique for perfectly seared shrimp with charred edges and juicy centers.
Step 1: Season the Shrimp Thoroughly
Pat the 1.5 lb Large Shrimp completely dry with paper towels. This step is non-negotiable—moisture prevents proper searing. Place them in a large bowl and toss with 1.5 tsp Kosher Salt, 0.75 tsp Freshly Ground Black Pepper, 0.5 tsp Smoked Paprika, and 0.25 tsp Cayenne Pepper.
The spices should coat the shrimp evenly, creating a flavorful crust when cooked. I prefer Diamond Crystal kosher salt for its clean taste and even distribution. Let the seasoned shrimp sit at room temperature for 10 minutes while you prepare the pan.
Step 2: Sear the Shrimp in Hot Oil
Heat 2 tbsp Olive Oil in a large cast-iron or stainless steel skillet over medium-high heat until it shimmers but doesn’t smoke. Add half the shrimp in a single layer, being careful not to crowd the pan. Cook undisturbed for 2-3 minutes per side until opaque and golden brown with charred edges.
You’ll know they’re ready to flip when the edges turn white and the bottoms develop a deep golden crust. Transfer cooked shrimp to a plate and repeat with the remaining shrimp, adding the remaining 1 tbsp Olive Oil if needed. The shrimp should be just cooked through—overcooking makes them rubbery.
Step 3: Create the Garlic Butter Baste
Reduce heat to medium and add the 2 tbsp Unsalted Butter to the same skillet. Once melted, add the 4 cloves Garlic Cloves and cook for 30 seconds until fragrant but not browned. Immediate browning means the heat is too high.
Add the cooked shrimp back to the pan and toss to coat in the garlic butter. Squeeze the juice from 1 whole Fresh Lemon over the shrimp and sprinkle with the lemon zest. The acidity brightens the rich butter and balances the spices.
Step 4: Garnish and Serve Immediately
Transfer the shrimp to a serving platter. Sprinkle with 0.25 cup Fresh Parsley and 0.5 tsp Red Pepper Flakes for color and a subtle heat. The parsley adds freshness, while the red pepper flakes provide a visual contrast and a hint of spice.
Serve immediately while the shrimp are hot. The residual heat will continue cooking them slightly, so timing is crucial. Each shrimp should have a glossy, flavorful coating from the garlic butter and lemon, with a perfect balance of smoky, spicy, and bright notes.
Pro Tips For Making Grilled Shrimp Recipe On Stove
- Pat Shrimp Dry: Use paper towels to thoroughly dry the shrimp before cooking—this prevents steaming and helps them sear properly in the butter and oil.
- Hot Pan First: Heat your pan until it’s almost smoking before adding the shrimp, otherwise they’ll absorb oil and turn soggy instead of crisp.
- Don’t Overcrowd: Cook shrimp in a single layer with space between each piece, or they’ll boil in their own juices rather than getting that golden crust.
- Zest the Lemon: Along with the juice, add a little lemon zest to the butter and garlic—it packs way more flavor and brightens the dish.
Common Mistakes When Making This Recipe
Overcrowding the Pan
Never cook all 1.5 lb Large Shrimp at once—this drops the pan temperature, causing steaming instead of searing. I learned this the hard way at my first BBQ competition. Cook in batches with 1 tbsp Olive Oil per batch to maintain that screaming hot surface. 🔥
Skipping the Dry Step
Pat those shrimp completely dry with paper towels before seasoning. Even a little moisture creates a barrier between the meat and pan, preventing that beautiful golden crust we all love. Wet shrimp just won’t char properly.
Moving Shrimp Too Soon
Resist the urge to poke or flip the shrimp for at least 2 minutes per side. They need time to develop that caramelized crust. You’ll see the edges turn white and the bottoms gain color—then it’s safe to flip. Patience is key here.
Using Low Heat
Your pan must be screaming hot over medium-high heat before adding shrimp. If the oil isn’t shimmering, it’s not ready. I use my cast-iron skillet for this—it retains heat beautifully and gives those perfect char marks.
Overcooking the Shrimp
Shrimp cook fast—2-3 minutes per side max. They’re done when just opaque and still slightly translucent in the center. Remember, they’ll continue cooking from residual heat after you remove them from the pan. Rubbery shrimp are a crime in my kitchen.
Burning the Garlic
When making the Garlic Cloves butter baste, keep the heat at medium and cook the garlic for only 30 seconds. Browned garlic turns bitter and ruins your beautiful dish. I pull the pan off the heat if I see any color change. 💡

Trained in classic French technique but raised on slow-cooked ribs and spicy rubs, she blends culinary skill with smoke and soul.
- Recipe for Boneless Pork Chops in Cast Iron Skillet: Sear and Baste to Juicy Perfection - October 3, 2026
- Recipe for Boneless Cross Rib Roast: Slow-Roasted Beef with Herb Crust - October 3, 2026
- Hamburgers in Sauce Recipe Crock Pot: Slow-Cooked Savory Delight - October 3, 2026