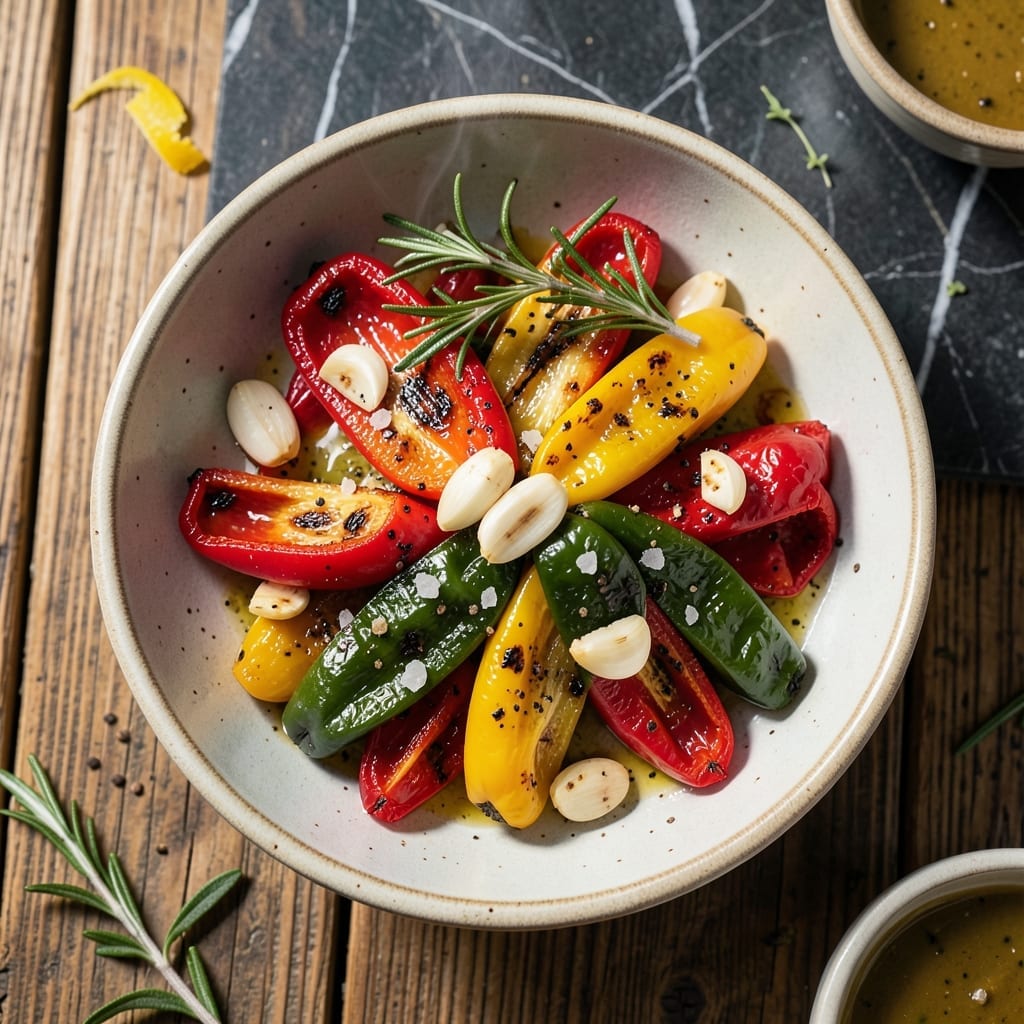
There’s a simple magic to grilling mini peppers that transforms their natural sweetness into something extraordinary. This method brings out their depth of flavor while keeping the process effortless.
High heat blisters the skins quickly, creating caramelized edges and a slight char that complements their inherent sweetness. The peppers soften just enough to develop complexity without losing their shape or texture.
What emerges from the grill are vibrant, glossy peppers with concentrated flavor in every bite. Their natural sweetness intensifies, balanced by smoky undertones from the open flame.
Serve these as a colorful side or appetizer that highlights the beauty of simple, fresh ingredients. The technique is straightforward but delivers impressive results.
Ingredients for Grilled Sweet Mini Peppers
Simple vegan ingredients for blistered, caramelized peppers with bold, smoky-sweet flavor.
| Ingredient | Amount | Notes |
|---|---|---|
| Sweet Mini Peppers 🌶️ | 2 lb | Assorted colors preferred |
| Extra-Virgin Olive Oil 🫒 | 3 tbsp | Divided for tossing and finishing |
| Sea Salt 🧂 | 1 tsp | Flaky variety preferred |
| Freshly Ground Black Pepper 🌶️ | ½ tsp | Coarse grind for texture |
| Garlic Cloves 🧄 | 3 cloves | Thinly sliced for infusion |
| Fresh Rosemary Sprigs 🌿 | 2 whole | Optional for aromatic grill smoke |
| Balsamic Vinegar 🍷 | 2 tbsp | Aged for depth of flavor |
| Maple Syrup 🍁 | 1 tbsp | Grade A for balanced sweetness |
| Lemon Zest 🍋 | 1 tsp | Finely grated for brightness |
| Red Pepper Flakes 🔥 | ¼ tsp | Crushed, optional for heat |
[recipe_ingredient_scaler]
The peppers are the star here. Look for firm, glossy mini peppers in mixed colors—red, yellow, and orange offer the best sweetness. Whole Foods and Trader Joe’s consistently carry high-quality options. Avoid any with soft spots or wrinkled skins. If using organic, the flavor tends to be more concentrated (worth the slight upcharge).
No fresh rosemary? Dried thyme or oregano works at half the amount. Swap maple syrup for agave nectar if that’s what you have. For extra char, use avocado oil instead of olive oil—it has a higher smoke point. The balsamic vinegar can be apple cider vinegar in a pinch (slightly sharper but still delicious).
Grilled peppers keep well in an airtight container for up to 4 days. Reheat briefly on the grill or in a hot pan to revive the char. For meal prep, store uncooked peppers in the crisper drawer—they’ll stay fresh for 1 week.
Why You’ll Love This Recipe
- 5-Minute Prep: I just toss the mini peppers with olive oil, salt, and smashed garlic—no chopping, no fuss.
- Smoky Garlic Bite: The grilled edges caramelize the natural sweetness while the garlic mellows into this warm, savory hug.
- Party or Meal Prep: I serve these warm as an appetizer or cold in lunchboxes all week. They disappear either way.
- Budget-Friendly Feast: A big bag of mini peppers costs pennies, and they stretch to feed a crowd with zero waste.
Step-by-Step Instructions for Grilled Sweet Mini Peppers
Here’s the method to achieve perfectly blistered and caramelized peppers with minimal effort.
Step 1: Prepare the Peppers and Seasoning Base
Begin by washing and thoroughly drying the 2 lb Sweet Mini Peppers. Remove any stems and seeds, then halve them lengthwise. This exposes more surface area for even charring and better flavor absorption.
In a large bowl, toss the peppers with 2 tbsp Extra-Virgin Olive Oil, ensuring each piece is lightly coated. Sprinkle with 1 tsp Sea Salt and 0.5 tsp Freshly Ground Black Pepper, then toss again to distribute the seasoning evenly. The oil helps the salt and pepper adhere while promoting caramelization on the grill.
Step 2: Infuse Aromatics for Depth of Flavor
Thinly slice the 3 cloves Garlic Cloves and add them to the bowl with the peppers. If using, add the 2 whole Fresh Rosemary Sprigs directly to the bowl as well. Toss everything together to combine. The garlic will mellow and sweeten as it grills, while the rosemary adds a piney aroma to the dish.
Let the peppers marinate at room temperature for 10-15 minutes. This brief rest allows the flavors to meld and the peppers to absorb the oil and seasonings, which enhances their natural sweetness and ensures they don’t stick to the grill.
Step 3: Grill to Blistered Perfection
Preheat your grill to medium-high heat. Place the peppers in a single layer on the grates, cut-side down. Grill undisturbed for 4-5 minutes until the edges begin to char and the skin blisters. The direct heat will create those coveted dark, caramelized spots.
Flip the peppers and grill for another 3-4 minutes until they’re tender but still hold their shape. If using the rosemary sprigs, place them on the grill for the last 2 minutes to release their aromatic oils into the smoke. Watch closely to prevent burning.
Step 4: Finish with Sweet-Tangy Glaze
Transfer the grilled peppers to a serving platter. In a small bowl, whisk together the remaining 1 tbsp Extra-Virgin Olive Oil, 2 tbsp Balsamic Vinegar, 1 tbsp Maple Syrup, 1 tsp Lemon Zest, and 0.25 tsp Red Pepper Flakes (if using). Drizzle this mixture over the warm peppers.
The residual heat from the peppers will slightly thicken the glaze, allowing it to cling beautifully. Toss gently to coat every piece evenly. The balsamic and maple syrup balance the smoky char with a sweet-tangy brightness, while the lemon zest adds a final pop of freshness.
Pro Tips For Making Grilled Sweet Mini Peppers
- Preheat the Grill: Get those grates screaming hot—medium-high heat for at least 10 minutes. I learned this the hard way after too many sad, floppy peppers sticking to a lukewarm grill.
- Slit the Peppers: Make a small lengthwise cut in each pepper before grilling so the heat penetrates evenly and they don’t burst open like tiny firecrackers.
- Skip the Overcrowding: Leave space between peppers on the grill—steam from crowded veggies turns them soggy instead of charred and sweet.
- Crush the Garlic: Smash the garlic cloves lightly with the side of your knife before tossing them with the peppers and oil—it releases more flavor without burning the cloves to bitter bits.
Health Benefits of grilled sweet mini peppers
Vitamin C Boost
These peppers pack a serious vitamin C punch—just ½ cup provides over 100% of your daily needs. This antioxidant powerhouse supports immune function and skin health. I notice I feel more energized when I include these regularly in my meals. 💪
Rich in Antioxidants
The vibrant colors in sweet mini peppers indicate high levels of carotenoids like beta-carotene, which your body converts to vitamin A. These compounds help combat oxidative stress and may reduce the risk of chronic diseases. The grilling process actually enhances their availability.
Low-Calorie Nutrient Density
At just 30 calories per cup, these peppers are a nutritionally dense addition to any meal. They’re fat-free, cholesterol-free, and packed with fiber—about 2 grams per serving—which aids digestion and keeps you feeling full longer.
Heart Health Support
The combination of potassium and fiber in these peppers supports cardiovascular health. Potassium helps regulate blood pressure, while fiber assists in maintaining healthy cholesterol levels. I love that something so flavorful can be so good for you.
Hydration Helper
These peppers are about 92% water, making them an excellent way to boost hydration. Their high water content also contributes to that satisfying crunch when grilled. Pair them with other water-rich veggies for a hydration-boosting meal. 💛
Digestive Benefits
The fiber in sweet mini peppers supports a healthy gut microbiome. They also contain natural enzymes that aid digestion. I often serve these as a pre-meal appetizer to stimulate digestion before the main course.
Nutrition Facts
Frequently Asked Questions
Do I need to seed the peppers before grilling?
It’s optional but recommended. Seeding helps prevent bitterness and creates more surface area for charring. Simply slice in half lengthwise and remove seeds with your fingers or a spoon.
Can I use a grill pan instead of an outdoor grill?
A cast-iron grill pan works well on medium-high heat. Preheat it thoroughly to achieve those signature char marks. You may need to work in batches to avoid overcrowding.
How do I prevent the peppers from falling through the grates?
Use a grill basket or skewer the halves. For gas grills, place peppers perpendicular to grates. On charcoal, arrange them on the outer edges where grates are closer together.
Can I make these ahead of time?
Grilled peppers keep well refrigerated in an airtight container for 3-4 days. Reheat briefly on the grill or in a hot pan to restore their texture before serving.

Trained in classic French technique but raised on slow-cooked ribs and spicy rubs, she blends culinary skill with smoke and soul.
- Recipe for Boneless Pork Chops in Cast Iron Skillet: Sear and Baste to Juicy Perfection - October 3, 2026
- Recipe for Boneless Cross Rib Roast: Slow-Roasted Beef with Herb Crust - October 3, 2026
- Hamburgers in Sauce Recipe Crock Pot: Slow-Cooked Savory Delight - October 3, 2026