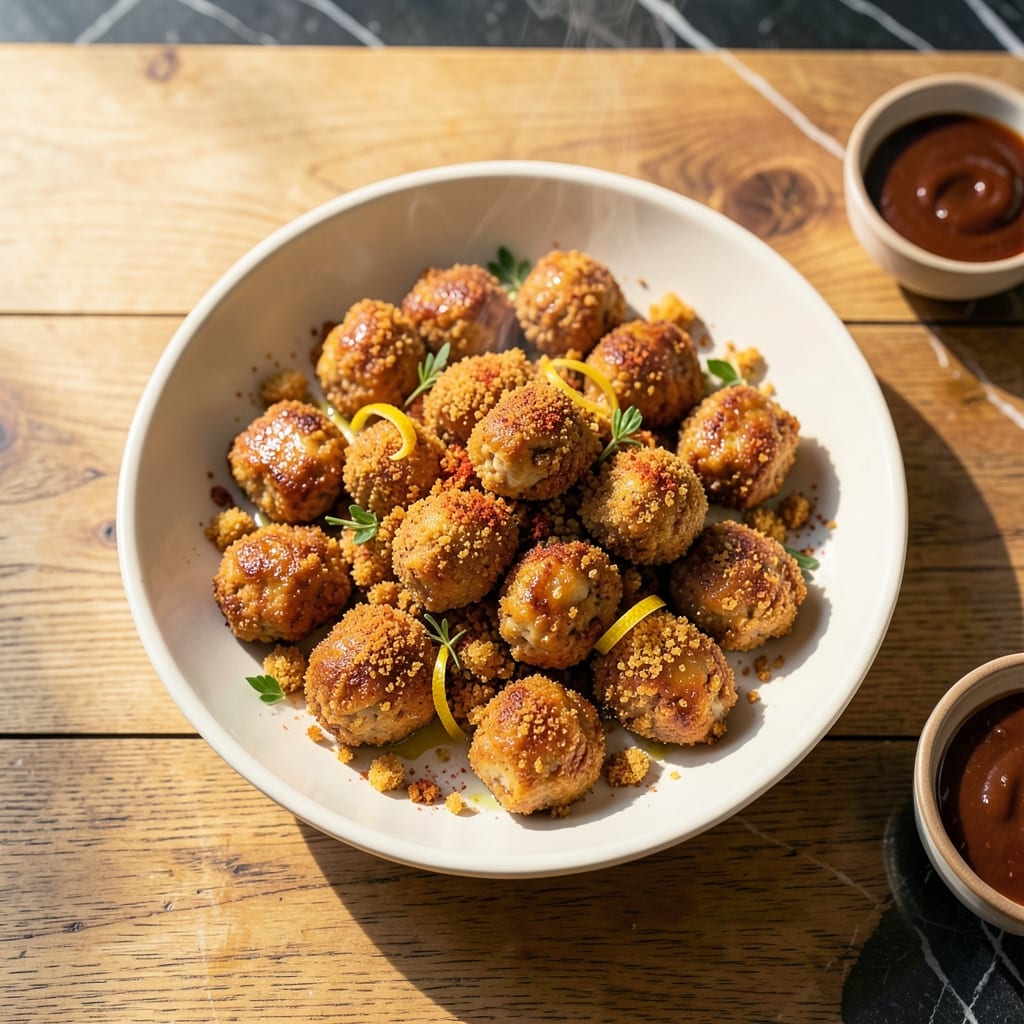
I’ve perfected a method for baking ground chicken nuggets that delivers a crispy exterior without frying. This approach ensures even cooking and a satisfying crunch in every bite.
By combining simple seasonings with breadcrumbs, the nuggets develop a golden, textured coating. Baking at high heat locks in moisture while creating that sought-after crispy finish.
The result is tender, juicy chicken with a crunch that rivals traditional nuggets. No special equipment is needed—just a baking sheet and 20 minutes.
These nuggets are ideal for quick meals or meal prep, offering a lighter alternative without sacrificing texture or flavor.
Ingredients for Ground Chicken Nugget Recipe Baked
Simple pantry staples combine to create these crispy baked nuggets with ease.
| Ingredient | Amount | Notes |
|---|---|---|
| Ground Chicken 🍗 | 1 ½ lb | Lean or regular, well-chilled |
| Panko Breadcrumbs 🍞 | 1 ½ cups | For extra crispiness |
| All-Purpose Flour 🌾 | ½ cup | For binding and coating |
| Large Eggs 🥚 | 2 whole | Beaten, for binding |
| Garlic Powder 🧄 | 1 tsp | Freshly ground preferred |
| Onion Powder 🧅 | 1 tsp | Enhances savory depth |
| Paprika 🌶️ | 1 tsp | Sweet or smoked variety |
| Dried Oregano 🌿 | ½ tsp | Mediterranean flavor boost |
| Salt 🧂 | 1 tsp | Kosher or sea salt |
| Black Pepper 🌶️ | ½ tsp | Freshly ground for best flavor |
| Olive Oil 🫒 | 2 tbsp | For baking sheet and crispiness |
| Grated Parmesan Cheese 🧀 | ½ cup | Optional for added flavor |
[recipe_ingredient_scaler]
The ground chicken must be cold to prevent the nuggets from falling apart. Whole Foods or Trader Joe’s offer high-quality options with good fat ratios. Panko breadcrumbs are essential for that crispy texture—regular breadcrumbs won’t deliver the same crunch. Look for Progresso or Kikkoman brands for consistent results.
No panko? Crushed cornflakes or regular breadcrumbs with a pinch of cornstarch can work in a pinch. Fresh garlic and onion can replace the powders at a 1:1 ratio, but minced finely. For a gluten-free version, use almond flour or gluten-free breadcrumbs. The Parmesan is optional but adds depth (vegan alternatives work too).
Store raw nuggets in the fridge for up to 24 hours before baking. Baked nuggets keep for 3-4 days in an airtight container. Freeze uncooked nuggets on a tray first, then transfer to a bag for up to 2 months.
Why You’ll Love This Recipe
- One Pan Magic: I just mix, shape, and bake—no frying, no mess, and the panko gets that perfect crunch every time.
- Garlic-Packed Bites: The garlic powder in the breading gives these nuggets a punch that’s way more flavorful than plain chicken.
- Kid-Approved Staple: Even my picky nephew asks for these. I make a double batch for lunches all week.
- Budget Hero: Ground chicken stretches further than whole cuts, and a bag of panko lasts me through multiple meals.
Step-by-Step Instructions for Baked Chicken Nuggets
This method guarantees a crispy exterior and tender interior without the need for deep frying.
Step 1: Prepare the Seasoning and Breading Station
In a shallow bowl, combine the 1.5 cups Panko Breadcrumbs, 0.5 cup Grated Parmesan Cheese, 1 tsp Garlic Powder, 1 tsp Onion Powder, 1 tsp Paprika, 0.5 tsp Dried Oregano, 1 tsp Salt, and 0.5 tsp Black Pepper. Stir until the seasoning is evenly distributed throughout the breadcrumbs.
Place the 0.5 cup All-Purpose Flour in a separate shallow bowl. In a third bowl, beat the 2 whole Large Eggs until well combined. This three-bowl setup ensures efficient dredging and coating with minimal mess.
Step 2: Coat the Ground Chicken
Using your hands, shape the 1.5 lb Ground Chicken into evenly sized nuggets, approximately 1.5 inches in diameter. I find slightly flattening them helps achieve maximum crispiness during baking.
Dredge each nugget first in the flour, shaking off any excess. Then dip it into the beaten eggs, allowing any excess to drip back into the bowl. Finally, press the nugget into the seasoned breadcrumb mixture, turning to coat all sides completely. Place the coated nuggets on a clean plate or tray while you finish the batch.
Step 3: Bake to Crispy Perfection
Preheat your oven to 400°F and line a large baking sheet with parchment paper. Drizzle the 2 tbsp Olive Oil over the parchment and spread it evenly with a brush or the back of a spoon to create a thin, even layer.
Arrange the coated nuggets on the prepared baking sheet, leaving 1 inch of space between each one to ensure even browning. Bake for 12-15 minutes, then flip each nugget carefully. Return to the oven and bake for an additional 8-10 minutes until they are golden brown and crispy on both sides.
Step 4: Rest and Serve
Remove the baking sheet from the oven and transfer the nuggets to a wire rack or paper towel-lined plate. Let them rest for 3-5 minutes—this brief pause allows the interior to set while maintaining crispness.
The nuggets should have a uniform golden hue with a texture that audibly crunches when bitten. Serve immediately with your favorite dipping sauce while they’re at peak crispiness. This method consistently delivers restaurant-quality results without the grease of traditional frying.
Pro Tips For Making Ground Chicken Nugget Recipe Baked
- Chill the Nuggets: Let the shaped nuggets rest in the fridge for 15-20 minutes before baking—I learned this the hard way after my first batch fell apart on the tray.
- Use Cold Chicken: Keep the ground chicken cold until mixing, or it’ll turn mushy and stick to your hands like glue.
- Skip Overcrowding: Leave space between nuggets on the baking sheet, or they’ll steam instead of crisp up.
- Double Coat Crust: Dip the nuggets in flour, egg, then panko, then repeat the egg and panko for a thicker, crunchier coat that actually stays put.
Make-Ahead Tips for Leftovers
Prep Ahead Strategy
Shape and bread your nuggets up to 24 hours before baking. Arrange them on a parchment-lined tray, cover loosely with plastic, and refrigerate. This lets flavors meld while keeping the coating dry and ready for the oven. 💡
Freezing Uncooked Nuggets
Lay unbaked nuggets on a tray, freeze for 1 hour until solid, then transfer to a freezer bag. Squeeze out excess air to prevent freezer burn. They’ll keep for up to 2 months without losing texture.
No need to thaw—bake frozen nuggets at 400°F for 18-20 minutes, flipping halfway.
Baked Nugget Storage
Cool completely before storing in an airtight container with parchment between layers. They’ll stay fresh in the fridge for 3-4 days. For longer storage, freeze in a single layer first.
Reheating for Crispiness
Revive refrigerated nuggets in a 400°F oven for 8-10 minutes on a wire rack. For frozen, add 5-7 minutes. Avoid microwaving—it’ll soften the coating. 🔥
Meal Prep Hack
Double the batch and portion into meal-prep containers with dipping sauces on the side. I like pairing with honey mustard or BBQ sauce for easy grab-and-go lunches.
Nutrition Facts
Frequently Asked Questions
Can I use regular breadcrumbs instead of panko?
Regular breadcrumbs can work, but panko is ideal for extra crispiness. If substituting, add 1 tsp cornstarch to regular breadcrumbs to help achieve a crunchier texture.
What’s the best way to shape the nuggets?
Roll 1.5 tbsp of ground chicken mixture into a ball, then flatten slightly. This shape bakes evenly and maximizes crispy surface area. Keep hands moist to prevent sticking.
Why did my nuggets turn out dry?
Overbaking or using lean ground chicken without added moisture can cause dryness. Try adding 1-2 tbsp water or milk to the mixture, and check for doneness at 15 minutes.
Can I make these gluten-free?
Yes! Substitute gluten-free breadcrumbs or almond flour for panko, and use cornstarch instead of all-purpose flour. The texture will be slightly different but still delicious.

Trained in classic French technique but raised on slow-cooked ribs and spicy rubs, she blends culinary skill with smoke and soul.
- Recipe for Boneless Pork Chops in Cast Iron Skillet: Sear and Baste to Juicy Perfection - October 3, 2026
- Recipe for Boneless Cross Rib Roast: Slow-Roasted Beef with Herb Crust - October 3, 2026
- Hamburgers in Sauce Recipe Crock Pot: Slow-Cooked Savory Delight - October 3, 2026