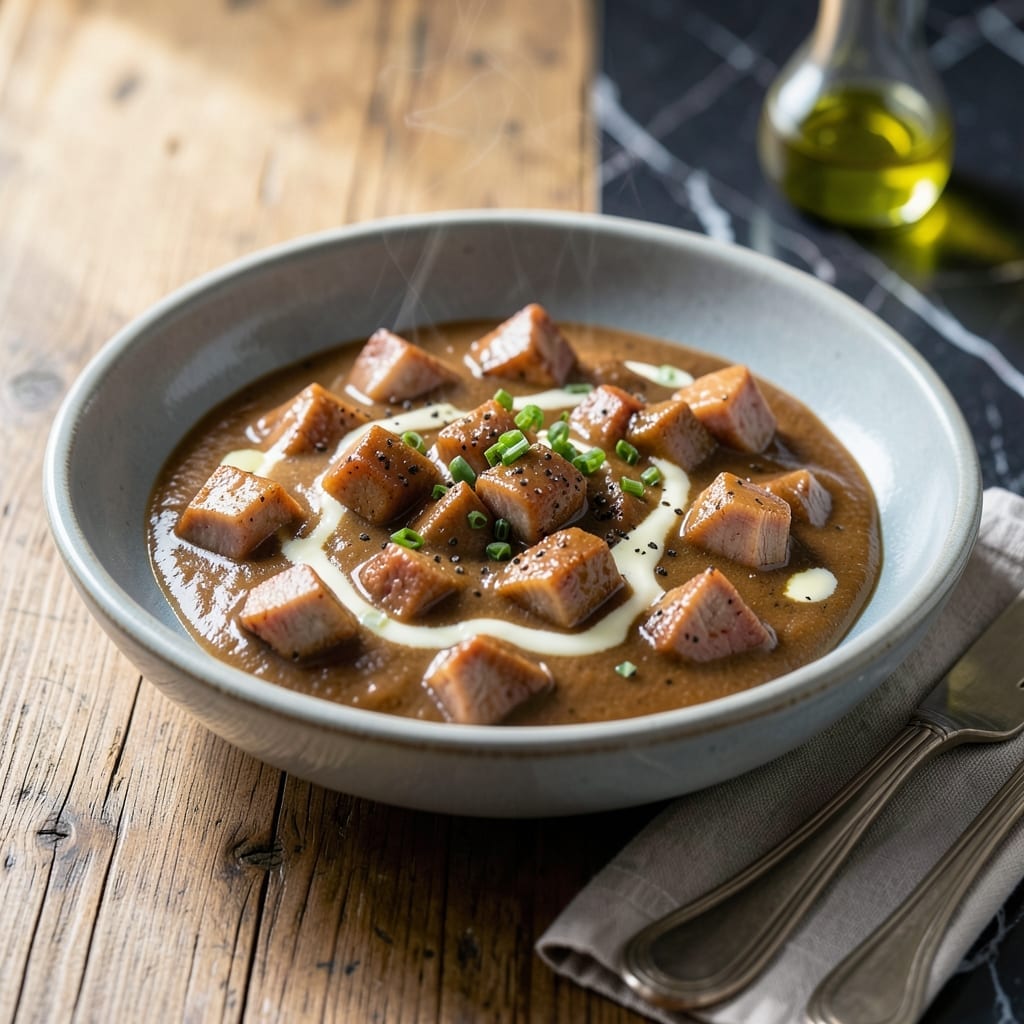
Sometimes you need rich, creamy ham gravy but don’t have pan drippings—this method solves that. Using butter as the fat base and a simple roux creates the perfect velvety consistency.
This from-scratch sauce comes together in minutes with pantry staples. It delivers the same comforting flavor you’d expect, without relying on leftover juices.
Ingredients for Ham Gravy Recipe Without Drippings
Butter, flour, milk, and a few pantry staples create this silky gravy from scratch.
| Ingredient | Amount | Notes |
|---|---|---|
| Unsalted Butter 🧈 | ½ cup | Fat base for roux |
| All-Purpose Flour 🌾 | ¼ cup | For thickening roux |
| Whole Milk 🥛 | 2 cups | Full-fat for creaminess |
| Chicken Broth 🍲 | 1 cup | Low-sodium preferred |
| Ham Base 🐖 | 2 tsp | Or powdered ham bouillon |
| Black Pepper 🌶️ | ½ tsp | Freshly ground preferred |
| Onion Powder 🧅 | ½ tsp | For depth of flavor |
| Garlic Powder 🧄 | ¼ tsp | Balances savory notes |
| Dijon Mustard 🟡 | 1 tsp | Adds tangy complexity |
[recipe_ingredient_scaler]
The butter is key here—land o’ lakes unsalted or any good-quality brand works. Don’t sub margarine, it won’t give you the same richness. Whole milk is non-negotiable for that creamy texture (2% or skim just won’t cut it). For the ham base, Better Than Bouillon is my go-to—it dissolves instantly and packs way more flavor than those little cubes.
No ham base? Crumbled cooked ham at one-third the amount works in a pinch. Need it dairy-free? Oat milk plus a pat of vegan butter gets you close. If you’re out of Dijon, regular yellow mustard works but dial it back to half the amount—it’s more pungent. The broth can be swapped with water plus extra ham base, but you’ll lose some depth.
Gravy thickens as it cools. Store in an airtight container for 3-4 days in the fridge. Reheat gently with a splash of milk to loosen. Freezes beautifully for 2-3 months (the texture might separate slightly, but a quick whisk fixes it).
Why You’ll Love This Recipe
- No Drippings Needed: I love that I can make rich ham gravy without waiting for pan drippings—just butter, flour, and ham base do the trick.
- Creamy & Savory: The whole milk and chicken broth blend with ham base for a velvety texture and deep, comforting flavor.
- Weeknight Lifesaver: Honestly, this comes together in 15 minutes, so it’s perfect for busy evenings when I need a quick, hearty side.
Step-by-Step Instructions for Ham Gravy Without Drippings
Here’s the method. Straightforward, tested, works every time.
Step 1: Create a Blonde Roux for the Base
Melt the 0.5 cup Unsalted Butter in a heavy saucepan over medium heat. I use a light-colored pan so I can judge the color of the roux accurately. Once melted, whisk in the 0.25 cup All-Purpose Flour all at once—this prevents lumps.
Cook the mixture, whisking constantly, for 2-3 minutes until it turns a light golden color and smells nutty. Don’t let it brown—this is a blonde roux, not a dark one. The flour needs this time to cook out its raw taste, which would otherwise make your gravy taste like paste.
Step 2: Gradually Incorporate the Liquids
Slowly pour in the 1 cup Chicken Broth while whisking continuously. I like to add it in a thin stream down the side of the pan, not directly into the center. This prevents the roux from seizing up and creating lumps.
Once the broth is fully incorporated, do the same with the 2 cups Whole Milk. The mixture will thicken as it heats—keep whisking until it’s smooth and begins to simmer. You’re building the creamy base that defines this dish.
Step 3: Season and Simmer to Perfection
Stir in the 2 tsp Ham Base, 0.5 tsp Black Pepper, 0.5 tsp Onion Powder, 0.25 tsp Garlic Powder, and 1 tsp Dijon Mustard. The ham base is your secret weapon here—it delivers that essential ham flavor without needing drippings.
Reduce the heat to low and let the gravy simmer for 5-7 minutes, stirring occasionally. You’ll notice it thickening further as it cooks. The gravy is ready when it coats the back of a spoon and leaves a clear path when you run your finger through it.
Step 4: Adjust Consistency and Serve
Taste and adjust seasoning if needed—I sometimes add a pinch more black pepper for extra kick. If the gravy is too thick, whisk in a splash more whole milk. If it’s too thin, let it simmer a bit longer.
Remove from heat and let it sit for 2 minutes before serving. This resting time allows the flavors to meld completely. The result should be a velvety, creamy sauce with rich ham flavor that’s perfect for drizzling over mashed potatoes, biscuits, or roasted vegetables.
Pro Tips For Making Ham Gravy Recipe Without Drippings
- Brown the Butter: Cook the unsalted butter until it turns a light golden brown before adding flour—this adds depth to the gravy that compensates for missing pan drippings.
- Whisk Constantly: Once you add the flour to the butter, keep whisking for a full 2-3 minutes over medium heat to cook out the raw flour taste and prevent lumps.
- Use Warm Milk: Heat your whole milk slightly before adding it to the roux; cold milk can cause the gravy to seize up and get lumpy.
- Adjust Ham Base: Start with half the recommended ham base, taste, then add more—it’s easy to overdo it, and you can’t take it out once it’s in.
Storing and Reheating This ham gravy recipe without drippings
🍳 Refrigerator Storage
To keep your ham gravy recipe without drippings fresh, transfer it to an airtight container once it has cooled to room temperature. Store it in the refrigerator, where it will stay safe to eat for 3–4 days. This method preserves the creamy texture while preventing any off-flavors from developing.
❄️ Freezer Storage
For longer storage, freeze your gravy in a sealed, freezer-safe container or heavy-duty freezer bag. It can last for 2–3 months without significant quality loss. For best results, portion it into smaller containers for easy thawing later. Leave a little space at the top to account for expansion as it freezes.
🔥 Reheating Methods
Reheat your gravy gently to maintain its smooth consistency. On the stovetop, warm it over low to medium heat, stirring frequently for 3–5 minutes. In the microwave, use 30-second intervals at 50% power, stirring between each to avoid hot spots. If using a smoker or oven, keep the temperature at 250°F (120°C) and check every 10 minutes until heated through.
💡 Quality Preservation
To prevent separation or dryness, add a splash of milk or broth when reheating. If frozen, thaw the gravy overnight in the refrigerator for even warming. Avoid high heat, as it can cause the gravy to break or become lumpy. Stirring constantly ensures a silky, lump-free finish every time.
Nutrition Facts

Trained in classic French technique but raised on slow-cooked ribs and spicy rubs, she blends culinary skill with smoke and soul.
- Recipe for Boneless Pork Chops in Cast Iron Skillet: Sear and Baste to Juicy Perfection - October 3, 2026
- Recipe for Boneless Cross Rib Roast: Slow-Roasted Beef with Herb Crust - October 3, 2026
- Hamburgers in Sauce Recipe Crock Pot: Slow-Cooked Savory Delight - October 3, 2026