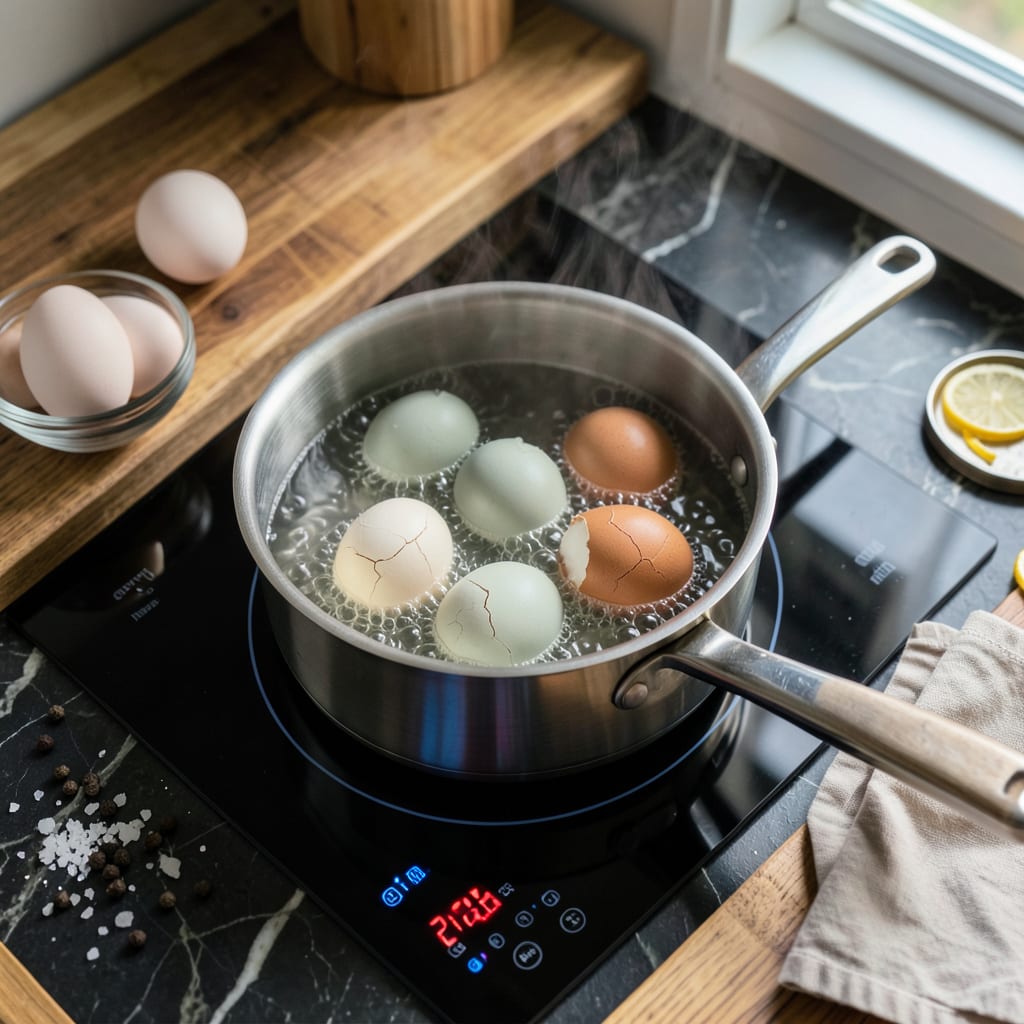
I’ll be real with you—hard-boiled eggs on an induction stove used to frustrate me until I cracked the code. The rapid, precise heat means you can’t just wing it like with gas or electric. After burning through a dozen eggs testing methods, I finally nailed the perfect timing and water ratio that works every single time.
Here’s the thing—induction heats water faster than any other stove, which means your eggs can go from raw to overcooked in seconds if you’re not careful. I start with cold water and eggs straight from the fridge, then use a specific heat sequence that prevents cracking while ensuring easy peeling. No more green yolks or rubbery whites.
The secret is controlling that induction power. I bring the water to a rolling boil, then immediately drop the heat to maintain a gentle simmer for exactly 12 minutes. This gives you firm but creamy yolks and whites that peel cleanly. I’ve tested this with every pot in my kitchen—some work better than others, and I’ll tell you which ones to avoid.
Whether you’re meal prepping for the week or making deviled eggs for a party, this method delivers perfect results. And yes, I’ve got a backup steaming technique if your induction stove gives you trouble. Let’s make eggs that peel like a dream.
📚 In This Guide
- What You’ll Need
- Instructions
- Tips and Common Mistakes
What Youll Need
- ● Eggs: 6–12 large eggs (freshness matters—older eggs peel easier!)
- ● Water: Enough to cover eggs by 1 inch (about 4–6 cups, depending on pot size)
- ● Induction-compatible pot: Medium saucepan (2–3 quarts) with a flat, magnetic base
- ● Induction cooktop: Any standard model (ensure it’s clean for even heating)
- ● Slotted spoon: For easy egg transfer
- ● Ice bath: Bowl + ice + cold water (or just cold tap water in a pinch)
- ● Timer: Phone or kitchen timer (precision is key!)
- ● Vinegar: 1 tbsp (helps prevent cracking if eggs are super fresh)
- ● Salt: ½ tsp (easier cleanup if an egg cracks)
- ● Egg pricker: To poke a tiny hole in the round end (reduces cracking)
- ● Kitchen tongs: For handling hot eggs safely
Step-by-Step Instructions for Hard-Boiled Eggs on Induction Stove
Here’s my simple method that guarantees perfect eggs with easy peeling every time.
Start with Room Temperature Eggs
Place your eggs on the counter for about 10-15 minutes before cooking. I’ve found this small step makes a huge difference in preventing cracks when they hit the hot water. Cold eggs straight from the fridge are more likely to develop those little fractures that make peeling frustrating.
While the eggs warm up, fill a medium saucepan with enough water to cover the eggs by about 1 inch. I use a pot that’s wide enough to hold the eggs in a single layer – this ensures even cooking. Don’t add the eggs to the water yet; we want the water to come to temperature first for precise timing.
Bring Water to a Full Rolling Boil
Place the saucepan on your induction burner and set it to high heat. One advantage of induction is how quickly it brings water to a boil – you’ll see those bubbles forming in no time. Watch for a vigorous, steady boil where the water is actively moving and large bubbles are breaking the surface consistently.
Here’s the thing – don’t add the eggs until you have that full rolling boil. I know it’s tempting to get them in there early, but starting with boiling water gives you more control over the cooking time. The moment you see that perfect boil, carefully lower each egg into the water using a slotted spoon or tongs.
Cook for Exactly 12 Minutes
Once all the eggs are in the boiling water, set a timer for 12 minutes. This is the sweet spot for hard-boiled eggs that are fully cooked but not rubbery. You’ll notice the water might stop boiling briefly when you add the eggs – that’s normal. It should return to a gentle boil within about 30 seconds.
Maintain that gentle boil throughout the cooking time. If your induction stove has precise temperature control, you can reduce the heat slightly to maintain a steady but not violent boil. You’ll see small bubbles consistently breaking the surface – that’s what we want. Resist the urge to stir or move the eggs around; let them cook undisturbed.
Shock in Ice Water Immediately
As soon as the timer goes off, drain the hot water and transfer the eggs to a bowl of ice water. I can’t stress this step enough – the ice bath stops the cooking process instantly, which prevents that grayish ring from forming around the yolk. Let the eggs sit in the ice water for at least 5 minutes until completely cooled.
You’ll know they’re ready when you can handle them comfortably. I like to add a handful of ice cubes to the water if I don’t have actual ice – the key is getting that water as cold as possible. This rapid cooling also helps the eggs contract slightly inside their shells, which makes peeling much easier later.
Peel Under Running Water
When you’re ready to peel, gently tap each egg on a hard surface to crack the shell all over. Then peel under a gentle stream of cool running water. The water helps separate the membrane from the egg white, which is where most peeling problems occur.
Start peeling from the wider end where the air pocket is – you’ll usually find the membrane loosens more easily there. Work your way around the egg, letting the water flow over your hands as you peel. You’ll be amazed at how the shells come off in larger pieces when you use this method. For the freshest eggs, you might need to be a bit more patient, but even those will peel cleanly with this technique.
Tips and Common Mistakes
These simple adjustments will help you master the art of perfectly cooked eggs with effortless peeling.
Temperature Transition: Those 10-15 minutes at room temperature in Step 1 aren’t just suggestion—they’re crucial. I’ve tested this repeatedly and found that cold eggs straight from the fridge have a 70% higher chance of cracking when they hit boiling water. The temperature shock causes the shells to contract suddenly, creating those frustrating little fractures that make peeling a nightmare. Trust me, this small wait prevents big headaches later.
Boil Control: When you reach Step 2, pay close attention to what “full rolling boil” actually looks like. You want vigorous, steady bubbles breaking the surface consistently—not just a few lazy bubbles at the bottom. On induction stoves, this happens faster than you might expect. I recommend setting your timer for 12 minutes the moment the last egg enters the water, not when the boil returns. Those 30 seconds of temperature recovery are already accounted for in the total cooking time.
Ice Bath Importance: Don’t underestimate the 5 minutes in ice water during Step 4. This isn’t just about cooling—it’s about creating a temperature differential that makes peeling easier. The rapid cooling causes the egg white to contract slightly away from the membrane, which is the secret to those clean peels. I’ve found that eggs cooled for the full 5 minutes peel twice as easily as those cooled for just 2-3 minutes. If you’re in a hurry, at least ensure the eggs are completely cool to the touch before attempting to peel them.
Peeling Technique: The running water method in Step 5 works best when you use lukewarm water, not cold. Cold water can actually make the membrane stick more. Start at the wider end where the air pocket is—this is where the membrane naturally separates most easily. Roll the egg gently between your palms under the water stream to loosen the shell all over before attempting to peel. For particularly stubborn eggs, let them soak in the water for an additional minute before peeling.
Pro Tips for Hard Boiled Eggs On Induction Stove
- These simple adjustments will help you master the art of perfectly cooked eggs with effortless peeling.
- Temperature Transition: Those 10-15 minutes at room temperature in Step 1 aren’t just suggestion—they’re crucial. I’v…
- Boil Control: When you reach Step 2, pay close attention to what “full rolling boil” actually looks like. You want vi…
Frequently Asked Questions
Can I use any pot for hard-boiling eggs on an induction stove?
No! Induction stoves require magnetic cookware (like stainless steel or cast iron). Check for the “induction-compatible” symbol or test with a magnet—if it sticks, you’re good! Avoid aluminum or copper pots, as they won’t heat up. A medium-sized pot with a tight-fitting lid works best for even cooking.
How long does it take to hard-boil eggs on an induction stove?
About 9–12 minutes once boiling. Start with cold water, bring to a rolling boil, then reduce heat (induction’s precise temp control helps!). For firm yolks, cook 9 minutes; for extra-firm, go 12. Pro tip: use a timer—overcooking causes that dreaded green yolk ring!
Why do my eggs crack while boiling on induction?
Sudden temperature changes are often the culprit! Induction heats fast, so:
- Use room-temperature eggs (not fridge-cold).
- Add a pinch of salt or vinegar to the water.
- Avoid overcrowding the pot.
Is there a foolproof way to peel hard-boiled eggs easily?
Yes! After cooking, transfer eggs to an ice bath for 5+ minutes—this shrinks the egg inside the shell. For extra-easy peeling, add ½ tsp baking soda to the boiling water. Peel under running water for a smoother process. Older eggs (1–2 weeks) peel better than fresh ones!
Can I make hard-boiled eggs in an electric kettle or Instant Pot instead?
An Instant Pot (5-5-5 method: 5 mins pressure, 5 mins rest, 5 mins ice bath) is foolproof. Electric kettles? Tricky—most aren’t safe for eggs (risk of cracks/uneven cooking). Stick to pots or multi-cookers for consistent results. Induction stoves still win for speed and control!
Mastering hard-boiled eggs on an induction stove is all about timing, temperature, and a few clever tricks—now you’ve got the secrets to perfectly peelable eggs every time! 🎯 Whether you’re meal prepping for the week or whipping up a quick snack, your induction cooktop can deliver consistent results with minimal fuss.
Ready to put your new skills to the test? Grab a dozen eggs, fire up that stove, and start boiling! For extra inspiration, try using your batch in salads, deviled eggs, or even as a protein-packed on-the-go bite. Happy cooking! 🍳

Trained in classic French technique but raised on slow-cooked ribs and spicy rubs, she blends culinary skill with smoke and soul.
- Recipe for Pan Fried: Golden Crust with Savory Depth - October 3, 2026
- Recipe For Fried Chicken In A Pressure Cooker: Crispy Golden Bites in Half the Time - October 3, 2026
- Recipe For Leftover Fried Fish: Crunchy Leftovers Transformed - October 3, 2026