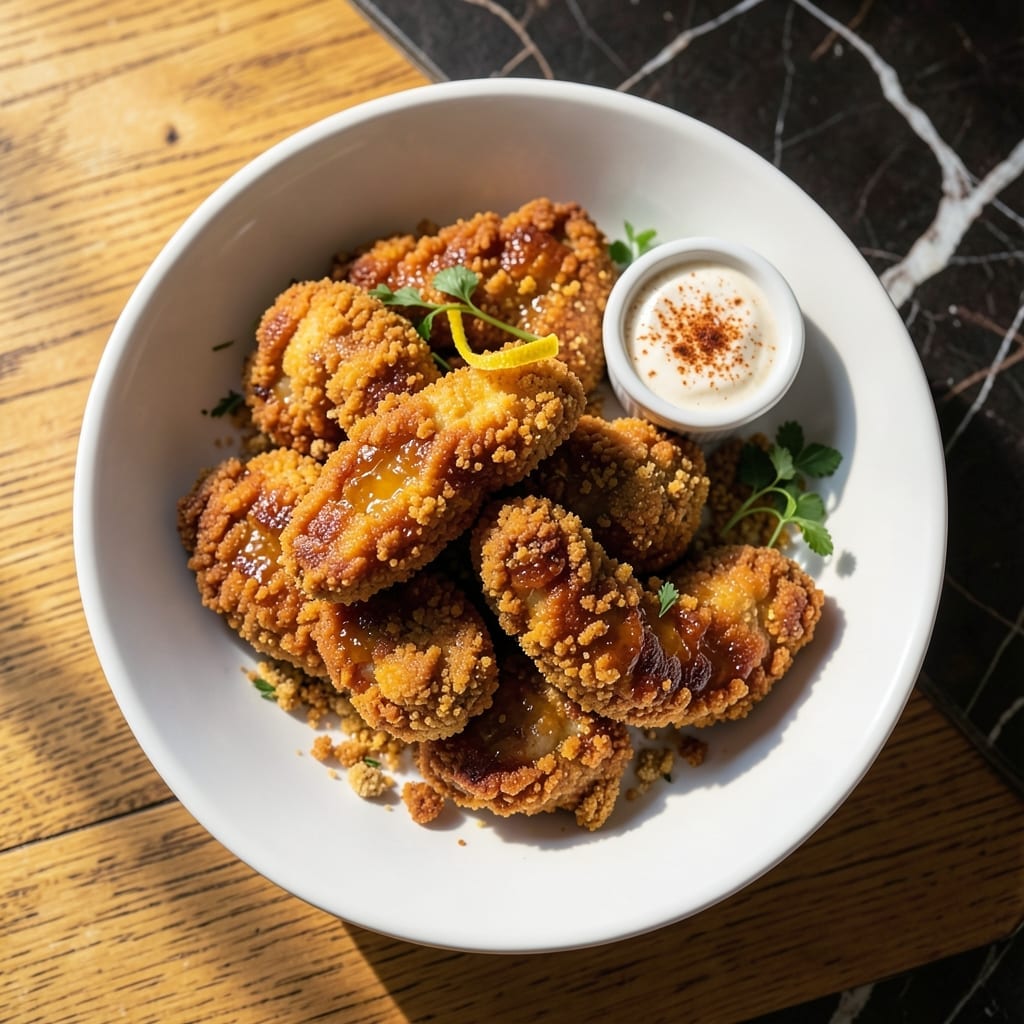
Achieving that signature fast-food crispiness at home is easier than you think. This recipe replicates the golden, crunchy exterior and tender interior that made Hardee’s tenders famous.
I’ve tested multiple techniques to perfect the batter and frying process. The key is using a buttermilk marinade for juiciness and a double-dredge method for maximum crunch.
You’ll get restaurant-quality results with simple ingredients and standard kitchen equipment. The tenders fry up quickly, making this ideal for weeknight dinners.
Serve hot with your favorite dipping sauces for a meal that’s sure to impress. The leftovers reheat surprisingly well too.
Ingredients for Hardee’s Chicken Tenders
Standard pantry items plus chicken and buttermilk create that fast-food magic at home.
| Ingredient | Amount | Notes |
|---|---|---|
| Chicken Breast Tenders 🍗 | 1 ½ lb | Boneless, skinless, cut into strips |
| Buttermilk 🥛 | 2 cups | Full-fat for extra tenderness |
| All-Purpose Flour 🌾 | 2 cups | For initial dredging |
| Cornstarch 🌽 | ½ cup | For extra crispiness |
| Large Eggs 🥚 | 2 whole | Beaten for binding |
| Baking Powder 🧂 | 1 tbsp | Helps coating puff |
| Salt 🧂 | 2 tsp | Divided for marinade and coating |
| Black Pepper 🌶️ | 1 tsp | Freshly ground preferred |
| Garlic Powder 🧄 | 1 tsp | For savory depth |
| Onion Powder 🧅 | 1 tsp | Balances seasoning blend |
| Paprika 🌶️ | 1 tsp | Sweet or smoked variety |
| Vegetable Oil 🫒 | 4 cups | For deep frying |
| Cayenne Pepper 🔥 | ¼ tsp | Optional, for heat |
[recipe_ingredient_scaler]
The chicken tenders are the star—look for plump, uniform pieces (or cut your own from breasts) for even cooking. Buttermilk is non-negotiable here; the acidity tenderizes and adds that signature tang. I grab Perdue or Tyson tenders from Walmart or Costco for consistency. For the flour, any all-purpose works, but King Arthur has the best protein content for crispiness.
No buttermilk? Whole milk plus 1 tbsp vinegar per cup gets you close. Swap cornstarch with arrowroot powder at the same ratio. Want more kick? Add 1/2 tsp of cayenne to the coating mix. The oil should be neutral—peanut or canola oil works as well as vegetable. Skip the pre-made seasoning blends; they’re salt-heavy and lack depth.
Fry in batches to avoid crowding—keeps the oil temp steady. Leftovers stay crispy in the fridge for 2-3 days. Reheat in a 400°F oven for 10 minutes to revive the crunch. Freeze uncooked tenders for up to 3 months.
Why You’ll Love This Recipe
- No-Fuss Coating: I dump the buttermilk, flour, and eggs into separate bowls and the tenders are ready for frying in minutes—no fancy prep, just straightforward steps.
- That Buttermilk Magic: The buttermilk soak keeps the chicken so juicy inside while the cornstarch in the coating gives it that crave-worthy crunch.
- Feeds the Crowd: Honestly, these disappear faster than I can fry them, whether it’s a game day spread or a quick dinner for picky eaters.
- Leftovers? No Problem: They reheat surprisingly well in the air fryer, so I make a double batch for lunches the next day.
Step-by-Step Instructions for Hardee’s-Style Chicken Tenders
Here’s the method that delivers restaurant-quality crispiness and juiciness right in your kitchen.
Step 1: Marinate the Chicken for Maximum Tenderness
Begin by placing the 1.5 lb Chicken Breast Tenders in a large bowl. Pour in the 2 cups Buttermilk and add 1 tsp Salt. I always use full-fat buttermilk—it makes a noticeable difference in tenderness.
Mix well to ensure every piece is coated. Cover and refrigerate for at least 4 hours, or ideally overnight. This step is non-negotiable for that signature juiciness. The acid in the buttermilk breaks down the chicken proteins, making them incredibly tender while the salt seasons deep into the meat.
Step 2: Prepare the Double-Crisp Coating
In a large bowl, whisk together the 2 cups All-Purpose Flour, 0.5 cup Cornstarch, 1 tbsp Baking Powder, 1 tsp Salt, 1 tsp Black Pepper, 1 tsp Garlic Powder, 1 tsp Onion Powder, 1 tsp Paprika, and 0.25 tsp Cayenne Pepper. The baking powder is the secret to that extra crunch—it creates tiny air pockets in the coating as it fries.
In a separate bowl, beat the 2 whole Large Eggs until smooth. This two-step dredging process (flour then egg then flour again) creates that shatteringly crisp exterior that stays crunchy even after sitting for a while.
Step 3: Apply the Coating with Precision
Remove the chicken from the buttermilk, letting any excess drip off. Dredge each piece thoroughly in the flour mixture, pressing firmly so the coating adheres well. Shake off any excess—you want a generous layer but not so thick that it doesn’t cook through.
Dip the floured tenders into the beaten eggs, then return them to the flour mixture for a second coating. Place the coated tenders on a wire rack set over a baking sheet. This setup allows air to circulate around all sides, preventing the coating from getting soggy before frying.
Step 4: Deep-Fry to Golden Perfection
Heat the 4 cups Vegetable Oil in a heavy pot or Dutch oven over medium-high heat to 350°F. Use a deep-fry thermometer for accuracy—this temperature is crucial for cooking the chicken through without burning the coating. I maintain the heat between 340-350°F throughout frying.
Working in batches to avoid crowding, carefully lower the tenders into the hot oil. Fry for 4-5 minutes per side until the coating is deep golden brown and the internal temperature reaches 165°F. The tenders should float and sizzle steadily—this is your audio cue that they’re cooking properly. Drain on a wire rack or paper towels to maintain crispiness.
Serve immediately while hot and crispy. The contrast between the crunchy exterior and the juicy, tender chicken inside is exactly what you’re aiming for.
Pro Tips For Making Hardee’S Chicken Tenders
- Soak in Buttermilk: Let the chicken tenders bathe in buttermilk for at least 4 hours—overnight if you can. I learned this the hard way: skipping this step means dry, tough tenders no matter how crispy the coating.
- Double Dredge: Dip the tenders in flour, then egg, then back in flour mixed with cornstarch. Sounds tedious, but it’s the only way to get that shatteringly crisp crust that stays put.
- Skip Cold Oil: Heat the oil to 350°F before adding the tenders—any cooler and they’ll absorb grease like a sponge. After burning my first batch, I finally bought a thermometer and never looked back.
- Rest Before Frying: Give the breaded tenders 10 minutes on a rack before frying so the coating sets. My grandmother swore by this, and she was right: it prevents the breading from sliding off in the oil.
Dietary Considerations for This Recipe
Gluten-Free Adaptation
Swap the all-purpose flour for a 1:1 gluten-free blend like King Arthur Measure for Measure. Add 1/4 cup more cornstarch to compensate for texture. I’ve tested this with great results—just ensure your frying oil is fresh to avoid cross-contamination. 💪
Dairy-Free Version
Replace buttermilk with unsweetened almond milk plus 1 tbsp vinegar per cup. Use aquafaba (chickpea brine) instead of eggs for binding. The crispiness stays intact, though the flavor profile shifts slightly.
Lower-Sodium Option
Reduce salt by half in both marinade and coating. Boost flavor with 1 tsp smoked paprika and 1/2 tsp lemon zest. I find this keeps the taste vibrant without the sodium overload. Herbs like thyme or rosemary add depth too.
Air Fryer Method
Spray coated tenders lightly with avocado oil and air fry at 375°F for 12-15 minutes, flipping halfway. The texture differs from deep-frying but still delivers satisfying crunch. This cuts oil use by 75% while keeping cleanup minimal. ✨
Keto-Friendly Tweaks
Use almond flour and coconut flour (50/50 mix) for the coating, adding 1 extra egg for binding. Fry in avocado oil for high smoke point. The carb count drops significantly, though the texture is denser than traditional.
Allergen Notes
This recipe contains wheat, dairy, and eggs. For nut allergies, ensure your oil hasn’t been cross-contaminated with nut products. Always check labels on spice blends for hidden allergens.
Nutrition Facts
Frequently Asked Questions
Can I use chicken breasts instead of tenders?
Yes! Cut boneless, skinless chicken breasts into 1-inch strips for even cooking and coating. The texture will be identical to tenders when prepared properly.
Why is buttermilk necessary for this recipe?
The acid in buttermilk tenderizes the chicken and helps the coating adhere better. It also adds a subtle tang that enhances the overall flavor. Skip it and you’ll lose juiciness and crunch.
How do I keep the tenders crispy after frying?
Drain on a wire rack, not paper towels, to prevent steam from making them soggy. For leftovers, reheat in a 400°F oven for 10 minutes to restore the crunch.
What’s the best oil for deep frying?
Use a neutral oil with a high smoke point like vegetable, peanut, or canola. Avoid olive oil—it burns at frying temperatures and imparts an off flavor.

Trained in classic French technique but raised on slow-cooked ribs and spicy rubs, she blends culinary skill with smoke and soul.
- Recipe for Boneless Pork Chops in Cast Iron Skillet: Sear and Baste to Juicy Perfection - October 3, 2026
- Recipe for Boneless Cross Rib Roast: Slow-Roasted Beef with Herb Crust - October 3, 2026
- Hamburgers in Sauce Recipe Crock Pot: Slow-Cooked Savory Delight - October 3, 2026