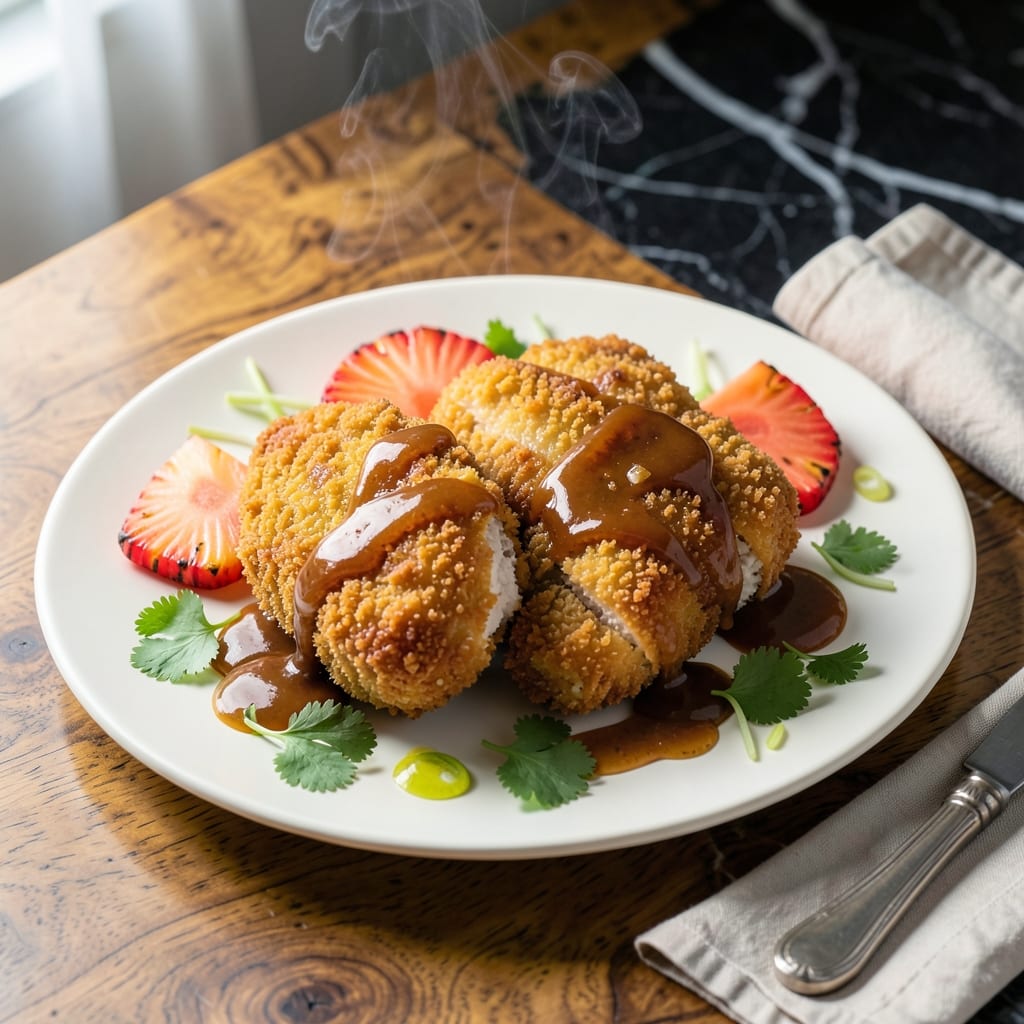
This recipe brings Hawaiian flavors to classic chicken katsu, delivering crispy cutlets with a tropical twist. The secret lies in the double-breading technique and a quick pan-fry that locks in juiciness while creating a golden crust.
Marinated in soy sauce and pineapple juice, the chicken develops tender, flavorful depth before coating. The panko breadcrumbs ensure an extra crispy texture that stays crunchy even after the sauce is added. Every bite balances savory and sweet perfectly.
Serve with steamed rice and a tangy Hawaiian-style gravy for the complete experience. The contrast of the crispy coating with the tender chicken makes this dish unforgettable.
Ready in under 45 minutes, it’s ideal for a flavorful weeknight meal that feels special.
Ingredients for Hawaiian Chicken Katsu
Quality ingredients create authentic Hawaiian flavors in this crispy, tender chicken dish.
| Ingredient | Amount | Notes |
|---|---|---|
| Boneless Chicken Breasts 🍗 | 1 ½ lb | Pounded to 1/2-inch thickness |
| Soy Sauce 🫒 | ½ cup | Low-sodium preferred for balance |
| Pineapple Juice 🍍 | ½ cup | Canned or fresh, unsweetened |
| Panko Breadcrumbs 🍞 | 2 cups | Japanese-style for extra crispiness |
| All-Purpose Flour 🌾 | ½ cup | For initial dredging layer |
| Large Eggs 🥚 | 2 whole | Beaten for breading adhesion |
| Vegetable Oil 💧 | 1 cup | Neutral flavor, for pan-frying |
| Garlic Cloves 🧄 | 3 cloves | Minced for marinade flavor |
| Fresh Ginger 🌿 | 1 tbsp | Grated for aromatic depth |
| Brown Sugar 🍚 | 2 tbsp | Light or dark, for caramelized notes |
| Cornstarch 🌾 | 2 tbsp | For thickening the gravy |
| Chicken Broth 🥫 | 1 cup | Low-sodium for controlled seasoning |
| Apple Cider Vinegar 🍏 | 1 tbsp | Balances sweetness in gravy |
| Kosher Salt 🧂 | 1 tsp | Diamond Crystal preferred for even seasoning |
| Black Pepper 🌶️ | ½ tsp | Freshly ground for best flavor |
[recipe_ingredient_scaler]
The chicken is the foundation—boneless, skinless breasts pounded to even thickness ensure consistent cooking. Panko breadcrumbs from the Asian aisle (or Kikkoman brand) deliver that signature crunch. For the pineapple juice, Dole or Del Monte canned versions work perfectly (no need for fresh). The soy sauce should be Japanese-style like Kikkoman for authentic flavor without overpowering saltiness.
No panko? Regular breadcrumbs at half the amount but expect less crunch. Swap pineapple juice for orange juice in a pinch (slightly different but still sweet). For gluten-free, use gluten-free panko and rice flour instead of all-purpose. The ginger can be ground ginger at one-quarter the amount, but fresh is strongly recommended for that bright, zesty note.
Marinate the chicken for 30 minutes max—longer makes it mushy. Store panko in an airtight container for up to 3 months. Leftovers keep 3-4 days in the fridge and reheat well in a toaster oven to maintain crispiness (microwave ruins the texture).
Why You’ll Love This Recipe
- One Pan Magic: I love that this comes together with just a bowl for dredging, a pan for frying, and no complicated steps.
- Sweet-Savory Crunch: The panko gives that perfect crisp while the pineapple juice and soy sauce create this addictive sweet-salty glaze.
- Feeds a Hungry Crowd: Honestly, it’s my go-to for family dinners—everyone from picky kids to second-helpings adults cleans their plates.
- Budget Stretcher: Chicken breasts stay affordable, and the simple pantry staples mean I can make this without a special grocery trip.
Step-by-Step Instructions for Hawaiian Chicken Katsu
Achieve perfectly crisp cutlets with this tested method that balances texture and island-inspired flavor.
Step 1: Marinate and Prepare the Chicken
Begin by pounding the 1.5 lb Boneless Chicken Breasts to a uniform 1/2-inch thickness between two sheets of plastic wrap. This ensures even cooking and consistent crispiness. Season both sides with 1 tsp Kosher Salt and 0.5 tsp Black Pepper.
In a bowl, whisk together 0.5 cup Soy Sauce, 0.5 cup Pineapple Juice, 3 cloves minced Garlic Cloves, and 1 tbsp grated Fresh Ginger. Submerge the chicken in the marinade and let it rest at room temperature for 15 minutes to absorb the flavors.
Step 2: Set Up the Breading Station
Arrange three shallow dishes for breading. Place 0.5 cup All-Purpose Flour in the first dish. In the second, beat the 2 whole Large Eggs until smooth. In the third, combine 2 cups Panko Breadcrumbs with 2 tbsp Brown Sugar for a hint of caramelized sweetness.
Remove the chicken from the marinade (discard the marinade) and pat it dry with paper towels. Dredge each piece in the flour, shaking off excess, then dip in the beaten eggs, allowing any excess to drip off. Finally, press the chicken into the panko mixture, ensuring full coverage for maximum crispiness.
Step 3: Pan-Fry to Golden Perfection
Heat 1 cup Vegetable Oil in a large skillet over medium-high heat until shimmering. Test the oil by dropping in a pinch of panko—if it sizzles immediately, it’s ready. Carefully place the breaded chicken in the skillet, working in batches if necessary to avoid crowding.
Fry for 4-5 minutes per side until the coating is deep golden brown and the internal temperature reaches 165°F. The crust should be so crispy that it audibly crunches when cut. Transfer the cooked chicken to a wire rack to drain excess oil.
Step 4: Prepare the Hawaiian-Style Gravy
In a saucepan, whisk together 1 cup Chicken Broth, 2 tbsp Cornstarch, 1 tbsp Apple Cider Vinegar, and any remaining marinade from the chicken (if reserved). Cook over medium heat, stirring constantly, until the mixture thickens to a gravy-like consistency, about 3-4 minutes.
Taste and adjust seasoning if needed, though the soy sauce in the marinade should provide sufficient saltiness. The gravy should coat the back of a spoon and have a glossy sheen.
Step 5: Serve Immediately for Maximum Crispiness
Slice the chicken into cutlets and arrange on a serving platter. Drizzle the warm gravy over the top or serve it on the side for dipping. The contrast of the crispy coating and the tangy-sweet gravy defines this dish.
For best results, serve immediately while the chicken is still hot and the crust remains at its peak crispiness. Delaying even a few minutes can cause the coating to soften.
Pro Tips For Making Hawaiian Chicken Katsu
- Pound the Chicken: Even out the thickness of your boneless chicken breasts to ½ inch with a rolling pin or meat mallet—I learned this the hard way after too many dry, overcooked edges.
- Chill the Coated Chicken: After dredging in flour and panko, let the chicken rest in the fridge for 15 minutes; it keeps the crumbs from falling off when they hit the hot oil.
- Skip the Overcrowding: Fry just two pieces at a time in ¼ inch of oil, or the temperature drops and you’ll end up with greasy, sad katsu instead of crispy.
- Reduce the Pineapple Juice: Simmer the pineapple juice for 3-4 minutes before adding soy sauce for a thicker, stickier glaze that clings to the chicken instead of sliding off.
Pro Cooking Tips for Great hawaiian chicken katsu
Oil Temperature Control
Use a deep-fry thermometer to maintain 350-375°F oil temperature. If it drops below 325°F, the breading absorbs oil and gets greasy. I use a Taylor Precision thermometer for accuracy. 🌡️
Double Frying Trick
For extra crispiness, fry the chicken once at 325°F for 2 minutes per side, rest for 5 minutes, then fry again at 375°F until golden. This creates a shatteringly crisp exterior.
Pounding Technique
Place chicken between plastic wrap and pound to ½-inch thickness with a meat mallet. Start from the center and work outward. Even thickness ensures the coating crisps uniformly without burning.
Breading Pressure
Press the panko mixture firmly into the chicken—this creates those beautiful craggy edges that get extra crispy. I use my palm to apply even pressure across the entire surface.
Resting Before Serving
After frying, rest the chicken on a wire rack for 2-3 minutes. This allows excess oil to drain while keeping the crust crispy. Never rest on paper towels—they trap steam. 💡
Gravy Consistency
If your gravy is too thick, whisk in 1-2 tbsp hot water. Too thin? Mix 1 tsp cornstarch with 1 tbsp cold water and stir into the gravy until it reaches the perfect drizzling consistency.
Nutrition Facts
Frequently Asked Questions
Can I use chicken thighs instead of breasts?
Yes, boneless thighs work well and may stay juicier. Pound them to 1/2-inch thickness for even cooking. Note they may take 1-2 minutes longer to reach 165°F.
Why did my breading fall off?
This usually happens if the chicken wasn’t dry before breading or the oil wasn’t hot enough. Pat it very dry after marinating and ensure oil is 350-375°F before frying.
Can I bake instead of frying?
For a lighter version, bake at 400°F for 20-25 minutes on a wire rack. Spray with oil first for crispiness, but frying gives the best texture.
How do I make it gluten-free?
Swap regular flour for rice flour and use gluten-free panko. Verify your soy sauce is gluten-free too. The method remains the same.

Trained in classic French technique but raised on slow-cooked ribs and spicy rubs, she blends culinary skill with smoke and soul.
- Recipe for Boneless Pork Chops in Cast Iron Skillet: Sear and Baste to Juicy Perfection - October 3, 2026
- Recipe for Boneless Cross Rib Roast: Slow-Roasted Beef with Herb Crust - October 3, 2026
- Hamburgers in Sauce Recipe Crock Pot: Slow-Cooked Savory Delight - October 3, 2026