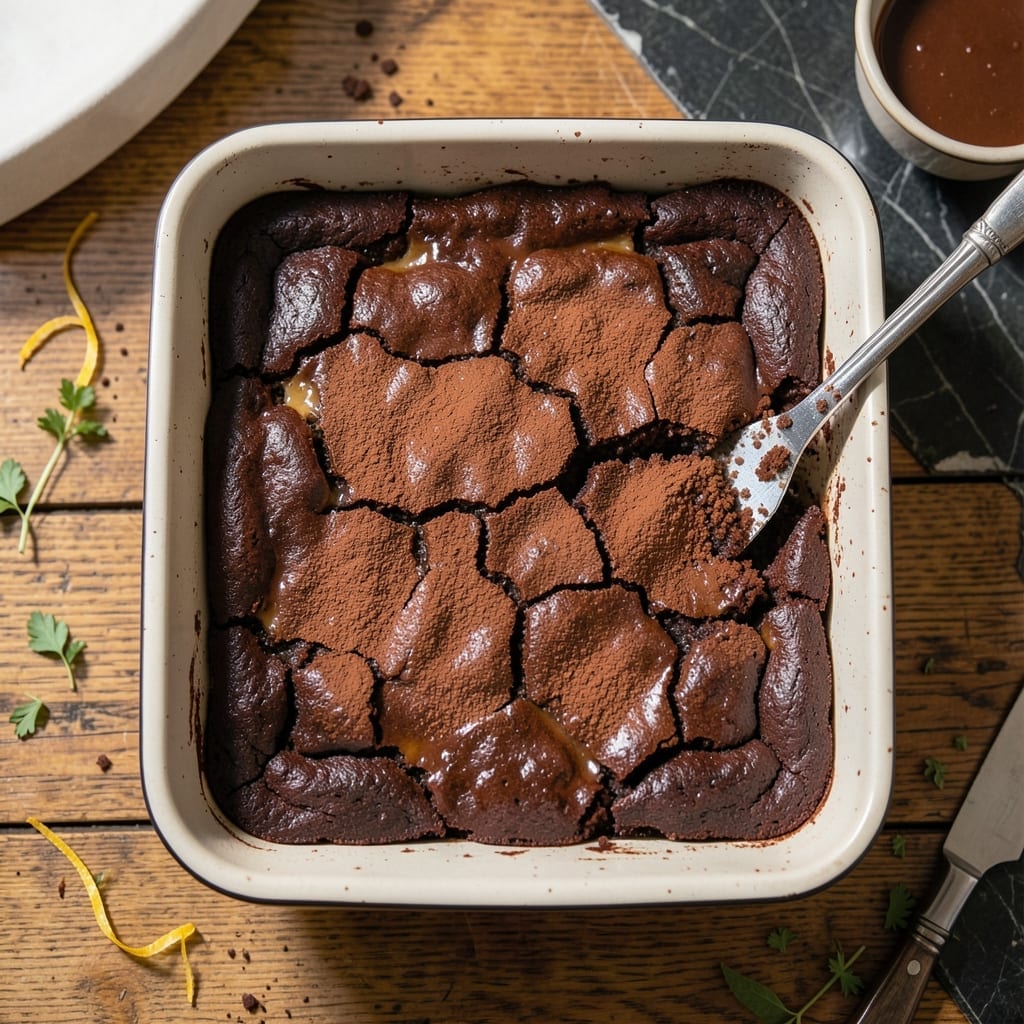
Fudgy, dense brownies with that signature crackly top are what this recipe delivers every time. I’ve tested it with different cocoa brands, but Hershey’s always gives the richest chocolate flavor and perfect texture.
This method uses an 8×8 pan for thick, bakery-style squares that stay moist for days. The secret is pulling them out just before they look fully set—residual heat finishes the job.
You’ll get crackly tops and gooey centers without any fancy equipment. A whisk, a bowl, and a wooden spoon are all you need to create these decadent treats.
Serve warm with a glass of milk or let cool for clean slices. These never last long in my kitchen.
Ingredients for Hershey’s Cocoa Brownie Recipe 8×8
Simple pantry staples create these decadent, fudgy treats with that signature crackly top.
| Ingredient | Amount | Notes |
|---|---|---|
| Hershey's Cocoa Powder 🍫 | ¾ cup | Unsweetened natural variety |
| All-Purpose Flour 🌾 | ¾ cup | Spoon and level for accuracy |
| Granulated Sugar 🧂 | 1 ½ cups | White sugar preferred |
| Unsalted Butter 🧈 | ½ cup | Melted, 1 stick |
| Large Eggs 🥚 | 2 whole | Room temperature preferred |
| Vanilla Extract 🌿 | 1 tsp | Pure vanilla for best flavor |
| Salt 🧂 | ¼ tsp | Table salt or fine sea salt |
| Baking Powder 🧂 | ¼ tsp | For slight lift |
| Semi-Sweet Chocolate Chips 🍫 | ½ cup | Optional for extra richness |
| Walnut Pieces 🌰 | ½ cup | Optional, chopped (the good stuff, not pre-chopped) |
[recipe_ingredient_scaler]
The cocoa is non-negotiable here. Hershey’s natural unsweetened gives that deep chocolate flavor and perfect texture every time—I’ve tested others, but this one wins. Grab it from the baking aisle at any grocery store. The butter should be real unsalted (not margarine) for that rich, bakery-style taste. If you’re at Whole Foods, their store brand cocoa works in a pinch, but Hershey’s is still king.
No cocoa powder? Melted baking chocolate at a 1:1 ratio (1 oz chocolate = 3 tbsp cocoa + 1 tbsp butter), but texture will differ slightly. Out of semi-sweet chips? Chop a chocolate bar instead. Skip the walnuts if you’re not a fan (or swap for pecans). The vanilla can be imitation in a bind, but pure extract is worth the splurge for that extra depth of flavor.
These keep beautifully at room temp in an airtight container for 4-5 days. They actually taste better the next day once flavors meld. Freeze for up to 3 months (thaw at room temp for that gooey texture). Pro tip: slice before freezing for easy single servings.
Why You’ll Love This Recipe
- One Bowl Wonder: I love that I can mix everything—cocoa, sugar, butter—in a single bowl and be done in 10 minutes flat.
- Rich Chocolate Fix: Hershey’s cocoa gives these brownies that deep, fudgy taste without needing expensive chocolate bars.
- Feeds a Small Crowd: An 8×8 pan makes just enough for my family of four, with a couple left for my lunchbox the next day.
- Budget Baking: Between us, a box of cocoa powder costs pennies per batch and lasts for multiple rounds of these.
Step-by-Step Instructions for Cocoa Brownies in 8×8 Pan
Here’s the method that guarantees dense, fudgy brownies with that signature crackly top.
Step 1: Melt Butter and Mix Wet Ingredients
Start by melting the 0.5 cup Unsalted Butter in a microwave-safe bowl or small saucepan. Let it cool slightly but keep it warm. I always melt my butter first so it doesn’t seize up when mixed with the other ingredients.
In a large mixing bowl, combine the melted butter with the 1.5 cups Granulated Sugar. Stir vigorously for about 1-2 minutes until the mixture looks glossy and slightly thickened. Then add the 2 whole Large Eggs one at a time, mixing well after each addition. Stir in the 1 tsp Vanilla Extract.
Real talk: this sugar-butter mixture is the foundation of that crackly top we all love. The more you stir at this stage, the better the texture will be.
Step 2: Incorporate Dry Ingredients
In a separate bowl, whisk together the 0.75 cup Hershey’s Cocoa Powder, 0.75 cup All-Purpose Flour, 0.25 tsp Salt, and 0.25 tsp Baking Powder. I sift my cocoa powder first to eliminate any lumps, which is especially important for that smooth, fudgy texture.
Gradually add the dry ingredients to the wet mixture, stirring just until combined. Don’t overmix—you want to see a few streaks of flour disappear, but no more. Overworking the batter will make your brownies tough instead of tender.
Here’s the thing—baking powder in brownies might seem unusual, but it gives just enough lift to prevent them from being too dense while maintaining that fudgy quality.
Step 3: Fold in Extras and Prepare Pan
Now stir in the 0.5 cup Semi-Sweet Chocolate Chips and 0.5 cup Walnut Pieces (if using). I always reserve a small handful of chocolate chips to sprinkle on top before baking for that bakery-style finish.
Line your 8×8-inch baking pan with parchment paper, leaving an overhang on all sides for easy removal. Lightly grease the paper or spray with nonstick spray. This step is non-negotiable for getting clean edges and preventing sticking.
Step 4: Bake to Fudgy Perfection
Preheat your oven to 350°F. Spread the batter evenly in the prepared pan. Bake for 25-30 minutes, or until a toothpick inserted in the center comes out with a few moist crumbs but no wet batter.
Don’t be tempted to overbake. The edges should look set, but the center will continue to cook as it cools. I start checking at 22 minutes because my oven runs hot, and the difference between perfect and dry brownies is just a few minutes.
The top should be shiny with that characteristic crackly appearance. If it’s not, your sugar-butter mixture might need more stirring next time.
Step 5: Cool and Slice
Let the brownies cool completely in the pan on a wire rack, about 1-2 hours. I know it’s hard to wait, but cutting them while warm will result in a gooey mess instead of clean squares. The cooling time allows the structure to set properly.
Once cooled, use the parchment overhang to lift the brownies out of the pan. Place on a cutting board and slice into 16 squares for perfect serving portions. Store leftovers in an airtight container at room temperature for up to 5 days.
Pro Tips For Making Hershey’S Cocoa Brownie Recipe 8×8
- Test with a Toothpick: Start checking for doneness at 25 minutes—these brownies go from perfect to overdone fast. I learned this the hard way after pulling out dry, crumbly batches.
- Melt Butter Slowly: Use low heat when melting the butter for the cocoa mixture to prevent scorching, which can add a bitter taste. About 2-3 minutes on medium-low does the trick.
- Sift the Cocoa: Sounds tedious, but sifting the Hershey’s cocoa powder breaks up clumps and gives you that smooth, fudgy texture. I skip this when I’m lazy, but the difference is noticeable.
- Cool Completely: Resist the urge to cut into them right away—let the brownies cool in the pan for at least 30 minutes. Cutting too soon makes a messy, crumbly disaster.
Perfect Pairings for This Recipe
Beverage Pairings
Nothing beats a cold glass of milk with warm brownies—the creamy contrast is unbeatable. For a boozy twist, try Baileys Irish Cream over ice. I also love a strong black coffee to cut through the sweetness. 🥛
Ice Cream Toppings
Turn these into à la mode by serving with vanilla bean ice cream. The hot-cold contrast is magical. Drizzle with warm caramel sauce or sprinkle crushed sea salt for a gourmet touch.
Fruit Complements
Fresh raspberries or sliced strawberries add a bright, tart counterpoint to the rich chocolate. A scoop of lemon sorbet works surprisingly well too. I always keep berries on hand for dessert plating.
Whipped Cream
Top with homemade whipped cream flavored with a touch of vanilla and powdered sugar. For extra flair, fold in cocoa powder to make chocolate whipped cream. This adds a light, airy texture.
Coffee Pairings
A cappuccino or espresso makes an elegant pairing. The bitterness of dark roast coffee enhances the chocolate notes. I recommend Starbucks French Roast for a bold flavor match. 🌟
Dessert Wine
For a sophisticated touch, serve with Port wine or Moscato d’Asti. The sweetness of these wines complements the brownies beautifully. A 3 oz pour is the perfect serving size.
Nutrition Facts
Frequently Asked Questions
Can I use Dutch process cocoa instead?
Stick with natural cocoa for this recipe. Dutch process has a different acidity level that can affect texture and rise. Hershey’s natural is the tested choice for best results.
Why did my brownies turn out cakey?
Overmixing the batter or using too much baking powder can cause this. Stir just until combined and measure ingredients precisely for dense, fudgy squares.
How do I get cleaner cuts?
Let them cool completely in the pan for 1-2 hours. Use a plastic knife or wipe a sharp knife with hot water between cuts for smooth edges.
Can I double the recipe for a 9×13 pan?
Yes, but increase baking time to 30-35 minutes. Start checking at 28 minutes to avoid overbaking.

Trained in classic French technique but raised on slow-cooked ribs and spicy rubs, she blends culinary skill with smoke and soul.
- Hamburger Patty Recipe No Egg: Juicy Bind With Breadcrumbs and Milk - October 3, 2026
- Recipe for Oven Baked Halibut: Buttery White Fish with Zesty Lemon Topping - October 3, 2026
- Meatball Curry Recipe Kerala Style: Coconut-Spiced Gravy With Tender Bites - October 3, 2026