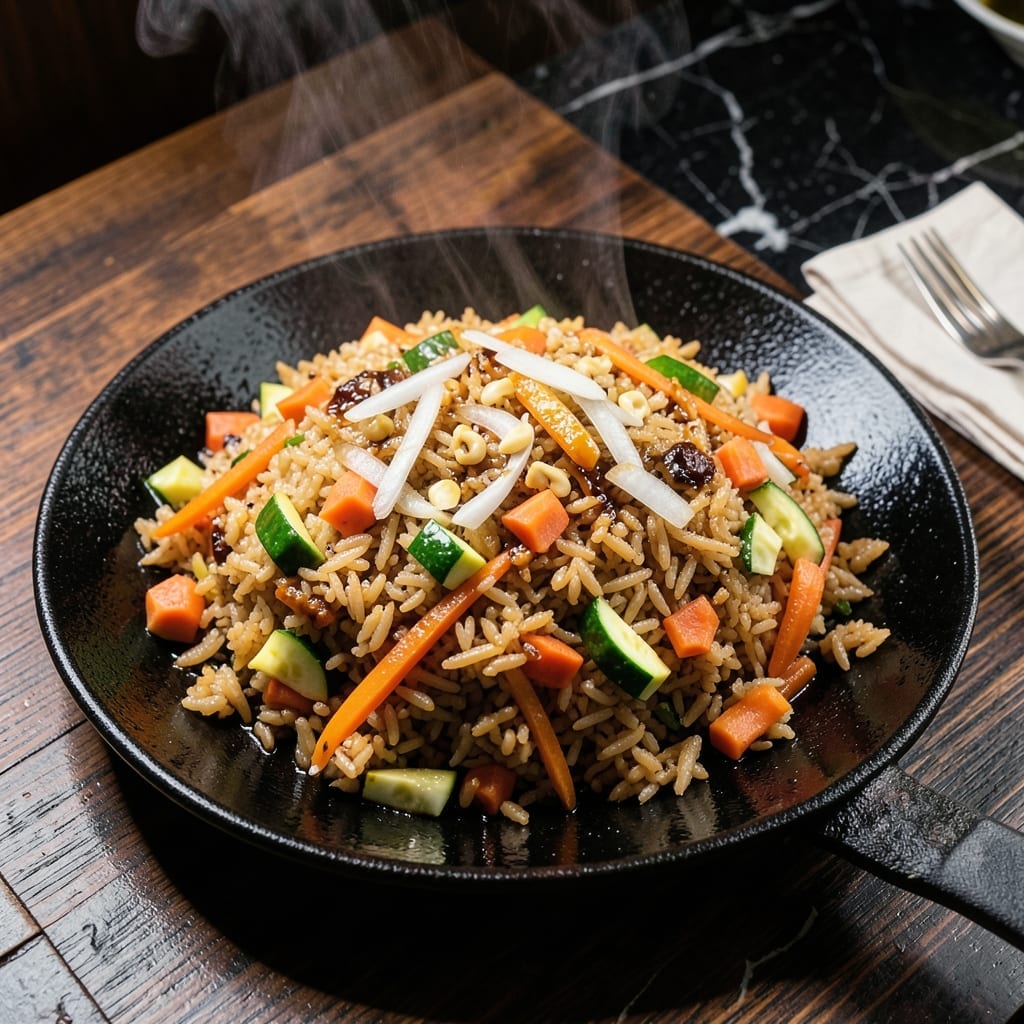
This hibachi-style fried rice brings the restaurant experience home without a wok. I developed this method to capture that signature smoky flavor using standard kitchen tools.
The secret is high heat and a few key techniques that mimic the teppanyaki grill. You’ll achieve perfectly charred bits and that unmistakable savory taste every time.
Ingredients for Hibachi Grill Fried Rice
Standard pantry staples plus a few fresh veggies bring this teppanyaki classic to life.
| Ingredient | Amount | Notes |
|---|---|---|
| Jasmine Rice 🍚 | 2 cups | Day-old, cooked and chilled |
| Vegetable Oil 🫒 | 3 tbsp | High smoke point preferred |
| Carrots 🥕 | 2 whole | Medium, diced small |
| Zucchini 🥒 | 1 whole | Medium, diced small |
| White Onion 🧅 | ½ whole | Finely diced |
| Garlic Cloves 🧄 | 3 cloves | Minced finely |
| Large Eggs 🥚 | 2 whole | Beaten lightly |
| Soy Sauce 💧 | 3 tbsp | Low-sodium preferred |
| Sesame Oil 🫒 | 1 tbsp | Toasted variety for depth |
| Green Onions 🌱 | 3 whole | Thinly sliced for garnish |
| Salt 🧂 | ½ tsp | Kosher or sea salt |
| Black Pepper 🌶️ | ½ tsp | Freshly ground preferred |
| Cooked Chicken Breast 🍗 | 8 oz | Diced small, optional protein |
| Butter 🧈 | 1 tbsp | For finishing (the good stuff, not margarine) |
[recipe_ingredient_scaler]
The rice is key here—day-old jasmine from the fridge (freshly cooked turns mushy). Trader Joe’s or any Asian market will have it. For the veggies, grab whatever looks freshest; carrots and zucchini hold up best to high heat. The soy sauce? I’m partial to Kikkoman low-sodium, but any brand works. Look for toasted sesame oil—it’s darker and more aromatic than the plain stuff.
No jasmine rice? Long-grain white works fine. Want extra protein? Swap chicken for shrimp or tofu (press the tofu first). Out of sesame oil? A dash of fish sauce adds that umami kick (but skip if vegetarian). Frozen peas or corn can join the party too—no need to thaw. The eggs? Skip ’em if you prefer, but they add that classic hibachi texture.
Cooked rice keeps 3-4 days in the fridge. Leftovers reheat best in a skillet with a splash of oil—microwave makes it soggy. This dish actually tastes better the next day once the flavors meld (worth the extra minute).
Why You’ll Love This Recipe
- One Pan Magic: I toss everything into my skillet—jasmine rice, diced carrots, zucchini, and white onion—and it cooks together in a flash.
- Smoky Sweetness: The veggies caramelize in that hot oil, giving it that signature hibachi flavor without a grill.
- Meal Prep Hero: I make a big batch on Sunday and it reheats beautifully for lunches all week.
- Budget Stretcher: Honestly, it turns a handful of affordable veggies and rice into a meal that feels like a restaurant splurge.
Step-by-Step Instructions for Hibachi Fried Rice
Here’s my tested method for achieving that signature hibachi flavor without the specialized grill.
Step 1: Prep and Heat the Ingredients
Begin by heating 2 tablespoons of the 3 tbsp Vegetable Oil in a large skillet or wok over medium-high heat. While it heats, finely dice the 2 whole Carrots, 1 whole Zucchini, and 0.5 whole White Onion. The key to hibachi-style cooking is high heat and quick cooking—so have everything prepped before you start.
Add the diced carrots, zucchini, and white onion to the hot oil. Stir-fry for 4-5 minutes until the vegetables are tender but still have a slight bite. You’ll notice the edges starting to brown slightly—that’s the smoky flavor we’re after. Add the 3 cloves Garlic Cloves and cook for 30 seconds until fragrant.
Step 2: Scramble the Eggs
Push the vegetables to one side of the pan and add the remaining 1 tablespoon Vegetable Oil. Pour in the 2 whole Large Eggs and scramble quickly with a spatula. Break them into small, soft curds—about the size of a pea. This should take 1-2 minutes.
Once the eggs are just set but still slightly runny, mix them into the vegetables. The residual heat will finish cooking them. Season with 0.5 tsp Salt and 0.5 tsp Black Pepper. At this point, your kitchen should smell incredible—garlicky, slightly sweet from the veggies, with that unmistakable wok hei aroma.
Step 3: Add Rice and Protein
Add the 2 cups Jasmine Rice, breaking up any clumps with your spatula. Stir-fry for 2-3 minutes until the rice is heated through and starts to crisp slightly. I like to press down on the rice with the spatula to create those coveted crispy bits.
Incorporate the 8 oz Cooked Chicken Breast and continue to cook for another 2 minutes, ensuring everything is evenly mixed. The chicken just needs to warm through since it’s already cooked. This step is where the dish really comes together—you’ll see the rice start to toast and develop that signature hibachi texture.
Step 4: Finish with Sauces and Garnish
Drizzle the 3 tbsp Soy Sauce and 1 tbsp Sesame Oil over the rice mixture. Stir well to coat every grain evenly. The soy sauce should darken the rice slightly and create a glossy sheen. Cook for an additional 1-2 minutes to let the flavors meld.
Remove from heat and stir in the 1 tbsp Butter until melted. This adds a rich finish that ties all the flavors together. Garnish with the 3 whole Green Onions, thinly sliced. The green onions add a fresh, crisp contrast to the savory rice. Serve immediately while hot—the texture changes quickly as it cools.
Pro Tips For Making Hibachi Grill Fried Rice
- Use Day-Old Rice: Fresh rice turns to mush in the wok—spread leftover jasmine rice on a tray and refrigerate it overnight so the grains dry out and stay separate when stir-fried.
- Crank the Heat: Hibachi-style rice needs a screaming-hot pan; heat the oil until it shimmers before adding veggies, then keep the flame high so everything sears instead of steams.
- Dice Uniformly: Cut carrots, zucchini, and white onion into ¼-inch pieces so they cook at the same rate and you’re not fishing out crunchy chunks later.
- Salt the Veggies: Sprinkle a pinch of salt on the onions and carrots as soon as they hit the pan—I learned this the hard way after too many bland bites; it pulls out moisture and seasons every piece.
Storing and Reheating This hibachi grill fried rice
Fridge Storage
Let your fried rice cool for no more than 2 hours before transferring to airtight containers. I use glass containers with snap-on lids—I find they keep flavors freshest. Store at 40°F or below for up to 4 days. The flavors actually deepen overnight as the soy sauce and sesame oil meld together. ❄️
Freezer Method
For longer storage, freeze portions in quart-size freezer bags for up to 3 months. Squeeze out excess air to prevent freezer burn and lay flat to save space. I always label with the date—it’s easy to forget! Leave 1 inch headspace for expansion.
Skillet Reheating
This is my go-to method for restoring that fresh hibachi texture. Heat 1 tbsp Vegetable Oil in a skillet over medium-high heat, add the rice, and stir-fry for 3-4 minutes. Sprinkle with 1 tsp water and cover for 1 minute to steam. 🔥
Microwave Option
For quick lunches, microwave individual portions covered with a damp paper towel. Heat on 70% power for 2 minutes, stir, then continue in 30-second intervals until reaching 165°F. Add a splash of water if it looks dry.
Pro Tip
If your rice seems dry after reheating, drizzle with ½ tsp Sesame Oil and toss. This brings back that glossy, restaurant-style finish. I always keep a bottle of Kikkoman in my pantry for touch-ups.
Nutrition Facts
Frequently Asked Questions
Can I use fresh rice instead of day-old?
No, fresh rice contains too much moisture and will turn mushy. Always use day-old, chilled rice for proper texture. Spread hot rice on a tray to cool quickly if you’re in a hurry.
What’s the best oil for high heat cooking?
Use oils with a high smoke point like vegetable, peanut, or avocado oil. Avoid olive oil as it can burn at the required medium-high heat.
How can I make this vegetarian?
Skip the chicken and add tofu or extra veggies like bell peppers or snap peas. Press tofu first to remove excess water for better texture.
Why does my rice taste bland?
You might need more soy sauce or sesame oil. Taste as you go and adjust seasoning. The butter at the end adds richness that balances the flavors.

Trained in classic French technique but raised on slow-cooked ribs and spicy rubs, she blends culinary skill with smoke and soul.
- Recipe for Boneless Pork Chops in Cast Iron Skillet: Sear and Baste to Juicy Perfection - October 3, 2026
- Recipe for Boneless Cross Rib Roast: Slow-Roasted Beef with Herb Crust - October 3, 2026
- Hamburgers in Sauce Recipe Crock Pot: Slow-Cooked Savory Delight - October 3, 2026