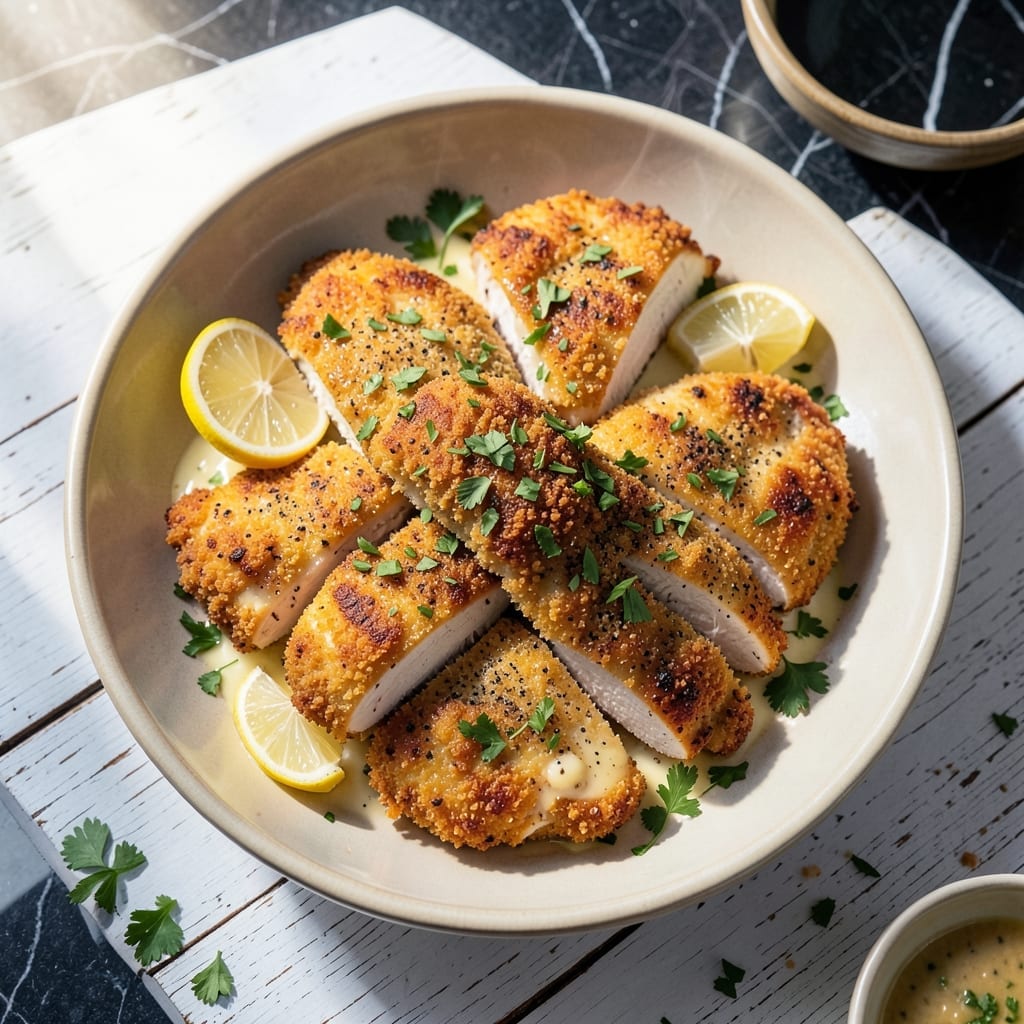
This baked chicken delivers the crispy coating and bold flavor ranch lovers crave, with a simple method that guarantees perfect results every time.
I developed this technique to transform ordinary chicken breasts into a restaurant-worthy dish using a classic seasoning packet as the flavor foundation. The secret lies in the double-coating process that creates a golden, shatteringly crispy exterior.
The ranch seasoning penetrates the meat while forming a flavorful crust that stays intact from oven to plate. Each bite offers tender juicy chicken protected by that signature herby, tangy coating.
Ready in under an hour with minimal prep, this becomes a weeknight favorite that tastes far more elaborate than the effort required.
Ingredients for Hidden Valley Ranch Chicken Breast
Transform ordinary chicken into a crispy, restaurant-worthy dish with these flavor-packed ingredients.
| Ingredient | Amount | Notes |
|---|---|---|
| Boneless Skinless Chicken Breasts 🍗 | 1 ½ lb | Pounded to even thickness |
| Hidden Valley Ranch Seasoning Packet 🌿 | 1 package | Original flavor, 1 oz |
| All-Purpose Flour 🌾 | 1 cup | For initial coating |
| Large Eggs 🥚 | 2 whole | Beaten for egg wash |
| Panko Breadcrumbs 🍞 | 1 ½ cups | For crispy outer coating |
| Buttermilk 🥛 | ½ cup | For marinade and moisture |
| Garlic Powder 🧄 | 1 tsp | Enhances ranch flavor |
| Onion Powder 🧅 | 1 tsp | Balances seasoning blend |
| Paprika 🌶️ | 1 tsp | For color and depth |
| Salt 🧂 | ½ tsp | Kosher or sea salt |
| Black Pepper 🌶️ | ½ tsp | Freshly ground preferred |
| Vegetable Oil 🫒 | 2 tbsp | For greasing baking dish |
| Unsalted Butter 🧈 | 2 tbsp | Melted, for extra richness |
[recipe_ingredient_scaler]
The chicken breasts must be pounded to an even thickness (about 1/2 inch) for consistent cooking and crispy coating. Hidden Valley Ranch seasoning is non-negotiable for authentic flavor—1 oz packets are standard. Panko breadcrumbs, available at any major supermarket, create the signature crunch. Buttermilk adds tenderness; low-fat works but full-fat yields superior results.
No buttermilk? Whole milk plus 1 tsp vinegar or lemon juice per cup works as a substitute. Panko can be replaced with regular breadcrumbs (texture will be less crisp). For gluten-free, use gluten-free panko or crushed cornflakes. The ranch seasoning packet cannot be substituted—its unique blend defines this dish. Diamond Crystal kosher salt is preferred for its clean flavor.
Store raw chicken in the fridge for up to 2 days or freeze for 9 months. Prepared chicken keeps 3-4 days refrigerated. For best crispiness, reheat in a 350°F oven for 10-15 minutes rather than microwaving. The double-coating process ensures the crust stays intact during storage and reheating.
Why You’ll Love This Recipe
- One Bowl Wonder: I mix everything right in a single bowl—flour, ranch packet, eggs, panko—no extra dishes piling up.
- That Ranch Zing: The Hidden Valley packet gives it that herby, tangy kick that’s way more exciting than plain breaded chicken.
- Freezer Friendly: I double the batch and freeze half for those nights I’m too tired to cook.
- Budget Stretcher: A packet of ranch and a few chicken breasts feed my whole family without breaking the bank.
Step-by-Step Instructions for Hidden Valley Ranch Chicken Breast
Achieve perfectly crispy, flavorful chicken with this proven baking method.
Step 1: Prepare and Season the Chicken
Begin by preheating your oven to 400°F. Pound the 1.5 lb boneless skinless chicken breasts to an even ½-inch thickness using a meat mallet. This ensures uniform cooking and prevents dry spots.
In a shallow dish, combine the 1 cup all-purpose flour, 1 package Hidden Valley Ranch seasoning packet, 1 tsp garlic powder, 1 tsp onion powder, 1 tsp paprika, 0.5 tsp salt, and 0.5 tsp black pepper. Dredge each chicken breast in this mixture, pressing firmly to adhere. Shake off any excess flour.
Step 2: Create the Egg Wash and Breadcrumb Coating
In a separate bowl, whisk the 2 whole large eggs with the 0.5 cup buttermilk until smooth. Dip each floured chicken breast into this egg wash, allowing any excess to drip off.
Place the 1.5 cups panko breadcrumbs in a third shallow dish. Press each chicken breast into the panko, turning to coat completely. The breadcrumbs should cling tightly to the egg wash, creating a thick, even layer for maximum crispiness.
Step 3: Bake to Golden Perfection
Lightly grease a baking dish with the 2 tbsp vegetable oil. Arrange the breaded chicken breasts in a single layer, ensuring they don’t touch. Drizzle the 2 tbsp melted unsalted butter evenly over the breadcrumbs for added richness and browning.
Bake in the preheated oven for 20-25 minutes, or until the coating is deep golden brown and the internal temperature reaches 165°F. Avoid flipping the chicken during baking to preserve the crispy crust.
Step 4: Rest and Serve
Remove the chicken from the oven and let it rest for 5 minutes on a wire rack. This allows the juices to redistribute, ensuring moist, tender meat beneath the crispy coating.
Serve immediately while the coating is at its crispiest. Each piece should have a uniform golden-brown crust with a satisfying crunch, while the chicken inside remains juicy and infused with the bold ranch seasoning flavor.
Pro Tips For Making Hidden Valley Ranch Chicken Breast
- Pound the Breasts: Use a meat mallet to even out chicken thickness to ½ inch—this guarantees even cooking and prevents dry, overdone edges while the center catches up.
- Double-Dredge for Crunch: After the egg wash, press the chicken firmly into panko for 5 seconds, then repeat the egg and panko once more; the extra layer makes the crust hold up to baking or frying without falling off.
- Rest Before Serving: Let the chicken rest 5 minutes on a rack after cooking so the juices redistribute and the ranch coating stays crisp instead of turning soggy from trapped steam.
- Toast the Panko: Lightly toast the panko in a dry pan for 2 minutes before breading—it adds a deeper crunch and prevents the seasoning from tasting flat.
Essential Equipment for Perfect Results
Baking Dish Essentials
I always reach for my stoneware baking dish—it distributes heat evenly and helps create that perfect golden crust. A 9×13-inch size gives the chicken breasts enough space to crisp without touching. Avoid glass dishes as they can cause uneven browning.
Meat Mallet
Pounding the chicken to an even ½-inch thickness is crucial for consistent cooking. I use a stainless steel meat mallet with a flat side for pounding and a textured side for tenderizing. A rolling pin works in a pinch, but the mallet gives you better control.
Dredging Station
Set up three shallow dishes for the flour, egg wash, and panko. I prefer stainless steel mixing bowls—they’re durable and easy to clean. The bowls should be wide enough to accommodate the chicken breasts without crowding. 💡
Cooling Rack
After baking, transfer the chicken to a wire cooling rack to maintain crispiness. This prevents the coating from getting soggy on the bottom. I place my rack over a sheet pan to catch any drips.
Instant-Read Thermometer
Don’t guess—use a digital instant-read thermometer to check the internal temperature. I trust my ThermoWorks Thermapen for accuracy. Insert the probe into the thickest part to ensure it reaches 165°F. ✨
Tongs for Serving
Use long-handled tongs to transfer the hot chicken from the baking dish to the cooling rack. This keeps your hands safe from the heat and helps preserve the crispy coating. I prefer tongs with silicone tips to avoid scratching my baking dishes.
Nutrition Facts
Frequently Asked Questions
Can I use regular breadcrumbs instead of panko?
Yes, but panko creates a lighter, crispier coating. Regular breadcrumbs will work in a pinch, though the texture will be denser. For best results, pulse regular breadcrumbs in a food processor to make them finer.
How do I keep the coating from falling off?
Press firmly when dredging in each layer and let the egg wash drip off briefly before adding panko. Chill the breaded chicken for 10 minutes before baking to help the coating set.
Can I make this gluten-free?
Use gluten-free flour and gluten-free panko. Many brands offer these alternatives with the same crispy results. Always check labels for certification.
What’s the best way to reheat leftovers?
Use a 350°F oven for 10-15 minutes to restore crispiness. Microwaving will make the coating soggy. Place on a wire rack to prevent steam buildup underneath.

Trained in classic French technique but raised on slow-cooked ribs and spicy rubs, she blends culinary skill with smoke and soul.
- Recipe for Boneless Pork Chops in Cast Iron Skillet: Sear and Baste to Juicy Perfection - October 3, 2026
- Recipe for Boneless Cross Rib Roast: Slow-Roasted Beef with Herb Crust - October 3, 2026
- Hamburgers in Sauce Recipe Crock Pot: Slow-Cooked Savory Delight - October 3, 2026