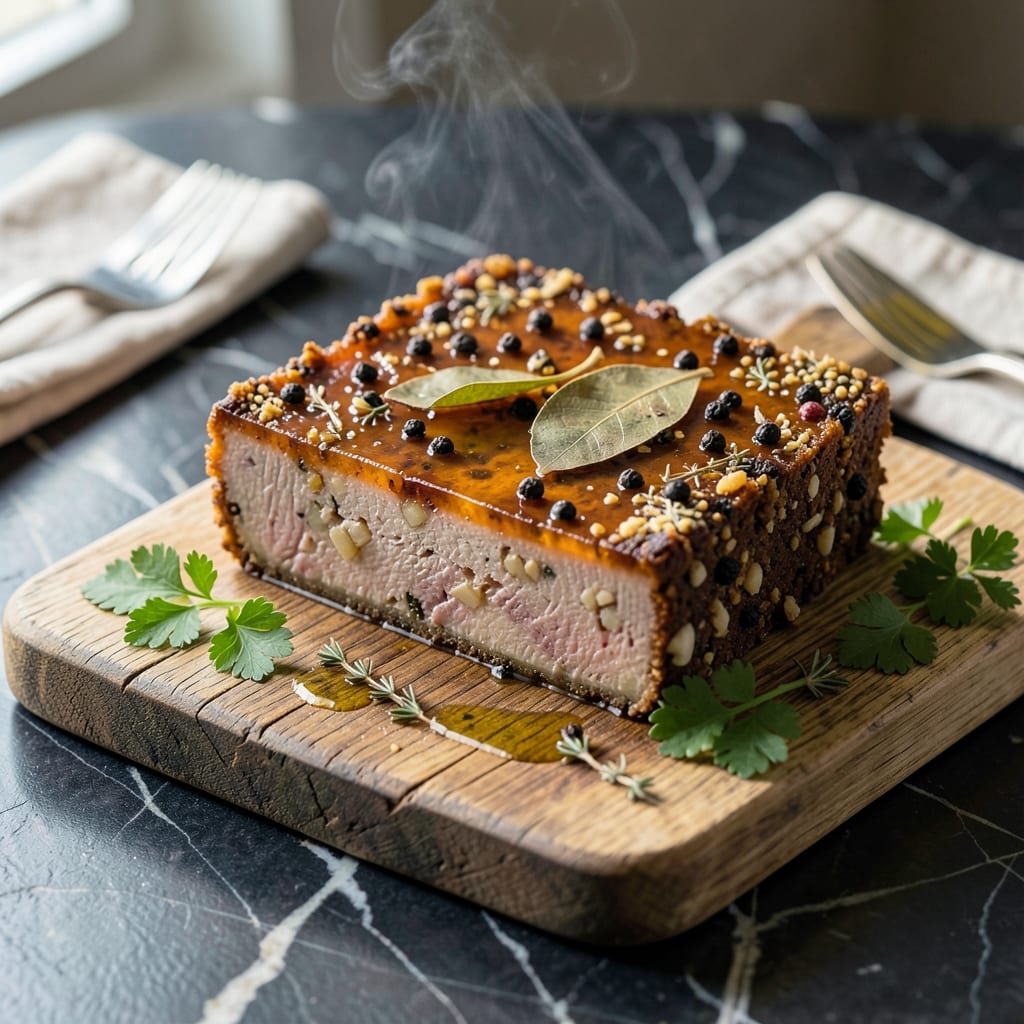
Traditional head cheese flavor doesn’t require the head—just the right technique and pork shoulder. This method preserves the classic texture and taste while using more accessible cuts.
I developed this approach to honor the dish’s roots without the specialty ingredients. The result is a traditional spread with the same rich, savory profile, perfect for sandwiches or charcuterie boards.
Pork shoulder offers the ideal fat-to-meat ratio, ensuring the finished product remains moist and flavorful. Slow cooking and proper seasoning create the authentic taste you expect.
Serve chilled with mustard or pickles for the full experience. Here’s how to make it at home.
Ingredients for Hog Head Cheese Recipe Without the Head
Pork shoulder and traditional spices recreate classic head cheese texture and flavor authentically.
| Ingredient | Amount | Notes |
|---|---|---|
| Pork Shoulder 🐖 | 3 lb | Boneless, skin-on for fat content |
| Kosher Salt 🧂 | 2 tbsp | Diamond Crystal preferred for texture |
| Black Peppercorns 🌶️ | 1 tbsp | Freshly cracked for boldness |
| Garlic Cloves 🧄 | 8 cloves | Peeled, smashed for infusion |
| Yellow Onion 🧅 | 1 whole | Diced, for aromatic base |
| Bay Leaves 🍃 | 4 whole | Dried, for depth of flavor |
| Juniper Berries 🫒 | 1 tsp | Lightly crushed for earthiness |
| Dried Thyme 🌿 | 1 tsp | Rubbed between fingers for release |
| Apple Cider Vinegar 🍏 | ½ cup | For balance and tang |
| Water 💧 | 4 cups | For slow cooking liquid |
| Pickling Spice 🌿 | 1 tbsp | Store-bought blend acceptable |
| Unflavored Gelatin 🧊 | 3 tbsp | For binding, Bloom strength 250 |
| Ice Cubes ❄️ | 2 cups | For cooling and setting |
[recipe_ingredient_scaler]
Pork shoulder is non-negotiable here—its fat content mirrors traditional head meat. Costco or Whole Foods carry high-quality cuts with good marbling. For spices, Penzeys offers superior juniper berries and pickling spice blends. The gelatin must be unflavored with a bloom strength of 250 or higher for proper setting (check the label).
No pork shoulder? Pork butt works identically—same cut, different name. Short on juniper berries? Add 1/2 tsp allspice for similar warmth. Apple cider vinegar can be swapped for white vinegar, but the fruitiness adds depth. For gelatin-free versions, agar-agar requires different ratios and techniques—best to stick with gelatin for authenticity.
The finished product keeps 1 week refrigerated in an airtight container, or 3 months frozen. Slice only after fully chilled—this prevents crumbling. The flavor deepens after 24 hours, so plan accordingly for optimal taste.
Why You’ll Love This Recipe
- I’ll be real: this makes enough to pack for lunches or serve at a potluck without breaking a sweat.
- No-Fuss Prep: I just toss pork shoulder with salt, peppercorns, garlic, and onion—no complicated steps or hard-to-find ingredients.
- Rich, Meaty Flavor: The slow-cooked pork shoulder soaks up the garlic and onion, making every bite ridiculously savory.
- Feeds a Crowd: I’ll be real: this makes enough to pack for lunches or serve at a potluck without breaking a sweat.
Step-by-Step Instructions for Hog Head Cheese Using Pork Shoulder
Master this traditional technique with pork shoulder for authentic texture and depth of flavor.
Step 1: Cure and Season the Pork Shoulder
Rub the 3 lb Pork Shoulder thoroughly with 2 tbsp Kosher Salt, 1 tbsp Black Peppercorns, 1 tsp Juniper Berries, and 1 tsp Dried Thyme. Ensure every surface is evenly coated, as this cure develops the foundational flavor profile characteristic of traditional head cheese.
Place the pork in a large bowl with 8 cloves Garlic Cloves, 1 whole Yellow Onion, 4 whole Bay Leaves, 1 tbsp Pickling Spice, 0.5 cup Apple Cider Vinegar, and 4 cups Water. Refrigerate for 12-24 hours to allow the spices to penetrate deeply.
Step 2: Slow-Cook the Pork Until Tender
Transfer the pork and all curing liquid to a large pot. Bring to a boil, then reduce heat to maintain a gentle simmer. Cook for 2.5-3 hours until the meat is fork-tender and easily separates from the bone.
Skimming any foam that rises to the surface during the first 30 minutes ensures a clean, clear broth. The pork is done when it shreds effortlessly with a fork and the liquid has reduced slightly, concentrating the flavors.
Step 3: Shred and Strain the Broth
Remove the pork from the pot and shred it into small, uniform pieces using two forks. Discard any large fat chunks, but retain some for authentic texture. Strain the cooking liquid through a fine-mesh sieve into a clean bowl, pressing lightly on the solids to extract maximum flavor.
You should have about 3 cups of rich, aromatic broth. If the liquid has reduced too much, supplement with additional water to reach this volume. The broth will serve as the base for your gelatin mixture.
Step 4: Bloom and Incorporate the Gelatin
Sprinkle 3 tbsp Unflavored Gelatin evenly over ½ cup of the warm, strained broth in a small bowl. Let it sit for 5 minutes to bloom, then stir until fully dissolved. This step is critical for achieving the proper set and sliceable texture.
Combine the gelatin mixture with the remaining broth and pour it over the shredded pork. Stir gently to ensure even distribution. The liquid should just cover the pork—add a splash more broth if needed.
Step 5: Chill and Set the Head Cheese
Pour the pork and liquid mixture into a loaf pan or other mold. Add 2 cups Ice Cubes to the top to accelerate the cooling process and help create a uniform texture. Cover and refrigerate for at least 8 hours, or overnight for best results.
The head cheese is fully set when it holds its shape and offers slight resistance when pressed. Slice thinly with a sharp knife, and serve chilled or at room temperature for the best texture and flavor release.
Pro Tips For Making Hog Head Cheese Recipe Without The Head
- Cook Low and Slow: I learned this the hard way—pork shoulder needs 3-4 hours at 275°F to break down properly. Rush it, and your head cheese will be tough instead of tender.
- Crush the Peppercorns: Sounds weird, but it works: lightly crushing the black peppercorns before adding them releases way more flavor into the brine.
- Don’t Skimp on Salt: Use 1/4 cup kosher salt per pound of pork—this isn’t the time to be shy. The brine needs to be aggressive to properly preserve and season the meat.
- Chill Before Slicing: After pressing, refrigerate the loaf overnight before slicing. I skip this when I’m lazy, but the texture is noticeably better when I don’t.
Pro Cooking Tips for hog head cheese recipe without the head
Spice Blooming Technique
Toasting whole juniper berries and black peppercorns in a dry pan for 30 seconds before grinding releases their essential oils. I use a mortar and pestle for this—it’s how my Nonna did it in Sicily. This small step makes a noticeable difference in depth of flavor. 🌡️
Gelatin Temperature Control
The broth must be warm (not boiling) when blooming the 3 tbsp gelatin. If it’s too hot, it’ll kill the gelatin’s setting power. I test with my finger—it should feel like warm bathwater. Stirring vigorously prevents clumping.
Fat Management
Don’t discard all the fat from the pork shoulder—retain about 20% for authentic texture. Too little fat makes it dry; too much causes slicing issues. I skim the surface with a fine-mesh ladle during cooking for balance.
Chilling Pro Tips
Adding 2 cups ice cubes to the top creates a temperature gradient that sets the head cheese evenly. I use a 9×5-inch loaf pan lined with parchment for easy removal. The ice also prevents a skin from forming on top.
Slicing Like a Pro
Use a sharp, thin-bladed knife (I prefer Wüsthof) dipped in hot water between slices. Wipe the blade clean after each cut for smooth edges. Slice against the grain for the most tender texture. 💡
Flavor Boost
After chilling, I often brush the surface with a little apple cider vinegar for extra tang. This is a trick I picked up from a butcher in our East Coast Italian community. It brightens all the rich flavors beautifully.
Nutrition Facts
Frequently Asked Questions
Can I use a different pork cut?
Pork butt works identically to shoulder. Avoid lean cuts like tenderloin, as the fat content is crucial for authentic texture.
Why add ice cubes during chilling?
Ice creates a temperature gradient for even setting and prevents a skin from forming on top. This ensures a smooth, uniform texture throughout.
How long can I store the finished product?
It keeps 1 week refrigerated in an airtight container or 3 months frozen. Flavor deepens after 24 hours.

Trained in classic French technique but raised on slow-cooked ribs and spicy rubs, she blends culinary skill with smoke and soul.
- Recipe for Boneless Pork Chops in Cast Iron Skillet: Sear and Baste to Juicy Perfection - October 3, 2026
- Recipe for Boneless Cross Rib Roast: Slow-Roasted Beef with Herb Crust - October 3, 2026
- Hamburgers in Sauce Recipe Crock Pot: Slow-Cooked Savory Delight - October 3, 2026