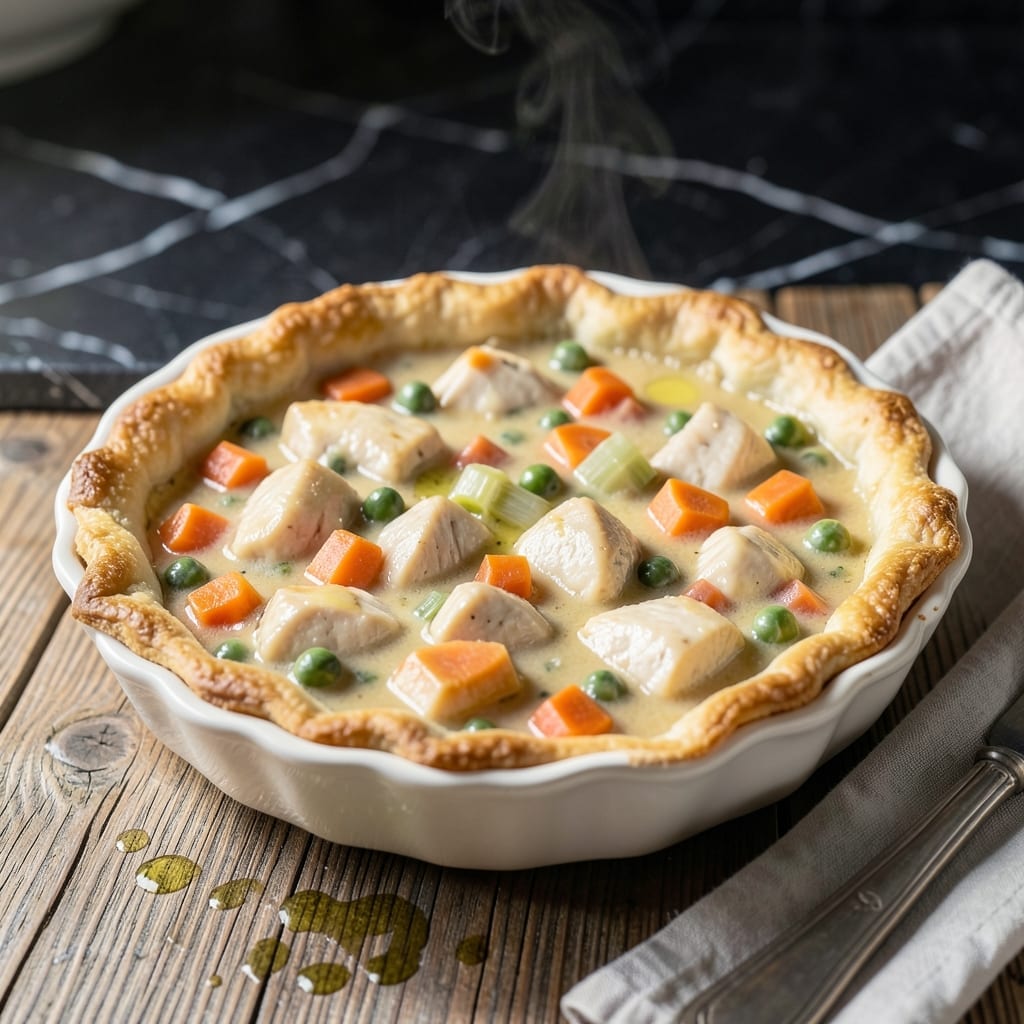
This chicken pot pie brings homemade comfort to your table with minimal effort. The Bisquick topping bakes to flaky perfection while sealing in the creamy, savory filling.
I developed this method for busy weeknights when I craved that classic pot pie experience without the fuss of traditional pastry. The filling comes together in 30 minutes, using simple ingredients you likely already have on hand.
The result is a golden, buttery crust over a rich, velvety filling packed with tender chicken and vegetables. It’s the kind of dish that feels special but comes together quickly.
Perfect for family dinners or cozy weekends. This recipe delivers on its promise of quick, satisfying comfort.
Ingredients for Homemade Chicken Pot Pie Recipe with Bisquick
Pantry staples plus a rotisserie chicken shortcut make this comfort classic effortless.
| Ingredient | Amount | Notes |
|---|---|---|
| Boneless Skinless Chicken Breasts 🍗 | 1 ½ lb | Diced into bite-sized pieces |
| Carrots 🥕 | 2 whole | Peeled and diced |
| Celery Stalks 🌿 | 2 whole | Diced, leaves included |
| Yellow Onion 🧅 | 1 whole | Finely diced |
| Frozen Green Peas 🌱 | 1 cup | No need to thaw |
| Unsalted Butter 🧈 | ½ cup | Divided for roux and filling |
| All-Purpose Flour 🌾 | ⅓ cup | For thickening filling |
| Chicken Broth 💧 | 1 ½ cups | Low-sodium preferred |
| Whole Milk 🥛 | ¾ cup | Full-fat for creaminess |
| Garlic Cloves 🧄 | 2 cloves | Minced for depth |
| Dried Thyme 🍃 | 1 tsp | Or 1 tbsp fresh |
| Salt 🧂 | 1 tsp | Kosher or sea salt |
| Black Pepper 🌶️ | ½ tsp | Freshly ground preferred |
| Bisquick Baking Mix 🍞 | 2 cups | Original variety works best |
| Whole Milk 🥛 | ⅔ cup | For Bisquick topping |
[recipe_ingredient_scaler]
The chicken is the foundation. I prefer rotisserie chicken for speed (just shred and go), but raw boneless, skinless breasts work too—dice them small so they cook fast. For vegetables, Costco’s pre-diced mirepoix saves chopping time if you’re really pressed. The Bisquick topping is the magic here—original mix only, the heart-smart version doesn’t fluff as nicely.
Swap the peas for corn or green beans (frozen is fine). No fresh thyme? Dried at one-third the amount does the trick. Want extra richness? Stir a spoonful of cream cheese into the filling. The milk can be whatever’s in your fridge, but whole milk gives the creamiest texture. Skip the pre-shredded carrots—they turn mushy (whole carrots hold up better).
Assemble and bake right away, or chill the filling for 24 hours before topping. Leftovers keep 3-4 days in the fridge—reheat covered to keep the crust tender. The topping’s best fresh, so add it just before baking if prepping ahead.
Why You’ll Love This Recipe
- I’ll be real: this makes two pies, so I bake one now and freeze the other for a future me who’s too tired to cook.
- One Bowl Wonder: Between us, the Bisquick topping means I just dump, stir, and spread—no pie crust stress, and it bakes up golden every time.
- Filling So Good: Honestly, the chicken and veggies simmer in a creamy broth that’s rich without being heavy, and those peas add the perfect pop of sweetness.
- Feeds the Freezer: I’ll be real: this makes two pies, so I bake one now and freeze the other for a future me who’s too tired to cook.
Step-by-Step Instructions for Homemade Chicken Pot Pie With Bisquick
This method delivers a creamy filling under a golden, flaky topping with minimal effort.
Step 1: Prepare and Cook the Chicken and Vegetables
Start by dicing the boneless skinless chicken breasts into bite-sized pieces. Season them with the salt and black pepper. In a large skillet over medium heat, melt half of the unsalted butter and cook the chicken for about 6-8 minutes until no longer pink inside.
Remove the chicken and set aside. In the same skillet, add the remaining butter, then sauté the diced carrots, celery stalks, finely diced yellow onion, and minced garlic cloves for 5-7 minutes until the vegetables soften. Stir in the dried thyme and cook for another 30 seconds until fragrant.
Add the frozen green peas to the skillet and cook for 2 minutes to warm through. Return the chicken to the skillet and stir to combine all the ingredients evenly.
Step 2: Create the Creamy Filling
Sprinkle the all-purpose flour over the chicken and vegetable mixture. Stir well to coat everything evenly and cook for 1-2 minutes to remove the raw flour taste. Slowly pour in the chicken broth, stirring constantly to avoid lumps.
Add the whole milk and continue stirring. Bring the mixture to a gentle simmer and cook for 3-5 minutes until the filling thickens and coats the back of a spoon. Taste and adjust seasoning if needed, though the initial salt and pepper should suffice.
Step 3: Prepare the Bisquick Topping
In a separate bowl, combine the Bisquick baking mix with the whole milk. Stir just until the dry ingredients are moistened and a soft dough forms. Avoid overmixing, as this can make the topping tough rather than flaky.
The dough will be slightly sticky but should hold together when pressed. If it feels too dry, add a splash more whole milk, but remember that the Bisquick mix is designed to be forgiving.
Step 4: Assemble and Bake the Pot Pie
Transfer the chicken and vegetable filling to a greased 9×13-inch baking dish or similar oven-safe dish. Spread it out evenly. Drop spoonfuls of the Bisquick dough on top of the filling, spacing them slightly apart to allow for expansion.
Bake in a preheated 400°F oven for 20-25 minutes or until the topping is golden brown and the filling is bubbly. Check at the 20-minute mark to prevent over-browning.
Let the pot pie rest for 5-10 minutes after baking to allow the filling to set slightly before serving. This ensures clean slices and a perfect texture.
Pro Tips For Making Homemade Chicken Pot Pie Recipe With Bisquick
- Pre-Cook the Chicken: Poach or sauté the boneless chicken breasts first—raw pieces in the filling turn rubbery or dry out in the oven. I learned this the hard way after biting into undercooked chunks more than once.
- Sauté the Veggies: Cook the onions, carrots, and celery in butter until soft before mixing with the filling. Sounds obvious, but skipping this step leaves you with crunchy, undercooked bits that ruin the texture.
- Thicken the Filling: Simmer your filling until it’s thicker than soup—it should coat the back of a spoon. A watery filling will soak the Bisquick topping and turn it into a sad, soggy mess.
- Vent the Top: Poke a few small slits in the Bisquick crust before baking. After my first pie exploded in the oven, I finally figured out that steam needs an escape route.
Creative Variations of These Flavors
Cheesy Cheddar Topping
Add 1 cup shredded sharp cheddar to the Bisquick mixture for extra richness. The cheese melts beautifully into the topping, creating a golden, savory crust that pairs perfectly with the creamy filling. I love this twist for a cozier, more indulgent version. 💛
Herb-Infused Variation
Mix 1 tbsp chopped fresh rosemary and 1 tsp dried parsley into the Bisquick dough. The herbs add a fragrant, earthy note that complements the chicken and vegetables beautifully. It’s a simple way to elevate the dish with garden-fresh flavors.
Spicy Kick
Stir ½ tsp cayenne pepper or 1 tsp smoked paprika into the filling for a subtle heat. For more boldness, add 1 diced jalapeño with the vegetables. This variation adds warmth without overpowering the classic comfort of the dish.
Vegetable Swap
Replace the peas with 1 cup diced potatoes or 1 cup corn kernels for heartier texture. For a Pacific Northwest twist, I sometimes add ½ cup chopped mushrooms from our local farmers market. Each brings a unique flavor while keeping the dish comforting.
Creamy Bacon Addition
Cook 4 slices crumbled bacon and add it to the filling with the chicken. The smoky, salty flavor deepens the dish’s richness. It’s a crowd-pleaser at our Portland dinner table, especially on chilly evenings. 🔥
Gluten-Free Option
Use Bisquick Gluten-Free mix in place of the original. The texture stays fluffy, and the flavor remains just as delicious. I’ve served this to gluten-sensitive friends, and they never guess it’s a modified version.
Nutrition Facts
Frequently Asked Questions
Can I use rotisserie chicken instead of raw?
Shred 3 cups of rotisserie chicken and skip the cooking step. Just add it when combining filling ingredients to save 10 minutes.
How do I prevent a soggy topping?
Ensure filling is bubbling hot before adding topping. Also, space Bisquick spoonfuls apart so steam can escape during baking.
Can I make this ahead of time?
Prepare filling 1 day ahead and refrigerate. Add topping and bake just before serving for freshest texture.
What if my topping browns too fast?
Tent with foil if browning before 20 minutes. Check at 15 minutes for even baking.

Trained in classic French technique but raised on slow-cooked ribs and spicy rubs, she blends culinary skill with smoke and soul.
- Recipe for Pan Fried: Golden Crust with Savory Depth - October 3, 2026
- Recipe For Fried Chicken In A Pressure Cooker: Crispy Golden Bites in Half the Time - October 3, 2026
- Recipe For Leftover Fried Fish: Crunchy Leftovers Transformed - October 3, 2026