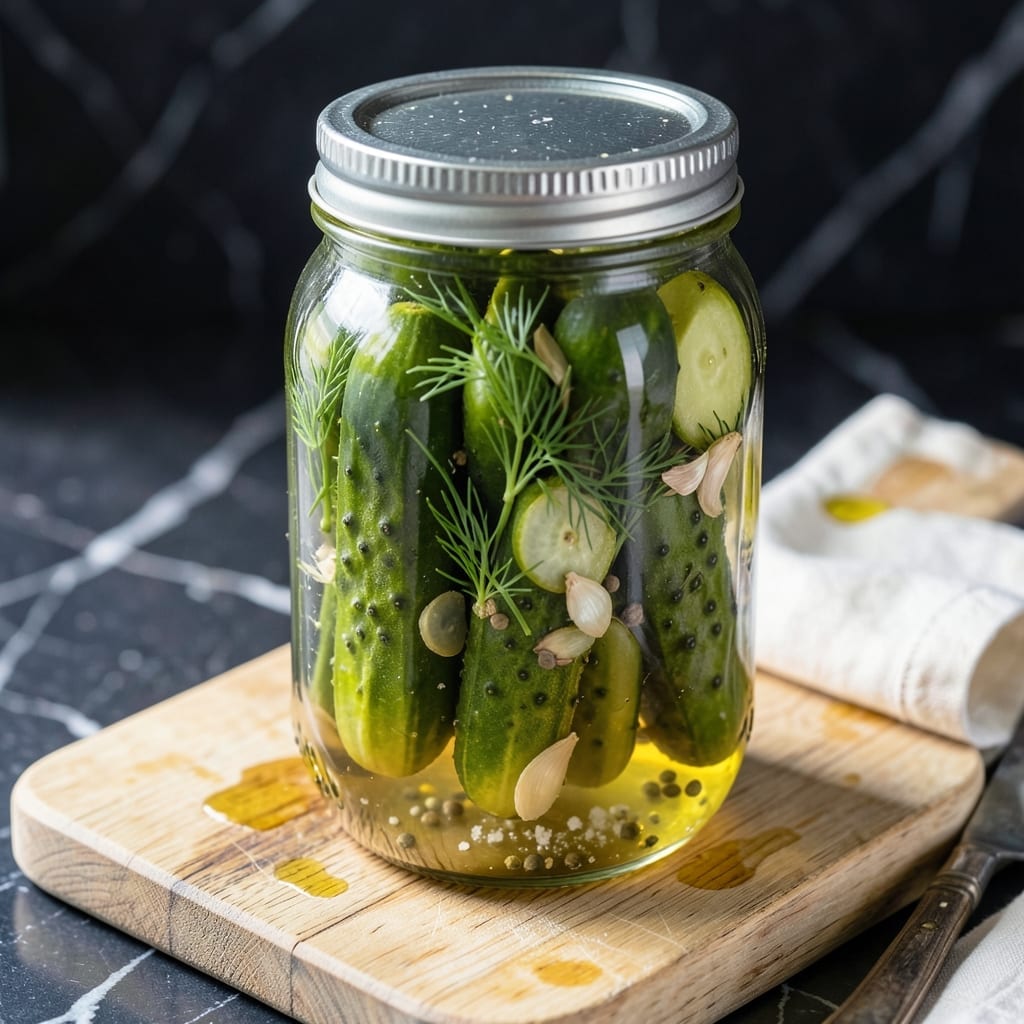
These refrigerator pickles deliver crisp, tangy flavor without canning. The cold brine method preserves texture while infusing cucumbers with garlic and dill.
Ready in 5 days, this technique requires no special equipment. The result is homemade pickles that stay fresh for weeks in your fridge.
Ingredients for Homemade Dill Pickles Recipe Refrigerator
Crisp cucumbers meet bold brine for tangy refrigerator pickles in days.
| Ingredient | Amount | Notes |
|---|---|---|
| Kirby Cucumbers 🥒 | 2 lb | Firm, small pickling variety |
| White Vinegar 💧 | 2 cups | 5% acidity for preservation |
| Water 💧 | 2 cups | Filtered for best flavor |
| Pickling Salt 🧂 | 2 tbsp | Non-iodized, fine grain |
| Granulated Sugar 🍚 | 1 tbsp | Optional for slight sweetness |
| Fresh Dill 🌿 | ½ cup | Stems and flowers included |
| Garlic Cloves 🧄 | 6 cloves | Peeled, lightly smashed |
| Mustard Seeds 🌿 | 1 tbsp | Yellow or brown variety |
| Black Peppercorns 🌶️ | 1 tbsp | Whole, not ground |
| Dill Seeds 🌿 | 1 tsp | Optional for extra dill flavor |
| Red Pepper Flakes 🌶️ | ½ tsp | Adjust for heat preference |
| Bay Leaves 🍃 | 2 whole | Dried, for aroma |
[recipe_ingredient_scaler]
The cucumbers are critical—Kirby or Persian varieties stay crisp best. Avoid waxed cucumbers (they won’t absorb brine). Farmers markets often have the freshest pickling cucumbers in summer. If using store-bought, Whole Foods or Trader Joe’s typically stock good options. Look for firm, deep green cucumbers about 3-4 inches long (the good stuff, not the pre-sliced kind).
Out of pickling salt? Kosher salt at half the amount works, but avoid iodized table salt—it can make brine cloudy. No fresh dill? Dried dill weed at one-quarter the amount (or whatever herbs you’ve got). Want more tang? Add an extra tablespoon of vinegar. The mustard seeds can be swapped for celery seeds if preferred (frozen works in a pinch for storage).
These pickles improve with time. Eat within 1 month for peak crunch, though they’ll keep 2-3 months refrigerated. The brine can be reused once—just add fresh cucumbers and let sit 5 days. Always use clean utensils to avoid contamination.
Why You’ll Love This Recipe
- No Cook Needed: No canning, no stove—just mix the brine, slice the Kirby cucumbers, and let the fridge do the work.
- Tangy Crunch: The vinegar and dill combo hits that perfect balance of sharp and fresh, with cucumbers that stay crisp for weeks.
- Snack or Side: I toss them in lunches, alongside sandwiches, or straight from the jar when the craving hits.
- Pennywise Pickles: A batch costs less than store-bought and makes enough to last until the next cucumber harvest.
Step-by-Step Instructions for Refrigerator Dill Pickles
Master the technique for crisp, tangy pickles that stay fresh in your fridge for weeks.
Step 1: Prepare the Cucumbers and Jars
Wash the 2 lb Kirby Cucumbers thoroughly and trim off the blossom end (about 1/16 inch). This step is crucial as the blossom end contains enzymes that can soften pickles. Leave the cucumbers whole or spear them lengthwise for easier packing.
Sterilize your jars and lids by submerging them in boiling water for 10 minutes. I use wide-mouth quart jars for this recipe, but pint jars work equally well. Ensure all components are completely dry before use to prevent contamination.
Step 2: Create the Brine Solution
In a medium saucepan, combine the 2 cups White Vinegar, 2 cups Water, 2 tbsp Pickling Salt, and 1 tbsp Granulated Sugar. Bring to a boil over medium-high heat, stirring until the salt and sugar fully dissolve.
This brine achieves the perfect balance of tang and mild sweetness. The 5% acidity of the white vinegar ensures proper preservation while maintaining that classic dill pickle flavor. Remove from heat once boiling and let cool slightly.
Step 3: Layer Aromatics and Cucumbers
Divide the 0.5 cup Fresh Dill, 6 cloves Garlic Cloves, 1 tbsp Mustard Seeds, 1 tbsp Black Peppercorns, 1 tsp Dill Seeds, 0.5 tsp Red Pepper Flakes, and 2 whole Bay Leaves evenly between your prepared jars. The garlic cloves should be lightly smashed to release their flavor.
Pack the cucumbers tightly into the jars, alternating directions for the best fit. Leave about ½ inch of headspace at the top. The tight packing prevents the cucumbers from floating, which could lead to uneven pickling.
Step 4: Add Brine and Seal
Carefully pour the warm brine over the cucumbers and aromatics, ensuring all ingredients are completely submerged. Tap the jars gently on the counter to remove any air bubbles. If needed, add a small weight (like a fermentation weight or a zip-top bag filled with water) to keep everything below the brine surface.
Wipe the rims clean with a damp cloth, then seal with lids. Let the jars cool to room temperature before refrigerating. The cucumbers will begin transforming immediately, but for the best flavor and texture, wait at least 5 days before tasting.
Real talk: The pickles will continue to develop flavor over time, becoming more tangy and complex. They’ll keep in the refrigerator for up to 2 months, though they’re usually devoured long before then.
Pro Tips For Making Homemade Dill Pickles Recipe Refrigerator
- Slice Evenly: Cut the Kirby cucumbers into consistent 1/4-inch rounds or spears so they pickle uniformly—I learned this the hard way after pulling out half-soggy, half-crunchy batches.
- Boil the Brine: Heat the vinegar, water, salt, and sugar just until the sugar dissolves, then cool completely before pouring over cucumbers. Hot brine turns them mushy in hours.
- Use Pickling Salt: Skip iodized table salt; the additives can make the brine cloudy and bitter. Pickling salt keeps your refrigerator dill pickles clear and crisp.
- Pack Tightly: Cramming the cucumbers snugly into the jar ensures they stay submerged in the brine, which actually changes the outcome—no white, unpickled spots.
Make-Ahead Tips for This homemade dill pickles recipe refrigerator
🔪 Week Before
Start by gathering your ingredients and supplies. Check your pantry for white vinegar, salt, and dill seeds, and pick up fresh cucumbers, garlic, and dill weed. Pro tip 💡: Choose firm, small cucumbers (like Kirby or Persian) for the best crunch. Sterilize your jars and lids by boiling them for 10 minutes to ensure they’re ready for pickling.
⏰ Day Before
Prep your cucumbers by washing and drying them thoroughly. Trim off the blossom end (about 1/8 inch) to prevent soft pickles. Slice them into spears or leave them whole, depending on your preference. Peel and smash 4-5 garlic cloves per jar, and measure out your brine ingredients (vinegar, water, salt, and sugar). Store everything in the fridge to keep it fresh.
🥘 Day Of
Assemble your jars by layering cucumbers, garlic, and dill weed. In a saucepan, heat your brine mixture until the salt and sugar dissolve—do not boil. Pour the hot brine over the cucumbers, ensuring they’re fully submerged. Seal the jars tightly and let them cool to room temperature before refrigerating.
✨ Last-Minute Tasks
Once cooled, give the jars a gentle shake to distribute the flavors. Label them with the date and place them in the fridge. For the best flavor, wait at least 5 days before tasting. Pro tip 🎯: Flip the jars every couple of days to keep the cucumbers crisp and evenly flavored.
Nutrition Facts

Trained in classic French technique but raised on slow-cooked ribs and spicy rubs, she blends culinary skill with smoke and soul.
- Recipe for Boneless Pork Chops in Cast Iron Skillet: Sear and Baste to Juicy Perfection - October 3, 2026
- Recipe for Boneless Cross Rib Roast: Slow-Roasted Beef with Herb Crust - October 3, 2026
- Hamburgers in Sauce Recipe Crock Pot: Slow-Cooked Savory Delight - October 3, 2026