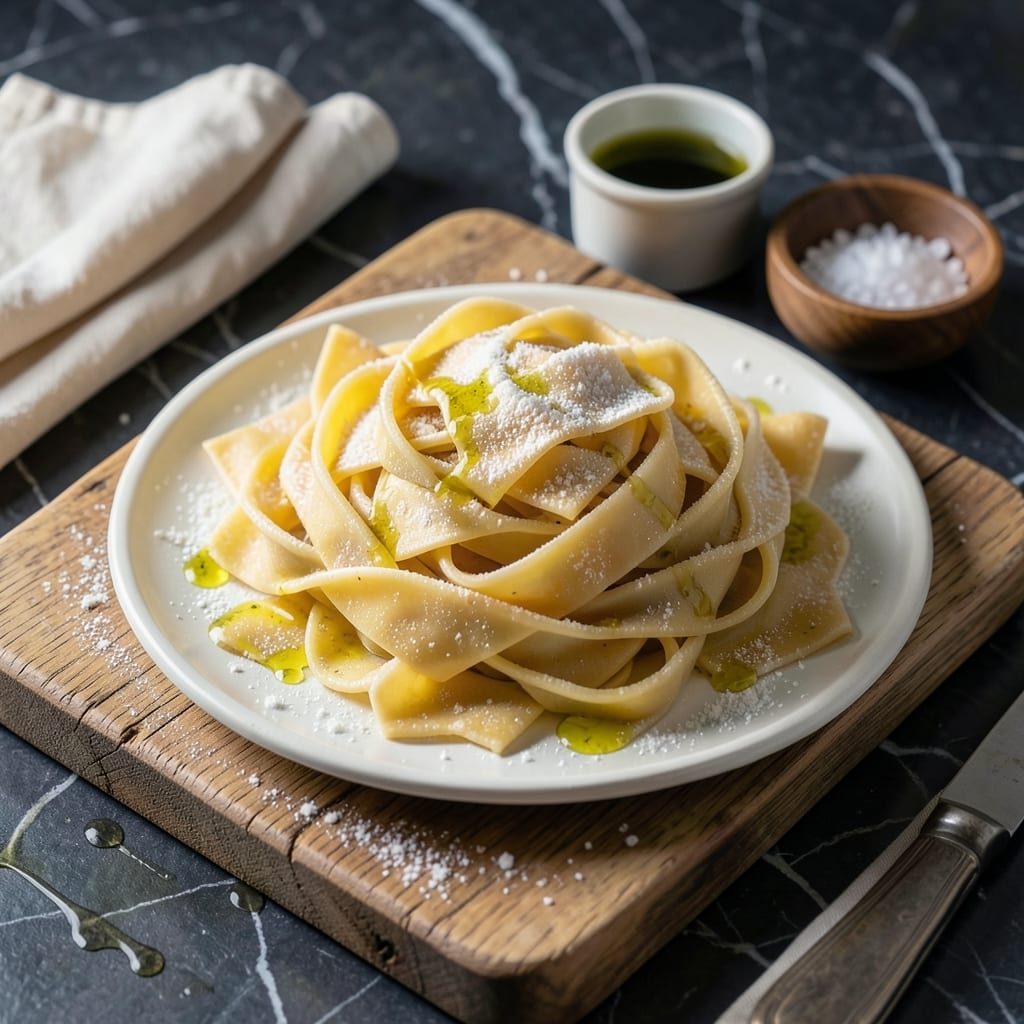
Fresh pasta without a machine is simpler than you think. I learned this technique from an Italian grandmother in Portland who swore by the rolling pin method.
This approach uses just flour and eggs to create silky ribbons that rival any restaurant version. The dough comes together quickly with minimal kneading and rests while you prep.
Rolling by hand gives you complete control over thickness, resulting in pasta with the perfect bite. The texture is tender yet substantial, with a delicate flavor that lets sauces shine.
Once mastered, you’ll never go back to store-bought. The process is satisfying, and the results are consistently impressive.
Ingredients for Homemade Pasta Recipe No Machine
Just flour, eggs, and a rolling pin create these silky pasta ribbons.
| Ingredient | Amount | Notes |
|---|---|---|
| All-Purpose Flour 🌾 | 2 cups | Plus extra for dusting surface |
| Large Eggs 🥚 | 4 whole | Room temperature preferred |
| Sea Salt 🧂 | ½ tsp | Fine grain preferred |
| Olive Oil 🫒 | 1 tsp | Optional for dough elasticity |
| Semolina Flour 🌾 | ½ cup | For dusting and texture |
[recipe_ingredient_scaler]
The flour matters here. King Arthur all-purpose is my go-to (consistent protein content), but any good brand works. Room temperature eggs incorporate better—just pull them out 30 minutes before starting. That Italian grandmother swore by 00 flour (the super-fine stuff), which you can find at World Market or online, but all-purpose gives great results too. Skip the salt if you’re serving with a salty sauce.
No all-purpose flour? Bread flour works but makes the dough slightly stiffer—add a splash of water if needed. Short on eggs? 3 whole eggs plus 1 yolk maintains richness. The olive oil is optional but adds elasticity (worth it if your dough feels dry). Semolina for dusting is traditional, but all-purpose flour works in a pinch.
Fresh pasta cooks in 2-3 minutes. Dust cut ribbons with flour, nest them on a tray, and refrigerate up to 24 hours. Or freeze flat on a sheet, then transfer to bags for 1 month. Don’t stack fresh pasta—it sticks. (The semolina trick prevents this too.)
Why You’ll Love This Recipe
- No Machine Needed: I just use my hands and a rolling pin—no fancy equipment, and it still turns out silky smooth.
- Rich Egg Flavor: The large eggs and olive oil give it that deep, buttery taste store-bought can’t touch.
- Freezer Friendly: I make a double batch, freeze half, and dinner’s halfway done for next week.
- Budget Stretcher: All-purpose flour and eggs cost pennies, and it feeds my family better than takeout.
Step-by-Step Instructions for Homemade Pasta No Machine
Here’s how I make silky, tender pasta ribbons entirely by hand with just a rolling pin.
Step 1: Create the Dough on a Clean Surface
On a clean work surface, mound the 2 cups All-Purpose Flour and make a well in the center. Add the 4 whole Large Eggs, 0.5 tsp Sea Salt, and 1 tsp Olive Oil into this well. Using a fork, gradually incorporate the flour into the wet ingredients, starting from the inner rim of the well.
Once the mixture becomes too stiff for the fork, use your hands to bring it together into a shaggy mass. The dough will feel rough at first, but resist the urge to add more flour—this initial stickiness is what gives the finished pasta its silky texture.
Step 2: Knead Until Smooth and Elastic
Dust your surface lightly with some of the 0.5 cup Semolina Flour and begin kneading the dough with the heels of your hands. Push the dough away from you, then fold it back over itself and turn it a quarter turn. Repeat this motion for 8-10 minutes.
You’ll know it’s ready when the dough transforms from rough and crumbly to smooth, supple, and slightly springy to the touch. If it sticks, sprinkle sparingly with more semolina—just enough to prevent sticking without drying out the dough. The finished dough should feel like soft Play-Doh.
Step 3: Rest the Dough for Optimal Texture
Shape the dough into a ball, wrap it tightly in plastic wrap, and let it rest at room temperature for 30 minutes. This resting period allows the gluten strands to relax, making the dough much easier to roll out thinly and evenly.
During this time, the dough will also hydrate fully, ensuring your pasta ribbons hold their shape during cooking. Don’t skip this step—resting is what separates chewy pasta from tender, melt-in-your-mouth strands.
Step 4: Roll and Cut the Pasta Ribbons
Divide the rested dough into 4 equal portions. Working with one piece at a time (keep the others covered), flatten it with your hands and begin rolling it out on a surface dusted with semolina. Roll from the center outward in all directions, turning the dough frequently to maintain an even thickness.
Continue rolling until the sheet is nearly translucent, about 1/16-inch thick. If it springs back, let it rest for 5 minutes before continuing. Once rolled, dust the sheet with semolina, then loosely roll it up and slice into ¼-inch wide ribbons. Unfurl the ribbons and let them dry on a floured surface for 10-15 minutes before cooking.
Step 5: Cook the Pasta to Al Dente Perfection
Bring a large pot of salted water to a rolling boil. Add the fresh pasta ribbons and cook for 2-3 minutes—fresh pasta cooks much faster than dried. Begin testing for doneness after 2 minutes by fishing out a strand and tasting it.
The pasta is done when it’s tender but still has a slight bite, and floats to the surface. Drain immediately and toss with your favorite sauce, as fresh pasta absorbs sauces beautifully. Serve right away for the best texture.
Pro Tips For Making Homemade Pasta Recipe No Machine
- Knead Longer: Work the dough for at least 8-10 minutes by hand—it’ll go from shaggy to smooth, and that’s when you know the gluten’s developed properly.
- Use Room-Temp Eggs: Take your eggs out of the fridge 30 minutes before mixing; cold eggs make the dough seize up, and you’ll fight it the whole time.
- Skip Over-Flouring: Dust your surface lightly with semolina, but don’t go heavy—too much flour toughens the pasta and dulls the flavor.
- Rest the Dough: Wrap it in plastic and let it sit at room temp for 30 minutes; I learned this the hard way—skipping it makes rolling nearly impossible.
Serving Suggestions for Leftovers
Simple Sauce Pairings
Fresh pasta deserves a light touch. Toss with 2 tbsp melted butter and ¼ cup grated Parmesan for a classic treatment. The simplicity lets the pasta’s delicate flavor shine. I often add a pinch of flaky sea salt at the end. 💛
Vegetable Enhancements
Sauté 2 cups cherry tomatoes with 3 garlic cloves and ¼ cup fresh basil for a quick, vibrant topping. The acidity cuts through the richness beautifully. Alternatively, roasted asparagus or zucchini ribbons add seasonal freshness.
Protein Additions
For heartier meals, top with grilled chicken or shrimp. I love searing 4 oz prosciutto until crispy and crumbling it over the pasta. A poached egg on top adds luxurious creaminess that pairs wonderfully with the silky ribbons.
Fresh Herb Finishes
Always finish with fresh herbs. Chopped parsley or basil adds brightness, while chives offer a mild onion note. A drizzle of high-quality olive oil from my Portland farmers market hauls enhances every bite. 🌿
Cheese Variations
Swap Parmesan for Pecorino Romano for sharper flavor, or use ricotta salata for a milder, saltier option. A sprinkle of freshly cracked black pepper over the cheese takes it to another level. Lily loves helping me grate the cheese – it’s her favorite job.
Nutrition Facts
Frequently Asked Questions
Can I use whole wheat flour?
Yes, but expect a denser texture. Start with 1 cup whole wheat and 1 cup all-purpose for best results. The pasta will have a nuttier flavor and may require extra 1-2 tsp water to reach the right consistency.
Why does my dough keep springing back?
This means the gluten needs more relaxation. Let it rest for 5 minutes between rollings, or cover and wait 10 minutes longer initially. Don’t force it—patience prevents tough pasta.
How thin should I roll the pasta?
Aim for about 1/16-inch thick, or nearly translucent. Hold it up to light—if you can see your hand’s shadow, it’s ready. Thinner sheets cook faster and absorb sauces better.
Can I make this ahead of time?
Dust cut ribbons with flour, then refrigerate on a tray for up to 24 hours. For longer storage, freeze flat on a sheet, then transfer to a bag for up to 1 month.

Trained in classic French technique but raised on slow-cooked ribs and spicy rubs, she blends culinary skill with smoke and soul.
- Recipe for Boneless Pork Chops in Cast Iron Skillet: Sear and Baste to Juicy Perfection - October 3, 2026
- Recipe for Boneless Cross Rib Roast: Slow-Roasted Beef with Herb Crust - October 3, 2026
- Hamburgers in Sauce Recipe Crock Pot: Slow-Cooked Savory Delight - October 3, 2026