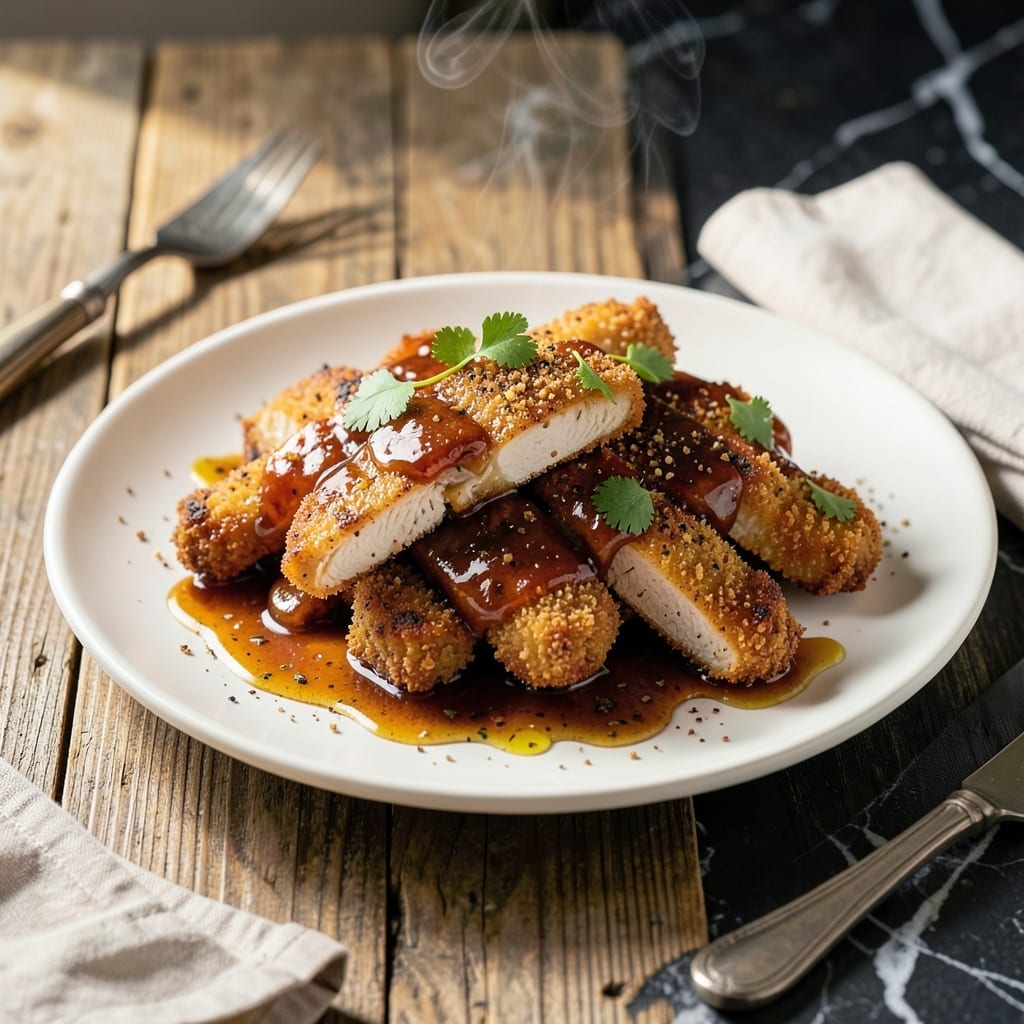
These chicken strips deliver tender perfection with every bite, thanks to a foolproof cooking method and a honey barbecue glaze that caramelizes beautifully.
I developed this recipe to combine my love of smoky flavors with a touch of sweetness, creating a dish that’s as satisfying as it is simple.
Ingredients for Honey Barbecue Chicken Strips
Simple ingredients for sticky, smoky, sweet chicken strips everyone will love.
| Ingredient | Amount | Notes |
|---|---|---|
| Boneless Skinless Chicken Breasts 🍗 | 1 ½ lb | Cut into 1-inch strips |
| All-Purpose Flour 🌾 | ½ cup | For dredging chicken |
| Kosher Salt 🧂 | 1 tsp | Diamond Crystal preferred |
| Black Pepper 🌶️ | ½ tsp | Freshly ground preferred |
| Garlic Powder 🧄 | 1 tsp | Not garlic salt |
| Smoked Paprika 🌶️ | 1 tsp | For smoky depth |
| Barbecue Sauce 🍯 | ¾ cup | Smoky variety preferred |
| Honey 🍯 | ¼ cup | Pure, local if possible |
| Apple Cider Vinegar 💧 | 1 tbsp | Balances sweetness |
| Worcestershire Sauce 🍶 | 1 tsp | Adds umami depth |
| Olive Oil 🫒 | 2 tbsp | For cooking chicken |
| Unsalted Butter 🧈 | 2 tbsp | For rich glaze finish |
| Cornstarch 🌾 | 1 tbsp | For thickening glaze |
[recipe_ingredient_scaler]
The chicken is everything here. Boneless, skinless breasts stay tender when cut into even strips—avoid pre-cut tenders, they dry out fast. I grab mine from Costco for bulk savings, but any grocery store works. Look for uniform thickness so they cook evenly. The Diamond Crystal kosher salt (the flaky kind) makes a difference in seasoning—don’t skip it if you’ve got it.
No smoked paprika? Regular paprika plus a pinch of liquid smoke gets you close. Swap maple syrup for honey if needed, but the honey’s floral notes really shine here. Out of BBQ sauce? Ketchup plus a dash of molasses and smoked paprika in a pinch. The vinegar balances the sweetness, so don’t leave it out (white vinegar works too).
Leftovers keep 3-4 days in the fridge—reheat in a skillet to crisp the coating. Freeze cooked strips for up to 3 months (thaw before reheating). The glaze thickens as it cools, so warm it gently with a splash of water if needed.
Why You’ll Love This Recipe
- 20-Minute Dinner: I can get these strips from fridge to table faster than takeout arrives.
- Garlic-Kissed Crisp: The garlic powder in the flour gives every bite that warm, savory depth before the honey barbecue glaze even hits.
- Lunchbox Hero: Cold leftovers taste just as good the next day—my kids beg for these in their school lunches.
- Budget Stretcher: A pound of chicken breasts turns into a meal that feeds four, and the pantry staples do the rest.
Step-by-Step Instructions for Honey Barbecue Chicken Strips
Here’s the method I use for crispy, saucy strips that stay tender every single time.
Step 1: Season and Dredge the Chicken Strips
Cut the 1.5 lb boneless skinless chicken breasts into 1-inch strips. In a shallow dish, combine the 0.5 cup all-purpose flour, 1 tsp kosher salt, 0.5 tsp black pepper, 1 tsp garlic powder, and 1 tsp smoked paprika.
Dredge each strip in the flour mixture, pressing gently to adhere. Shake off excess flour—too much will create a gummy coating instead of a crispy crust. This seasoned dredge builds a flavorful foundation that locks in moisture.
Step 2: Pan-Fry to Golden Perfection
Heat the 2 tbsp olive oil in a large skillet over medium-high heat until shimmering. Add the dredged chicken strips in a single layer, working in batches if needed to avoid crowding. Crowding steams the chicken instead of frying it.
Cook for 4-5 minutes per side until golden brown and crispy. You’ll know they’re ready to flip when the strips release easily from the pan. Transfer to a paper towel-lined plate to drain excess oil while you finish the rest.
Step 3: Create the Sticky Honey Barbecue Glaze
In a small saucepan, combine the 0.75 cup barbecue sauce, 0.25 cup honey, 1 tbsp apple cider vinegar, 1 tsp Worcestershire sauce, and 2 tbsp unsalted butter over medium heat.
Bring to a gentle simmer, then whisk in the 1 tbsp cornstarch until smooth. Continue simmering for 2-3 minutes, stirring constantly, until the mixture thickens enough to coat the back of a spoon. The glaze should be glossy and slightly sticky.
Step 4: Coat and Finish the Chicken
Return all the cooked chicken strips to the skillet (off heat) and pour the warm glaze over them. Toss gently with tongs until every piece is evenly coated. Let them sit in the glaze for 1-2 minutes to absorb the flavors.
The residual heat will help the glaze cling to the crispy exterior, creating that perfect sticky-sweet finish. Serve immediately while the glaze is still glossy and warm—the contrast between the crispy coating and tender interior is what makes this dish special.
Pro Tips For Making Honey Barbecue Chicken Strips
- Pound the Chicken: Use a meat mallet or rolling pin to flatten the chicken breasts to an even 1/2-inch thickness. I learned this the hard way—uneven pieces mean some strips are dry while others are undercooked.
- Season the Flour: Mix the kosher salt, black pepper, and garlic powder right into the flour before dredging. Sounds weird, but it works—every bite gets that perfect seasoning without clumping.
- Skip the Overcrowding: Fry the strips in batches with space between each piece, or they’ll steam instead of crisp. After burning three batches, I finally figured out that patience here is non-negotiable.
- Rest Before Saucing: Let the cooked strips rest on a wire rack for 5 minutes before tossing in honey barbecue sauce. This keeps them crispy instead of soggy—I skip this when I’m lazy, but the dish is noticeably better when I don’t.
Dietary Considerations for This Recipe
Gluten-Free Option
Swap the 0.5 cup all-purpose flour for 0.5 cup cornstarch or a gluten-free all-purpose blend. I’ve tested with Bob’s Red Mill 1-to-1 and the results are just as crispy. The key is pressing the coating firmly onto the chicken strips. 💪
Lower-Sugar Version
Reduce the 0.25 cup honey to 2 tbsp and replace the remaining with 0.25 cup sugar-free maple syrup. The glaze will be less sticky but still packed with smoky-sweet flavor. I find this works well for those watching their sugar intake.
Dairy-Free Adaptation
Replace the 2 tbsp unsalted butter with 2 tbsp olive oil or dairy-free butter. The glaze will be just as rich and glossy. I often use Miyoko’s brand for a buttery flavor without the dairy.
Lower-Carb Option
Skip the dredging step entirely and simply season the chicken strips with salt, pepper, and spices. Pan-fry as directed, then coat with the glaze. This reduces carbs significantly while keeping all the flavor.
Allergen Note
This recipe contains no nuts, but always check your barbecue sauce label—some brands add nut-based thickeners. For nut-free certainty, I recommend Stubb’s Original. 💡
Protein Swap
For a poultry alternative, try turkey breast strips using the same method. They cook slightly faster, so reduce the pan-fry time to 3-4 minutes per side to prevent drying out.
Nutrition Facts
Frequently Asked Questions
Can I bake these instead of pan-frying?
Yes! Bake at 400°F for 15-18 minutes, flipping halfway. The coating won’t be as crispy, but the glaze will still cling beautifully.
How do I keep the glaze from sliding off?
Let the glaze simmer until it thickens enough to coat a spoon. Toss the strips in the warm glaze immediately after cooking so it adheres better.
What’s the best way to reheat leftovers?
Use a skillet over medium-low heat for 2-3 minutes per side. This revives the crispiness better than a microwave.
Can I use chicken tenders instead of breasts?
Yes, but reduce cooking time to 3-4 minutes per side as they’re thinner and dry out faster.

Trained in classic French technique but raised on slow-cooked ribs and spicy rubs, she blends culinary skill with smoke and soul.
- Recipe for Boneless Pork Chops in Cast Iron Skillet: Sear and Baste to Juicy Perfection - October 3, 2026
- Recipe for Boneless Cross Rib Roast: Slow-Roasted Beef with Herb Crust - October 3, 2026
- Hamburgers in Sauce Recipe Crock Pot: Slow-Cooked Savory Delight - October 3, 2026