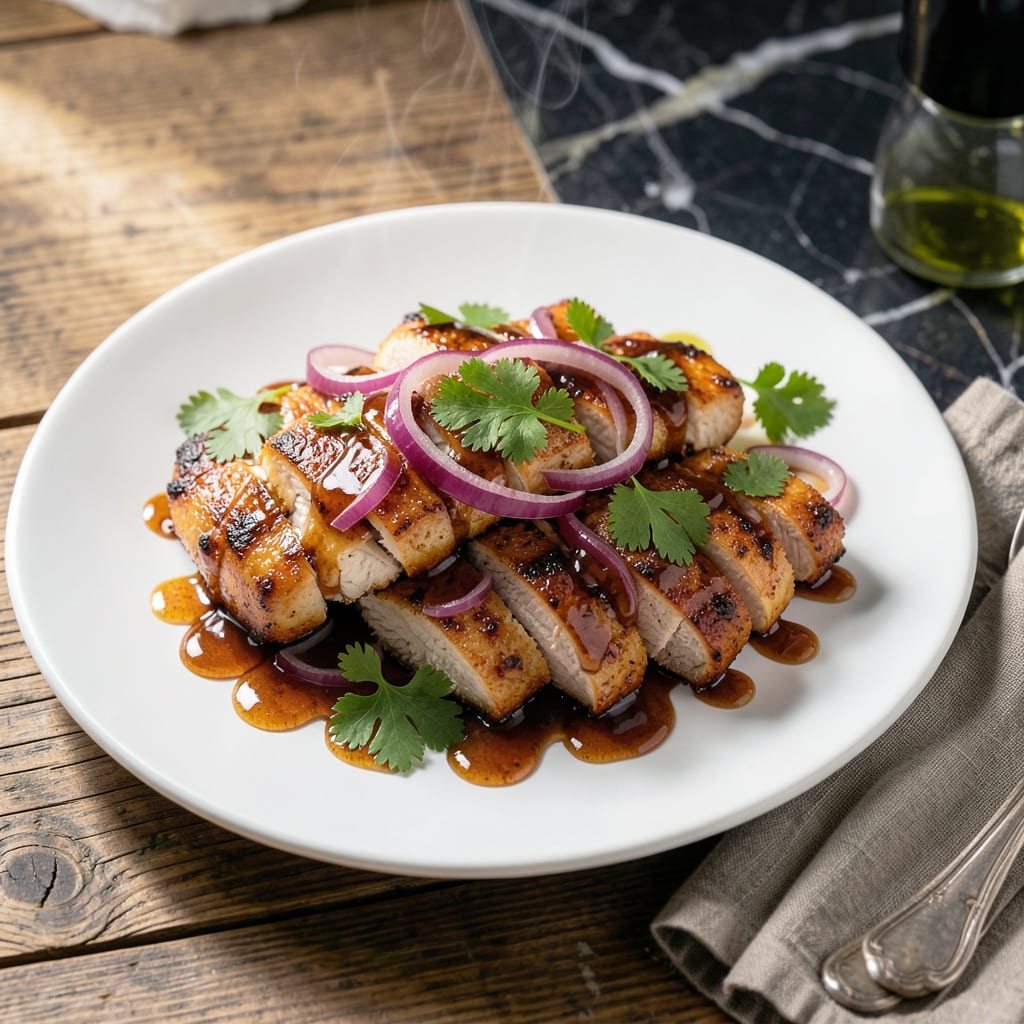
These oven-baked chicken strips deliver a sweet and smoky experience without the grill. The honey BBQ glaze creates a caramelized coating that locks in moisture.
I developed this method to bring that classic smokehouse flavor indoors. Simple ingredients, foolproof technique, and results that taste like they came from the pit.
Ingredients for Honey Bbq Chicken Strips
Simple ingredients bring bold sweet and smoky flavors to your oven-baked chicken strips.
| Ingredient | Amount | Notes |
|---|---|---|
| Chicken Breast 🍗 | 1 ½ lb | Boneless, skinless, cut into strips |
| Honey 🍯 | ½ cup | Pure, unfiltered preferred |
| Barbecue Sauce 🍯 | 1 cup | Thick, smoky variety |
| Olive Oil 🫒 | 2 tbsp | Extra-virgin for richness |
| Apple Cider Vinegar 💧 | 1 tbsp | For tangy balance |
| Worcestershire Sauce 🫒 | 1 tbsp | Adds depth to glaze |
| Garlic Powder 🧄 | 1 tsp | Enhances savory notes |
| Onion Powder 🧅 | 1 tsp | Complements sweetness |
| Smoked Paprika 🌶️ | 1 tsp | For authentic smokehouse flavor |
| Salt 🧂 | 1 tsp | Kosher or sea salt |
| Black Pepper 🌶️ | ½ tsp | Freshly ground preferred |
| All-Purpose Flour 🌾 | ½ cup | For light coating |
| Large Eggs 🥚 | 2 whole | Beaten for dredging |
[recipeingredientscaler]
The chicken is the foundation, so opt for boneless, skinless breasts—uniform thickness ensures even cooking. For the honey, local, raw varieties add complexity, but any pure honey works. The BBQ sauce should have a thick consistency and pronounced smokiness; Stubb’s Original or Sweet Baby Ray’s are reliable choices at most supermarkets. Smoked paprika is non-negotiable here—it delivers that classic smokehouse flavor without a grill.
No smoked paprika? Regular paprika plus a pinch of liquid smoke gets you close. Out of apple cider vinegar? White vinegar at half the amount works in a pinch. Want extra depth? Add a teaspoon of Dijon mustard to the glaze. For a spicier kick, include a quarter teaspoon of cayenne. The flour coating can be swapped for panko if you prefer extra crunch (adjust cooking time slightly).
The glaze can be mixed 2 days ahead and stored in the fridge—stir before using. Cooked strips keep well for 3-4 days refrigerated, though they’re best served fresh. Reheat in the oven to maintain crispness. Freeze uncooked marinated strips for up to 3 months for quick future meals.
Why You’ll Love This Recipe
- 20-Minute Meal: I can get these honey BBQ chicken strips from prep to plate faster than the kids can argue over who gets the last one.
- Sweet & Smoky: The honey and barbecue sauce create that sticky, caramelized glaze I crave every time.
- Party or Lunchbox: Honestly, I’ve served these at backyard BBQs and packed them for work lunches—they’re that adaptable.
- Leftovers? Yes Please: They reheat beautifully, so I always make extra for next-day sandwiches or salads.
Step-by-Step Instructions for Honey BBQ Chicken Strips
Master this technique for crispy, saucy strips with minimal effort and maximum flavor.
Step 1: Prepare and Season the Chicken
Cut the 1.5 lb chicken breast into even 1-inch thick strips. This ensures uniform cooking and prevents dry, overdone pieces. Pat them thoroughly dry with paper towels—moisture inhibits browning and crisping.
Season both sides generously with 1 tsp salt, 0.5 tsp black pepper, 1 tsp garlic powder, 1 tsp onion powder, and 1 tsp smoked paprika. I rub the spices in firmly so they adhere well and create a flavorful crust. Let the seasoned strips rest at room temperature for 10 minutes while you prepare the dredging station.
Step 2: Create the Dredging and Breading Station
In a shallow dish, whisk the 2 whole large eggs until fully combined and slightly frothy. In a separate shallow dish, place the 0.5 cup all-purpose flour. The two-step dredging process creates a light, crispy coating that holds up to the saucy glaze.
Dip each seasoned chicken strip into the beaten eggs, allowing excess to drip off for 5 seconds. Then dredge in the flour, pressing gently to ensure full coverage. Shake off any excess flour—too much will create a thick, pasty coating. Place the dredged strips on a wire rack set over a baking sheet to allow air circulation.
Step 3: Pan-Sear for Crispy Texture
Heat 2 tbsp olive oil in a large, oven-safe skillet over medium-high heat until shimmering but not smoking. Working in batches to avoid crowding, add the dredged chicken strips. Cook for 3-4 minutes per side until deeply golden brown and crispy.
You’ll know they’re ready to flip when the edges appear opaque and the coating releases easily from the pan. Don’t move the strips too soon—this prevents proper crust formation. Transfer the seared strips to a plate lined with paper towels to drain any excess oil while you make the glaze.
Step 4: Prepare the Honey BBQ Glaze
In a medium bowl, combine 1 cup barbecue sauce, 0.5 cup honey, 1 tbsp apple cider vinegar, and 1 tbsp Worcestershire sauce. Whisk until smooth and fully integrated. The vinegar and Worcestershire add depth and balance the sweetness of the honey and barbecue sauce.
Taste the glaze and adjust if needed—though the measurements are precise, personal preference may call for a touch more tang or sweetness. This glaze should be thick enough to cling to the chicken strips without running off completely.
Step 5: Glaze and Bake to Perfection
Return the seared chicken strips to the skillet. Pour the prepared glaze evenly over the strips, turning to coat each piece thoroughly. Place the skillet in a preheated 375°F oven and bake for 10-12 minutes, or until the chicken reaches an internal temperature of 165°F.
The glaze will bubble and caramelize slightly, creating a sticky, finger-licking finish. Let the strips rest in the skillet for 2 minutes after removing from the oven—this allows the glaze to set and the juices to redistribute. Serve immediately while hot and saucy.
Pro Tips For Making Honey Bbq Chicken Strips
- Slice Against the Grain: Cut the chicken breast into strips against the grain for the most tender bite—I learned this the hard way after chewing through rubbery pieces one too many times.
- Preheat the Pan: Get your pan screaming hot before adding the chicken, about 2 minutes on medium-high. Sounds obvious, but it actually changes the outcome from steamed to seared.
- Thin the Honey: Warm the honey for 10 seconds in the microwave before mixing it with the BBQ sauce. It blends smoother and coats the chicken evenly instead of clumping.
- Rest Before Serving: Give the strips 5 minutes off the heat before serving. I skip this when I’m lazy, but the dish is noticeably juicier when I don’t.
Make-Ahead Tips for This Dish
Glaze Prep Ahead
Mix the 1 cup barbecue sauce, 0.5 cup honey, 1 tbsp apple cider vinegar, and 1 tbsp Worcestershire sauce up to 2 days ahead. Store in an airtight container in the fridge. Stir well before using. 💡
Marinate Overnight
Combine the seasoned 1.5 lb chicken strips with ¼ cup of the glaze in a sealed bag. Marinate for 4-12 hours in the fridge. This boosts flavor and keeps the meat juicy. I do this before coastal rides to save time.
Pre-Dredge Strips
Dredge the chicken strips in flour and egg up to 6 hours ahead. Place them on a wire rack in the fridge. Cover loosely with plastic wrap. This keeps the coating crisp without sogginess.
Freeze Uncooked
Freeze uncooked, dredged strips in a single layer on a tray first. Then transfer to a freezer bag for up to 3 months. Thaw overnight in the fridge before cooking. Perfect for last-minute meals. ❄️
Reheat Properly
Reheat cooked strips in a 375°F oven for 8-10 minutes to maintain crispness. Avoid microwaving—it makes the coating soggy. Add a fresh brush of glaze if needed.
Portion for Parties
Double the recipe and prep strips in batches. Keep cooked batches warm in a 200°F oven while finishing others. This ensures everyone gets hot, crispy strips at the same time.
Nutrition Facts

Trained in classic French technique but raised on slow-cooked ribs and spicy rubs, she blends culinary skill with smoke and soul.
- Recipe for Boneless Pork Chops in Cast Iron Skillet: Sear and Baste to Juicy Perfection - October 3, 2026
- Recipe for Boneless Cross Rib Roast: Slow-Roasted Beef with Herb Crust - October 3, 2026
- Hamburgers in Sauce Recipe Crock Pot: Slow-Cooked Savory Delight - October 3, 2026