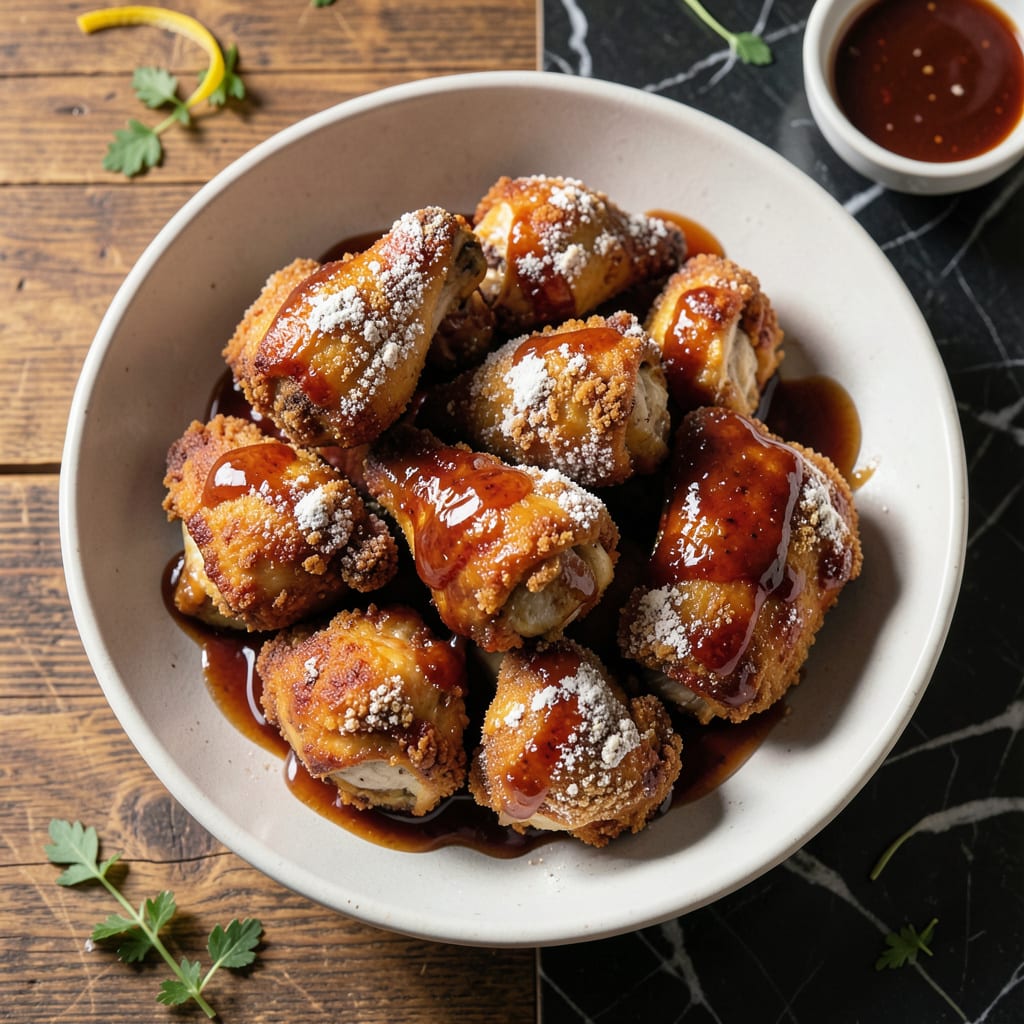
This recipe combines crispy, golden fried chicken with a sticky-sweet honey BBQ glaze that delivers perfect balance of smoky and sweet in every bite.
Using a two-step frying method ensures crispy skin while keeping the meat juicy, and the glaze adds a glossy finish that’s impossible to resist.
Ingredients for Honey Bbq Fried Chicken
Crispy chicken meets sticky-sweet glaze with these carefully selected ingredients for perfect balance.
| Ingredient | Amount | Notes |
|---|---|---|
| Chicken Thighs 🍗 | 2 lb | Boneless, skin-on for crispiness |
| Buttermilk 🥛 | 1 ½ cups | Full-fat for tenderness |
| All-Purpose Flour 🌾 | 2 cups | For crispy coating |
| Cornstarch 🌾 | ½ cup | Extra crunch builder |
| Kosher Salt 🧂 | 1 tbsp | Diamond Crystal preferred |
| Black Pepper 🌶️ | 1 tsp | Freshly ground |
| Paprika 🌶️ | 1 tsp | Smoked for depth |
| Garlic Powder 🧄 | 1 tsp | Enhances flavor profile |
| Onion Powder 🧅 | 1 tsp | Balances sweetness |
| Vegetable Oil 🫒 | 4 cups | For deep frying |
| Honey 🍯 | ½ cup | Pure, unprocessed |
| BBQ Sauce 🍯 | 1 cup | High-quality, smoky flavor |
| Apple Cider Vinegar 🍏 | 2 tbsp | Balances sweetness |
| Unsalted Butter 🧈 | 2 tbsp | For glaze richness |
[recipe_ingredient_scaler]
The chicken thighs are non-negotiable here—bone-in, skin-on delivers the crispiest skin and juiciest meat. Buttermilk from a local dairy or Whole Foods ensures maximum tenderness. For the flour, King Arthur all-purpose is my go-to for reliable results. The cornstarch is the secret to that next-level crunch. Don’t skip it.
No buttermilk? Whole milk with a splash of vinegar works in a pinch. Out of cornstarch? Instant mashed potato flakes give similar crispiness. For the BBQ sauce, Stubb’s Original or Sweet Baby Ray’s are solid store-bought options. The honey should be real—local raw honey if possible (better flavor and supports beekeepers).
The glaze keeps for 1 week refrigerated in an airtight container. Fried chicken is best eaten fresh, but leftovers reheat well in a 375°F oven for 10-12 minutes. Never microwave—it’ll lose that crispiness.
Why You’ll Love This Recipe
- One Bowl Wonder: I just toss the chicken in buttermilk, then dredge in flour and cornstarch—no fancy prep or extra dishes.
- Sweet & Crispy: The honey in the BBQ glaze caramelizes on that cornstarch crust, making every bite ridiculously good.
- Weeknight Hero: Honestly, it’s my go-to for busy Tuesdays when I need something hearty and fast.
- Budget Friendly: Chicken thighs stay juicy and cost half what breasts do, so I can feed a crowd without breaking the bank.
Step-by-Step Instructions for Honey BBQ Fried Chicken
Master the technique for achieving that ideal balance of crispy coating and sticky-sweet glaze.
Step 1: Marinate the Chicken Thighs in Buttermilk
Place the 2 lb Chicken Thighs in a large bowl and pour over the 1.5 cups Buttermilk. Ensure each piece is fully submerged by pressing down gently. This buttermilk bath tenderizes the meat and helps the coating adhere while adding a subtle tang.
Cover the bowl and refrigerate for at least 4 hours, or ideally overnight. The longer it marinates, the more flavorful and tender your chicken will be. I always prepare this the night before to maximize the effect.
Step 2: Create the Crispy Coating Mixture
In a shallow dish, whisk together the 2 cups All-Purpose Flour, 0.5 cup Cornstarch, 1 tbsp Kosher Salt, 1 tsp Black Pepper, 1 tsp Paprika, 1 tsp Garlic Powder, and 1 tsp Onion Powder. The cornstarch is the secret to achieving that extra crunch that sets this recipe apart.
Remove the chicken from the buttermilk, letting any excess drip off, then dredge each piece thoroughly in the flour mixture. Press gently to ensure the coating adheres completely and forms an even layer. Place the coated pieces on a wire rack to rest for 10 minutes—this helps the coating set.
Step 3: Deep-Fry to Golden Perfection
In a heavy-bottomed pot or Dutch oven, heat the 4 cups Vegetable Oil to 350°F. Use a deep-fry thermometer for accuracy. Carefully lower the chicken into the hot oil, working in batches to avoid overcrowding. Fry for 8-10 minutes, turning occasionally, until the coating is deep golden brown and the internal temperature reaches 165°F.
Drain the fried chicken on a wire rack set over a baking sheet. This allows air to circulate around the pieces, keeping them crispy rather than steaming them on a paper towel. Maintain the oil temperature between batches by allowing it to return to 350°F before adding more chicken.
Step 4: Prepare the Honey BBQ Glaze
In a saucepan over medium heat, combine the 0.5 cup Honey, 1 cup BBQ Sauce, 2 tbsp Apple Cider Vinegar, and 2 tbsp Unsalted Butter. Stir frequently as the mixture comes to a gentle simmer, then reduce heat to low and let it cook for 3-4 minutes until slightly thickened.
The vinegar cuts through the sweetness, while the butter adds a silky richness to the glaze. Taste and adjust seasoning if needed—you want a balance of sweet, smoky, and tangy flavors. Remove from heat once it reaches your desired consistency.
Step 5: Glaze and Serve Immediately
While the chicken is still hot from the fryer, brush it generously with the honey BBQ glaze, ensuring each piece is fully coated. The heat from the chicken will help the glaze set slightly, creating a sticky, glossy finish that clings to every crispy ridge of the coating.
Serve immediately while the chicken is still crispy and the glaze is warm. Any leftovers should be stored in an airtight container in the refrigerator, though the coating is best enjoyed fresh. Reheat in a 375°F oven for 10-12 minutes to help restore some of the original crispiness.
Pro Tips For Making Honey Bbq Fried Chicken
- Brine the Thighs: Soak chicken thighs in buttermilk with 1 tablespoon of kosher salt for at least 4 hours—I learned this the hard way after my first batch came out dry and bland.
- Double Dredge: Dip the thighs in flour-cornstarch mix, back into buttermilk, then back into the flour for that extra-crispy crust that actually holds up to the honey BBQ sauce.
- Skip Cold Oil: Heat your oil to 350°F before adding the chicken, or you’ll end up with greasy, soggy coating instead of that golden crunch we’re all after.
- Glaze Last: Toss the fried chicken in honey BBQ sauce only after frying—coating it before will burn the sugars and leave you with a bitter, sticky mess.
Common Mistakes When Making honey bbq fried chicken
Skipping the Marinade
I’ve seen folks rush this step, but buttermilk marinating is non-negotiable. It tenderizes the meat and helps the coating cling. Skipping it results in dry, bland chicken. Give it at least 4 hours, but overnight is ideal for maximum flavor. 🔥
Overcrowding the Fryer
Frying too many pieces at once drops the oil temperature, leading to greasy, soggy chicken. Work in batches, leaving space between pieces. Use a deep-fry thermometer to maintain 350°F—this ensures even cooking and that perfect golden crust.
Incorrect Oil Temperature
If the oil isn’t hot enough, your chicken will absorb too much grease. If it’s too hot, the outside burns before the inside cooks. Aim for 350°F consistently. I use a Lodge cast iron pot for even heat distribution.
Skipping the Rest
After coating, let the chicken rest on a wire rack for 10 minutes. This helps the flour adheres better and prevents it from sliding off during frying. Resting also ensures a crispier final product.
Glazing Too Early
Brush the honey BBQ glaze on immediately after frying while the chicken is still hot. If you glaze too early, the sugar can burn in the oil. The heat helps the glaze set and cling beautifully.
Poor Draining Method
Draining on paper towels steams the chicken, making it soggy. Use a wire rack over a baking sheet to allow air circulation. This keeps the coating crispy while excess oil drips away. 💡
Nutrition Facts

Trained in classic French technique but raised on slow-cooked ribs and spicy rubs, she blends culinary skill with smoke and soul.
- Meat Loaf Recipe With Beef And Pork: Homestyle Blend With Rich Gravy - October 3, 2026
- Hamburger Patty Recipe No Egg: Juicy Bind With Breadcrumbs and Milk - October 3, 2026
- Recipe for Oven Baked Halibut: Buttery White Fish with Zesty Lemon Topping - October 3, 2026