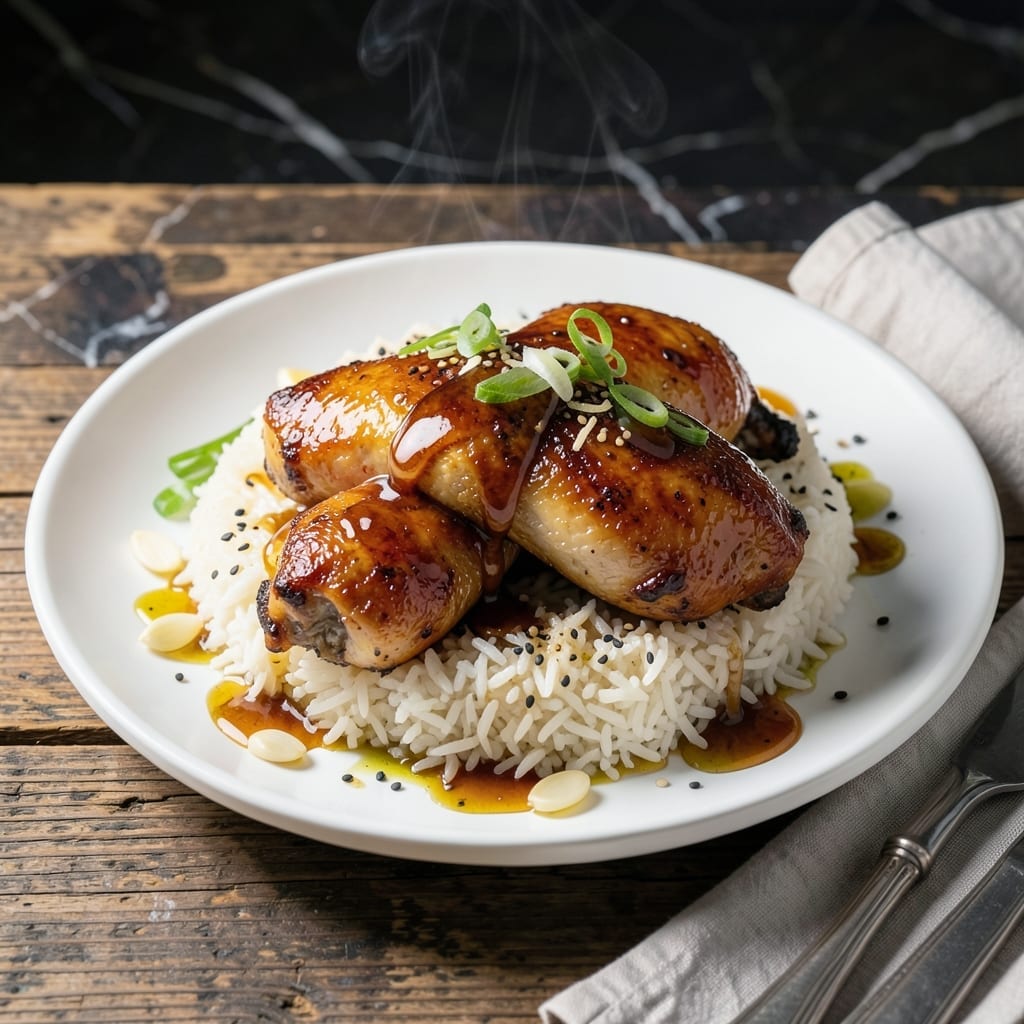
This Instant Pot method delivers tender chicken coated in a sweet, sticky honey glaze in just 30 minutes. The pressure cooker locks in moisture while concentrating the sauce into a rich, glossy finish.
I developed this technique for busy weeknights when time is tight but flavor can’t be compromised. Simple ingredients combine with the Instant Pot’s efficiency to create a dish that tastes like it simmered for hours.
The result is fall-off-the-bone chicken with a caramelized honey coating that clings to every piece. It pairs perfectly with steamed rice or roasted vegetables for a complete meal.
No fancy skills required—just layer, pressure cook, and let the appliance do the work. The sauce thickens beautifully under the lid.
Ingredients for Honey Chicken Recipe Instant Pot
Tender chicken and a sweet, sticky glaze come together with pantry staples for this dish.
| Ingredient | Amount | Notes |
|---|---|---|
| Chicken Thighs 🍗 | 2 lb | Boneless, skinless preferred |
| Honey 🍯 | ½ cup | Raw or pure, not flavored |
| Soy Sauce 🫒 | ⅓ cup | Low-sodium for balance |
| Garlic Cloves 🧄 | 4 cloves | Minced for even distribution |
| Fresh Ginger 🌿 | 1 tbsp | Grated or finely minced |
| Rice Vinegar 💧 | 2 tbsp | Or apple cider vinegar |
| Ketchup 🍅 | ¼ cup | For depth and tang |
| Olive Oil 🫒 | 1 tbsp | For sautéing aromatics |
| Cornstarch 🌾 | 1 tbsp | To thicken the sauce |
| Water 💧 | ⅓ cup | For pressure cooking |
| Green Onions 🧅 | 3 whole | Sliced for garnish |
| Sesame Seeds 🌰 | 1 tbsp | Toasted for garnish |
| Salt 🧂 | ½ tsp | Kosher or sea salt |
| Black Pepper 🌶️ | ¼ tsp | Freshly ground preferred |
[recipe_ingredient_scaler]
The chicken is the foundation—boneless, skinless thighs yield the most tender result under pressure. Costco or Sam’s Club offer excellent bulk options for family-sized portions. For the honey, local raw varieties add complexity, but standard grocery store brands work perfectly. The soy sauce should be low-sodium to prevent the dish from becoming overly salty as it reduces.
No rice vinegar? Apple cider vinegar at an equal amount provides similar tang. Fresh ginger can be swapped with one-third the amount of ground ginger. If avoiding added sugar, substitute maple syrup for honey at a 1:1 ratio. The ketchup adds depth—tomato paste plus a teaspoon of sugar can pinch hit in a binds, though the flavor profile shifts slightly.
Store raw chicken in the coldest part of the fridge for up to 2 days. The finished dish keeps well for 4-5 days refrigerated, and the sauce actually deepens in flavor overnight. Freeze portions for up to 3 months in airtight containers.
Why You’ll Love This Recipe
- Set and Forget: I dump everything in the Instant Pot and walk away—no babysitting, no stirring, just tender chicken thighs soaking up honey and soy while I do laundry.
- Sweet-Savory Magic: The honey caramelizes with the soy, garlic, and ginger into this sticky, glossy glaze that makes the thighs taste like they simmered all day.
- Feeds the Week: I make a double batch on Sunday and it reheats beautifully for lunches or a quick dinner over rice or noodles.
- Budget Hero: Chicken thighs stay cheap, and a little honey and soy go a long way to make them taste like a restaurant dish.
Step-by-Step Instructions for Honey Chicken Instant Pot
Master the technique for fall-off-the-bone tender chicken with a glossy, caramelized glaze.
Step 1: Sear and Sauté the Aromatics
Set your Instant Pot to the Sauté function on Normal heat. Add the 1 tablespoon Olive Oil and wait until it shimmers. Pat the 2 lb Chicken Thighs dry, then season both sides with the 0.5 tsp Salt and 0.25 tsp Black Pepper. Working in batches, sear the chicken for 3-4 minutes per side until deep golden brown.
Remove the chicken and set aside. In the same pot, add the 4 cloves Garlic Cloves and 1 tbsp Fresh Ginger, sautéing for 1-2 minutes until fragrant. This builds the flavor foundation that defines the finished dish.
Step 2: Deglaze and Pressure Cook
Pour in the 0.33 cup Soy Sauce, 0.5 cup Honey, 0.25 cup Ketchup, and 2 tbsp Rice Vinegar. Stir well, scraping the bottom to release any browned bits—this prevents the Burn notice and incorporates maximum flavor. Return the chicken to the pot, securing the lid.
Set the Instant Pot to High Pressure for 8 minutes. Ensure the valve is sealed. The chicken will cook gently in the aromatic liquid, emerging tender and infused with sweet-savory depth. The natural release is critical here to prevent toughening.
Step 3: Finish with a Glossy Glaze
Once the pressure releases naturally, switch back to Sauté mode. Remove the chicken and set aside. In a small bowl, whisk the 1 tbsp Cornstarch with the 0.33 cup Water until smooth. Stir this slurry into the pot and simmer for 3-4 minutes, stirring constantly, until the sauce thickens to a syrup-like consistency that coats the back of a spoon.
Return the chicken to the pot and toss to coat evenly in the glossy glaze. The sauce should cling to each piece with a visible sheen, signaling it’s ready to serve.
Step 4: Garnish and Serve
Transfer the chicken to a serving platter. Sprinkle with the sliced 3 whole Green Onions and 1 tbsp Sesame Seeds for a fresh contrast and visual appeal. The green onions add a crisp bite, while the sesame seeds provide a nutty toasted note.
Serve immediately while the glaze is still sticky and the chicken is at its most tender. The sauce will thicken slightly as it cools, but it should remain luscious and spoonable.
Pro Tips For Making Honey Chicken Recipe Instant Pot
- Sear the Thighs First: I learned this the hard way—skipping the sauté step leaves you with pale, soggy chicken. Toss the thighs in the Instant Pot on high heat for 3-4 minutes per side until golden, then pressure cook as usual.
- Thicken the Honey Sauce: After cooking, transfer the chicken out and reduce the sauce in the pot using the sauté function for 5-7 minutes. The honey-soy mixture will go from watery to glossy and coat the back of a spoon.
- Mince the Ginger Fine: Sounds weird, but it works: grind the fresh ginger to a near-paste so it melts into the sauce instead of leaving stringy bits in every bite.
- Use Natural Release: Resist the urge to quick-release—letting the pressure drop naturally for 10 minutes keeps the thighs juicy instead of turning them rubbery.
Storing and Reheating This Recipe
Refrigerator Storage
Let the chicken cool completely, then transfer to airtight containers with some of the sauce. It keeps beautifully for 4-5 days at 40°F or below. The flavors deepen overnight as the chicken soaks up the glaze. ❄️
Freezer Storage
Portion the chicken and sauce into freezer-safe bags or containers, leaving 1 inch headspace for expansion. It freezes well for up to 3 months without texture loss. I use quart-sized freezer bags for easy stacking.
Label with the date—trust me, you’ll forget when you prepped it otherwise.
Stovetop Reheating
Gently warm the chicken and sauce in a skillet over medium-low heat for 5-7 minutes. Add 2 tbsp water to loosen the sauce if needed. Stir occasionally to prevent sticking.
Microwave Reheating
Place a single portion in a microwave-safe dish, cover with a damp paper towel, and heat on 70% power for 1-2 minutes. Stir and repeat in 30-second intervals until warmed through. 🔥
Sauce Thickening Tip
If the sauce separates during reheating, simmer it for 1-2 minutes while stirring. A quick slurry of ½ tsp cornstarch and 1 tbsp water can restore its glossy consistency if needed.
Nutrition Facts
Frequently Asked Questions
Can I use chicken breasts instead of thighs?
Yes, but reduce pressure time to 6 minutes to prevent dryness. Thighs stay juicier, but breasts work if you prefer leaner meat. Always use bone-in for best results.
Why did I get a Burn notice?
This happens if sauce sticks to the bottom. Always deglaze thoroughly after sautéing and ensure there’s enough liquid (0.5 cup minimum). Scrape browned bits well.
How can I make the sauce thicker?
Simmer uncovered after cooking for 3-4 minutes. For extra thickness, mix 1 tsp cornstarch with 1 tbsp water and stir in.
Is this recipe gluten-free?
Substitute soy sauce with tamari and verify ketchup is gluten-free. All other ingredients are naturally gluten-free. Check labels carefully.

Trained in classic French technique but raised on slow-cooked ribs and spicy rubs, she blends culinary skill with smoke and soul.
- Energy Ball Recipe Peanut Butter: No-Bake Protein-Packed Bites - September 24, 2026
- Jerk Chicken Recipe Crock Pot: Slow-Cooked Caribbean Heat - September 24, 2026
- Japanese Curry Recipe Kenji: Chef-Tested Rich and Velvety Sauce - September 24, 2026