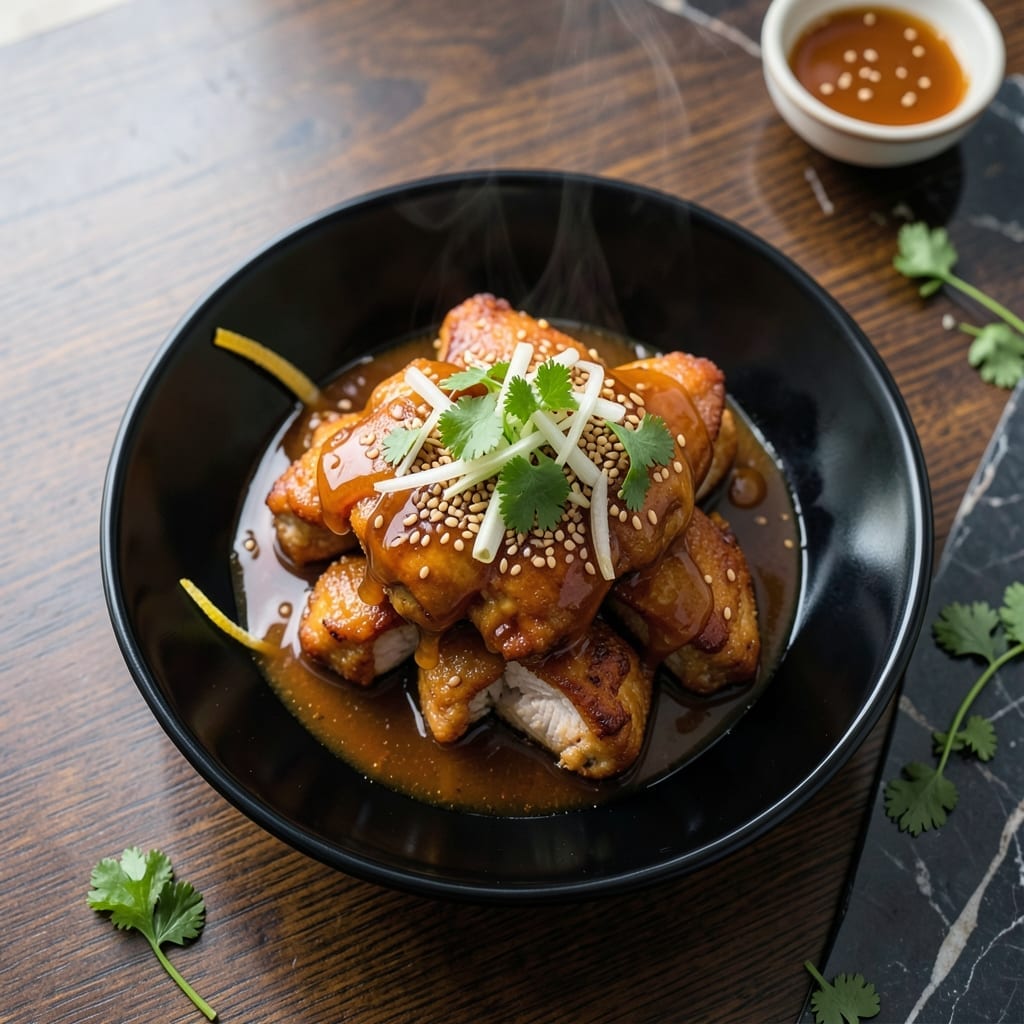
This takeout favorite brings restaurant-quality flavor to your home kitchen with a perfect balance of sweet and savory. The secret lies in the glossy honey sesame sauce that coats each piece of tender chicken.
I developed this recipe after countless trials to replicate the dish from my favorite Boston Chinese spot. The key is a simple marinade and quick fry, followed by tossing in the sticky, aromatic sauce.
You’ll achieve crispy chicken pieces with a glossy coating that’s impossible to resist. The sesame seeds add the final authentic touch that makes this dish truly special.
Ready in under 30 minutes, this recipe proves homemade can taste better than delivery. Here’s how to make this classic dish.
Ingredients for Honey Sesame Chicken Recipe Chinese Food
Pantry staples and a quick grocery run get you this takeout classic at home.
| Ingredient | Amount | Notes |
|---|---|---|
| Boneless Chicken Thighs 🍗 | 1 ½ lb | Cut into bite-sized pieces |
| Cornstarch 🌾 | ½ cup | For crispy coating |
| Large Eggs 🥚 | 2 whole | Beaten for marinade |
| Soy Sauce 🫒 | ¼ cup | Low-sodium preferred |
| Rice Vinegar 🍚 | 2 tbsp | For balancing sweetness |
| Honey 🍯 | ⅓ cup | For sticky glaze |
| Sesame Oil 🫒 | 1 tbsp | Toasted for aroma |
| Garlic Cloves 🧄 | 3 cloves | Minced for sauce |
| Fresh Ginger 🌿 | 1 tbsp | Grated, for depth |
| Sesame Seeds 🌰 | 2 tbsp | Toasted for garnish |
| Green Onions 🧅 | 3 whole | Thinly sliced for topping |
| Vegetable Oil 🫒 | 1 cup | For frying chicken |
| Granulated Sugar 🍚 | 2 tbsp | Balances acidity |
| Red Pepper Flakes 🌶️ | ½ tsp | Optional for heat |
[recipe_ingredient_scaler]
The chicken is everything here. Boneless thighs stay juicy where breasts dry out (trust me on this). I grab mine from Market Basket—consistent quality, good price. The cornstarch is your secret to that shatter-crack coating. Don’t skip it. For the honey, local raw stuff if you’ve got it, but the bear-shaped bottle works just fine for this.
No honey? Maple syrup at a 1:1 swap—flavor shifts slightly but still delicious. Out of rice vinegar? Apple cider vinegar in a pinch. The sesame oil is non-negotiable though—it’s what makes it taste like the restaurant. If you’re gluten-free, tamari instead of soy sauce. And if you hate spice, skip the red pepper flakes entirely.
Sauce thickens as it sits, so serve immediately. Leftovers keep 3-4 days in the fridge—reheat in a pan, not the microwave (soggy disaster). Freezes for 1 month if you double the batch. Pro tip: sprinkle sesame seeds right before serving so they stay crunchy.
Why You’ll Love This Recipe
- One Bowl Wonder: I toss the chicken in cornstarch and egg right in the bowl, no extra dishes piling up.
- Sweet-Savory Magic: The honey and soy sauce create this sticky, glossy coating that clings to every bite.
- Weeknight Hero: Between us, it’s my Tuesday night lifesaver when I need dinner fast.
- Leftovers? Yes Please: The flavors deepen overnight, so lunch the next day tastes even better.
Step-by-Step Instructions for Honey Sesame Chicken
Here’s the method I use to get that perfect crispy coating and glossy, sweet-savory glaze every time.
Step 1: Coat the Chicken in Egg and Cornstarch
Cut the 1.5 lb boneless chicken thighs into bite-sized pieces and pat them dry with paper towels. This removes excess moisture so the coating sticks better. In a bowl, beat the 2 large eggs until smooth.
Dip each piece of chicken into the beaten eggs, letting any excess drip off. Then roll the chicken in the 0.5 cup cornstarch, pressing gently to ensure an even coating. The cornstarch is what gives this dish that signature crispy texture.
Place the coated chicken on a plate and set it aside while you heat the 1 cup vegetable oil in a large skillet over medium-high heat. You want the oil hot enough to sizzle when the chicken hits it.
Step 2: Fry the Chicken Until Golden and Crispy
Once the oil is shimmering (test with a small piece of chicken—it should sizzle immediately), carefully add the chicken in a single layer, working in batches if needed to avoid crowding. Crowding the pan lowers the oil temperature and leads to soggy chicken.
Fry the chicken for 4-5 minutes per side or until it turns golden brown and the internal temperature reaches 165°F. The coating should be crispy and lightly blistered. Use a slotted spoon to transfer the fried chicken to a paper towel-lined plate to drain excess oil.
Step 3: Make the Honey Sesame Sauce
In a clean saucepan, combine the 0.25 cup soy sauce, 2 tbsp rice vinegar, 0.33 cup honey, 2 tbsp granulated sugar, 1 tbsp sesame oil, 3 minced garlic cloves, 1 tbsp grated fresh ginger, and 0.5 tsp red pepper flakes (if using).
Bring the mixture to a gentle simmer over medium heat, stirring occasionally. Let it cook for 3-4 minutes until it thickens slightly and becomes glossy. The sauce should coat the back of a spoon but still be pourable. Taste and adjust the sweetness or saltiness if needed.
Step 4: Toss and Garnish
Add the crispy chicken to the saucepan with the honey sesame sauce. Gently toss to coat each piece evenly, ensuring every bite is packed with flavor. Let it simmer together for 1-2 minutes so the chicken absorbs some of the sauce.
Transfer the honey sesame chicken to a serving platter. Sprinkle the 2 tbsp sesame seeds and 3 thinly sliced green onions over the top for a fresh, aromatic finish. Serve immediately while the chicken is still crispy and the sauce is glossy.
Pro Tips For Making Honey Sesame Chicken Recipe Chinese Food
- Velvet the Chicken: Toss the boneless thighs with 1 tablespoon cornstarch and 1 egg before cooking—I learned this the hard way, but it’s what gives that tender, restaurant-style texture.
- Skip Cold Oil: Heat your oil until it shimmers before adding the chicken, or you’ll end up with greasy, soggy pieces instead of that crispy crust.
- Thin Your Soy: Mix the soy sauce with a splash of rice vinegar before adding to the pan—sounds weird, but it balances the salt and keeps the sauce from overpowering the dish.
- Rest Before Saucing: Let the cooked chicken rest 2 minutes on a rack before tossing in the honey-sesame glaze, or the coating will slide right off.
Common Mistakes When Making This Recipe
Skipping the Drying Step
I learned the hard way that wet chicken makes soggy coating. Pat those 1.5 lb chicken thighs dry with paper towels before dipping in egg. This removes moisture so the cornstarch sticks properly, creating that perfect crispy texture we all want. 💡
Overcrowding the Pan
Frying all the chicken at once drops the oil temp, resulting in greasy pieces. Work in batches with 1 cup vegetable oil at medium-high heat. Give each piece space to crisp up—this takes 4-5 minutes per side.
Sauce Too Thick
If your sauce thickens too much before adding chicken, it’ll clump instead of coat. Simmer the honey mixture for just 3-4 minutes until glossy but pourable. The 0.33 cup honey and 0.25 cup soy sauce should flow smoothly.
Underseasoned Sauce
Taste before combining with chicken! The sauce needs balance between sweet honey, tangy rice vinegar, and savory soy sauce. Add a pinch of sugar or splash of vinegar if it tastes flat.
Soggy Sesame Seeds
Sprinkle the 2 tbsp sesame seeds right before serving, not during cooking. This keeps them crisp and aromatic. The same goes for green onions—add them fresh at the end for color and crunch.
Rushing the Rest
Let the chicken drain on paper towels for 2-3 minutes after frying. This prevents the sauce from sliding right off. I made this mistake in my Boston kitchen—lesson learned the hard way!
Nutrition Facts
Frequently Asked Questions
Can I use chicken breast instead of thighs?
You can, but thighs stay juicier. Breast dries out faster during frying. If using breast, reduce cooking time to 3-4 minutes per side and monitor internal temperature closely.
What if I don’t have rice vinegar?
Apple cider vinegar works as a substitute. Use the same 2 tbsp measurement. Avoid white vinegar—it’s too harsh and will overpower the dish’s delicate balance.
How do I make this gluten-free?
Swap regular soy sauce for tamari or coconut aminos. Ensure cornstarch is labeled gluten-free. The rest of the ingredients are naturally free of gluten.
Can I bake the chicken instead of frying?
Yes! Toss coated chicken in 1 tbsp oil and bake at 400°F for 20-25 minutes, flipping halfway. It won’t be as crispy but still delicious.

Trained in classic French technique but raised on slow-cooked ribs and spicy rubs, she blends culinary skill with smoke and soul.
- Beef Brisket Beer Recipe: Smoky, Beer-Braised Beauty in 6 Hours - October 15, 2026
- Smoked Whitefish Recipe: Wood-Fired Flakes with Herbed Butter Drizzle - October 15, 2026
- Smoked Teriyaki Beef Jerky Recipe: Umami-Deep Flavor in Every Chewy Bite - October 15, 2026