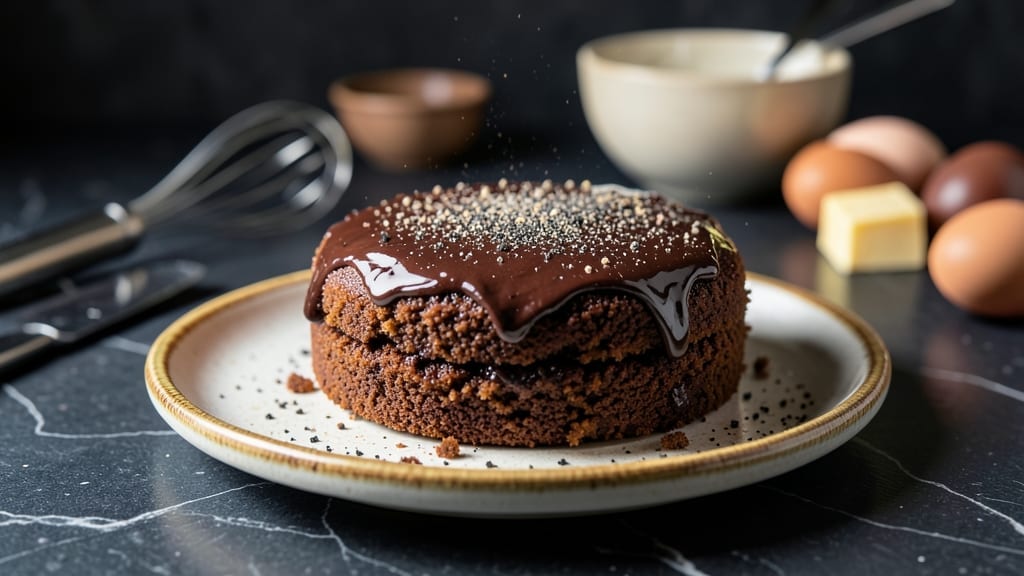
Transforming a simple boxed cake mix into a decadent hot fudge cake is one of those kitchen magic tricks that never fails to impress. The secret lies in layering moist cake with rich, gooey fudge between each tier—no scratch baking required.
I first perfected this technique during a busy holiday weekend when I needed a showstopper dessert without the fuss of homemade cake.
This recipe delivers restaurant-quality layers with minimal effort: a tender cake base, velvety chocolate fudge, and optional whipped cream for extra indulgence. The hot fudge sauce uses just four ingredients but packs maximum flavor, creating that signature warm, melty topping that makes every bite feel like a treat.
What sets this apart is how the fudge binds the layers together, ensuring each slice is rich and cohesive.
By the time you’re done, you’ll have a cake that looks like it came from a bakery—golden layers separated by glossy fudge, ready to be sliced and served. The best part? It requires no special skills, just a few pantry staples and about an hour of hands-off baking time.
Whether you’re feeding a crowd or craving a solo dessert, this recipe delivers every time.
Serve warm with a scoop of vanilla ice cream or a dollop of whipped cream for the ultimate indulgence. The combination of warm cake and cold ice cream creates the perfect contrast, making this the ultimate comfort dessert. Let’s get baking!
Ingredients for hot fudge cake recipe with cake mix
Pantry staples and a few indulgent extras. This is your shortcut to bakery-style layers.
| Ingredient | Amount | Notes |
|---|---|---|
| Chocolate Cake Mix 🍫 | 1 box | Any quality brand (Betty Crocker or Duncan Hines) |
| Unsalted Butter 🧈 | 1 cup | Full-fat, softened for cake layers |
| Large Eggs 🥚 | 4 whole | Room temperature for even mixing |
| Milk 🥛 | 1 cup | Whole milk preferred for richness |
| Vanilla Extract 🌸 | 2 tsp | Pure extract, not imitation |
| All-Purpose Flour 🌾 | ½ cup | For extra moisture in cake layers |
| Semisweet Chocolate Chips 🍫 | 1 ½ cups | High-quality, not chips with additives |
| Heavy Whipping Cream 🥛 | 1 cup | Full-fat for fudge consistency |
| Granulated Sugar 🍚 | 1 cup | For fudge sweetness |
| Powdered Sugar 🍚 | ½ cup | For fudge smoothness |
| Salt 🧂 | ¼ tsp | Kosher or sea salt |
| Vanilla Ice Cream 🍦 | 2 cups | For serving (optional) |
| Whipped Cream 🥛 | ½ cup | For garnish (optional) |
[recipe_ingredient_scaler]
The chocolate cake mix is your secret weapon—Betty Crocker or Duncan Hines work perfectly. But here’s the game-changer: add extra butter and eggs to transform that dry mix into a moist, tender cake. I always grab full-fat butter from the store’s dairy case—it’s worth the extra few cents for that rich flavor. For the fudge, use high-quality chocolate chips like Ghirardelli or Nestlé Toll House—those with additives can make the fudge grainy. Pro tip: check your milk’s expiration date—old milk can make the cake taste off. Trust me, this is where flavor starts.
No vanilla extract? Vanilla bean paste works too—just use half the amount. Running low on chocolate chips? Chop a chocolate bar instead—just make sure it’s at least 60% cocoa. The whipped cream can be store-bought, but homemade whipped cream with a pinch of vanilla takes it to the next level. For the fudge, if you’re worried about lumps, microwave the heavy cream for 30 seconds first. And if you’re feeling fancy, swap the powdered sugar for confectioners’ sugar from the bulk section—it’s finer and dissolves better. Don’t skip the salt, though—it balances all that sweetness perfectly.
This cake keeps beautifully—3 days in the fridge covered tightly. The fudge layer stays gooey if you refrigerate it, but it’s even better the next day once everything settles. For serving, I always scoop ice cream right before slicing—warm cake and cold ice cream is the ultimate combo. If you’re prepping ahead, assemble the cake layers and refrigerate them, then bake just before serving. That way, the fudge stays warm and melty. Leftovers? Slice and freeze for up to 2 months—perfect for quick dessert nights.
Why You’ll Love This Recipe
- No-Fuss Moisture Boost: I love that this recipe sneaks in an extra ½ cup all-purpose flour—trust me, it’s the secret to cake layers that stay moist even after soaking up all that luscious fudge. No dry, crumbly cake here, just tender, rich bites that melt in your mouth.
- Restaurant-Quality Fudge: That homemade fudge made with 1 cup heavy whipping cream and 1½ cups semisweet chocolate chips? It’s the difference between a box mix cake and a dessert that feels like a splurge. The texture is thick, velvety, and just sweet enough—no artificial aftertaste, just pure chocolate satisfaction.
- Freezer-Friendly Leftovers: Honestly, this cake is my secret weapon for busy weeks. Bake it, slice it, and freeze it for up to two months. Pull out a piece when you’re craving something decadent but don’t want to start from scratch—it reheats beautifully and still tastes like it came fresh from the oven.
- Budget Dessert Win: Using a boxed chocolate cake mix cuts down on prep time and keeps costs low, but the real magic is in the fudge filling. You’re already using pantry staples like sugar and cream, so the only splurge is the high-quality chocolate chips—worth every penny for that melt-in-your-mouth texture.
Step-by-step instructions for hot fudge cake with cake mix
Here’s how to transform a simple box mix into decadent chocolate layers with a luscious fudge filling!
Prepare the Cake Batter for Moist Layers
In a large mixing bowl, combine the 1 box chocolate cake mix, the ½ cup all-purpose flour, and the ¼ tsp salt. This extra flour helps create ultra-moist layers that won’t dry out when combined with the fudge. In a separate bowl, beat the 1 cup unsalted butter, the 4 large eggs, the 1 cup milk, and the 2 tsp vanilla extract until smooth and creamy.
Gradually add the dry ingredients to the wet mixture, mixing on low speed just until combined. Avoid overmixing – you want a thick, slightly lumpy batter that will yield tender layers. Divide the batter evenly between two 9-inch round cake pans (about 1½ cups per pan) and set aside. This preparation ensures your cake will have that perfect cake-mix texture while still being rich enough to hold up to the fudge filling.
Create the Ultimate Chocolate Fudge Filling
In a medium saucepan, combine the 1 cup heavy whipping cream, the 1 cup granulated sugar, and the ½ cup powdered sugar. Bring to a gentle boil over medium heat, stirring constantly until the sugar completely dissolves. Remove from heat and let cool for 5 minutes – you want it warm but not hot when you add the chocolate.
Stir in the 1½ cups semisweet chocolate chips until completely melted and smooth. The mixture should be thick but pourable – if it’s too thin, let it cool another 2 minutes. This fudge filling is the star of the cake, so take your time getting it perfectly smooth. Once ready, pour the fudge evenly between the two cake layers, spreading it to the edges for maximum flavor in every bite.
Bake the Cake Layers to Perfection
Preheat your oven to 350°F. Grease the bottoms of your prepared cake pans with a thin layer of melted butter (using about 1 tablespoon). This prevents sticking and helps create that beautiful golden crust. Bake the cake layers for 25-30 minutes, or until a toothpick inserted in the center comes out clean. Rotate the pans halfway through baking for even browning.
Let the baked layers cool in the pans for 10 minutes before removing to wire racks. While they cool, prepare the whipped cream by beating the 1 cup heavy whipping cream until soft peaks form. This will be our final garnish, adding that restaurant-quality presentation. The cooling time is crucial – it allows the layers to set slightly so they hold up when stacked with the fudge filling.
Assemble the Ultimate Hot Fudge Cake
Place one cake layer on a serving plate and spread half of the fudge filling evenly over the top. Add the second cake layer and spread the remaining fudge on top. Gently press down to ensure everything is well combined. This assembly method creates that signature layered look while keeping the fudge perfectly centered in every slice.
Top with dollops of the whipped cream and serve immediately with 2 cups vanilla ice cream on the side. The contrast of warm cake with cold ice cream is pure magic! For an extra-special touch, lightly torch the whipped cream to create golden brown peaks. This cake is best enjoyed fresh from the oven when the fudge is still warm and gooey – it’s an experience you won’t want to miss!
Pro Tips For Making Hot Fudge Cake Recipe With Cake Mix
- Soften Butter Properly: I used to rush this and wonder why my cake layers turned out dense—those eggs and butter need to be truly room temp, not just sitting out for 10 minutes. Press the butter between two sheets of parchment in a single layer and let it sit for 30-45 minutes until it yields slightly when pressed with a finger. That’s the magic for fluffy layers that hold up to the fudge.
- Cool Fudge Slowly: The fudge filling is where people mess up—either too hot and seizing the chocolate or too cold and clumping. After melting the chocolate chips, let the mixture sit for exactly 5 minutes (no peeking!), then test by dipping a spoon in: it should coat the back smoothly but not drip like syrup. If it’s still too thin, wait another 2 minutes. Rushing this step makes the filling grainy.
- Grease Pans Right: Skimping on the butter here is a fast track to a stuck cake. Melt just 1 tablespoon of that 1 cup unsalted butter, brush it evenly on the pan bottoms, then dust with a tiny bit of flour—tap out the excess. The extra flour from the recipe’s ½ cup already helps, but this step guarantees the layers release cleanly. Trust me, you’ll curse yourself if you don’t.
- Press Layers Gently: This isn’t a smash cake—treat the assembly like layering lasagna. Place the first layer, spread half the fudge, then add the second layer lightly. Press down just enough to merge the layers, using a offset spatula to smooth the top. Overpressing flattens the fudge into a sad puddle; too little and it’ll slide apart when sliced. Find that happy medium, and every bite will have that perfect ratio of cake to gooey goodness.
Pro cooking tips for hot fudge cake recipe with cake mix
Mastering Cake Batter Texture
I’ve learned the hard way that overmixing is the enemy of tender cake layers. Mix your dry ingredients—½ cup all-purpose flour plus the cake mix—with just ¼ tsp salt until combined, then fold them into the wet mixture gently.
You want thick, slightly lumpy batter that looks almost like cookie dough. This ensures air pockets stay intact, giving you that light, fluffy texture. Pro tip: Use a spatula to scrape the bowl—don’t rely on a mixer. 🥄
The Secret to Perfect Fudge
The key to silky fudge lies in temperature control. After bringing the 1 cup heavy cream, 1 cup granulated sugar, and ½ cup powdered sugar to a gentle boil, let it cool for exactly 5 minutes before adding chocolate. This prevents seizing.
If your mixture looks too thin, let it sit another 2 minutes—patience here makes all the difference. Stirring constantly while melting the 1½ cups chocolate chips ensures no lumps. I always use Ghirardelli chips for that extra richness. 🍫
Oven Temperature Matters
Baking at 350°F is non-negotiable for even layers. I preheat my oven for 15 minutes to ensure consistent heat. Grease the bottoms of your pans with melted butter—1 tablespoon per pan—and don’t skip it! This prevents sticking and creates that golden crust.
Rotate the pans halfway through baking for even browning, and trust your toothpick test: it should come out clean. Letting the layers cool in the pans for 10 minutes is crucial—they’ll hold their shape better when assembling. 🔥
Layering Like a Pro
Press gently when stacking layers—don’t smash them! Spread the fudge evenly to the edges so every bite captures that rich chocolate. I use a serrated knife to slice through the cake layers cleanly, which makes assembly easier.
For a restaurant-worthy finish, dollop whipped cream on top and torch it lightly with a kitchen torch. The caramelized peaks add that extra touch of elegance. Trust me, it’s worth the effort. ✨
Avoiding Common Pitfalls
Old milk ruins the cake’s flavor, so check expiration dates before mixing. If your fudge turns out too thick, warm it gently in the microwave for 10-second intervals until pourable. And never skip the cooling step—rushing this makes the cake crumble when you try to slice it.
I’ve made all these mistakes, and they’re the ones that turn a good cake into a disaster. Better to take your time! 💡
Nutrition facts
Frequently asked questions
Why does this recipe use extra flour and butter?
The ½ cup all-purpose flour keeps the cake layers ultra-moist, preventing dryness when layered with the fudge. The 1 cup unsalted butter transforms the cake mix into tender, rich layers that hold up perfectly to the chocolate filling. This combo ensures each bite stays moist and indulgent.
Can I make the fudge filling ahead of time?
Yes! Prepare the fudge filling up to 2 days ahead and store it in an airtight container in the fridge. Let it warm slightly before spreading between cake layers. If it thickens too much, microwave in 10-second intervals until pourable. This saves time when baking day arrives.
What if my cake layers don’t look even when sliced?
Use a serrated knife to slice through the layers—it glides through better than a regular knife. If layers are uneven, gently press them together when assembling to create a flat surface. This ensures clean slices and even fudge distribution.
Is it okay to skip the whipped cream topping?
The whipped cream is optional and mostly for presentation. The cake and fudge alone are already decadent. If you prefer, just serve with 2 cups vanilla ice cream on the side for the perfect warm-cold contrast.

Trained in classic French technique but raised on slow-cooked ribs and spicy rubs, she blends culinary skill with smoke and soul.
- Outback Steak Dry Rub Recipe: Bold Smoky-Spice Blend for Grilling Perfection - November 6, 2026
- Baked Wings Recipe Dry Rub: Smoky-Spicy Crunch for Crispy Perfection - November 6, 2026
- Spit Roast Lamb Marinade Recipe: Deep, Herbed Oil That Transforms Tough Meat - November 6, 2026