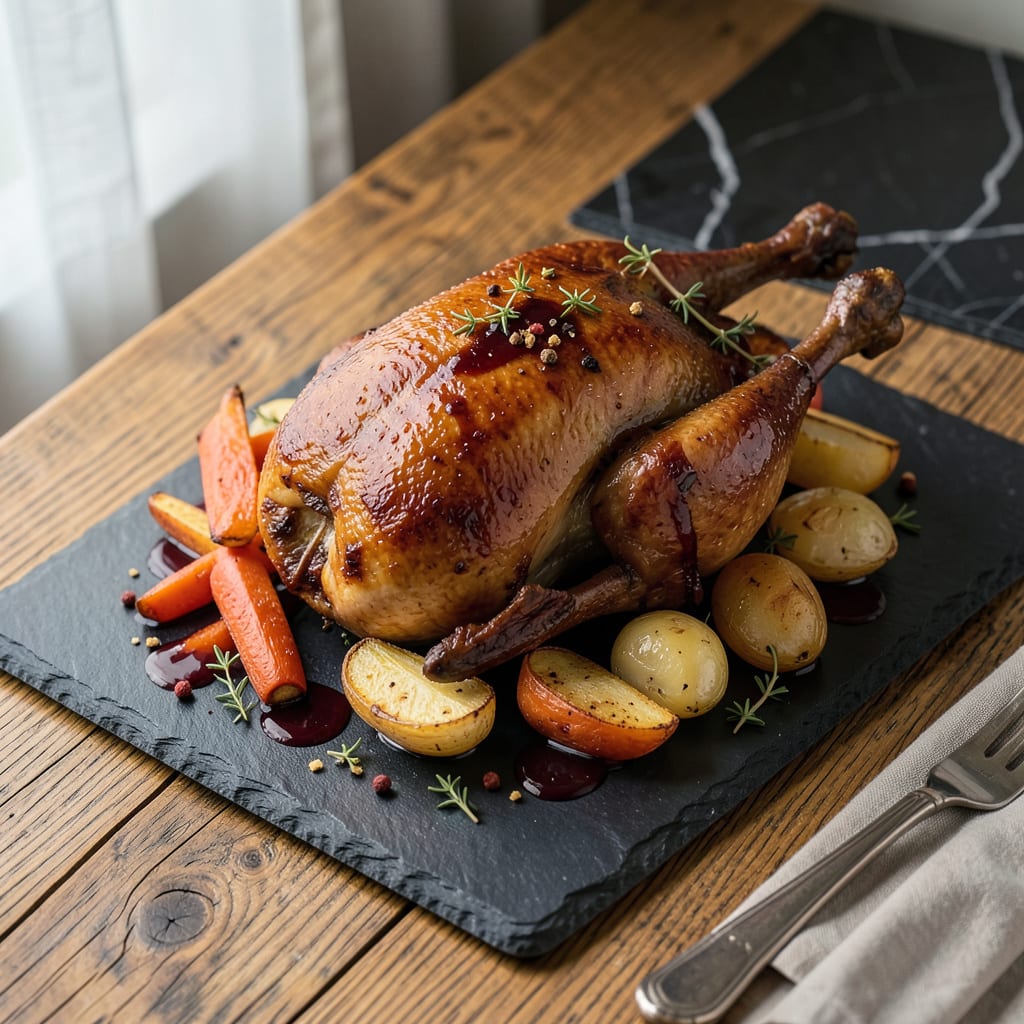
Cooking a frozen duck might seem intimidating, but I’ve got a foolproof method that delivers crispy skin and juicy meat every time. No fancy equipment needed—just patience and a few key techniques I learned the hard way after ruining my first three ducks.
The secret starts with proper thawing (never at room temperature!) and scoring the skin to render fat evenly. I’ll walk you through the exact fridge or cold-water thawing process, then show you how to achieve that perfect golden-brown crust while keeping the meat tender. This isn’t your average roast—duck needs special attention to balance fat and flavor.
What you’ll end up with is a showstopping centerpiece: crackling skin that shatters at the touch, rich meat that practically falls off the bone, and enough rendered fat to make the best roasted potatoes you’ve ever tasted. The aroma alone will have everyone gathering around the table before it’s even carved.
Fair warning: this isn’t a weeknight rush job. But the payoff—juicy slices with that coveted crispy skin—is worth every minute. Let me show you how to make this duck the star of your meal without the stress.
📚 In This Guide
- What You’ll Need
- Instructions
- Tips and Common Mistakes
What Youll Need
- ● 1 whole frozen duck (4–6 lbs, thawed overnight in the fridge or using the cold-water method) 🦆
- ● Kosher salt (2–3 tbsp for dry-brining, plus extra for seasoning)
- ● Black pepper (1 tsp, freshly ground)
- ○ Aromatics (optional but recommended): 1 onion (quartered)
- ● 1 orange or lemon (sliced, for brightness)
- ● 4 garlic cloves (smashed)
- ● 2 sprigs fresh thyme/rosemary
- ● Cooking fat (2 tbsp duck fat, butter, or neutral oil for basting)
- ○ Honey or maple syrup (optional) (1 tbsp, for glaze)
- ● Roasting pan + rack (or a wire rack over a baking sheet)
- ● Sharp chef’s knife or kitchen shears (for trimming excess fat)
- ● Meat thermometer (instant-read, critical for perfect doneness 🌡️)
- ● Basting brush or spoon
- ● Aluminum foil (to tent if skin browns too fast)
- ● Paper towels (for patting duck dry)
- ● Tongs (for safe handling)
- ○ Carving fork (optional, for serving)
Instructions for Cooking Frozen Duck to Perfection
Here’s my straightforward method that guarantees crispy skin and juicy meat every time.
Thaw the Duck Safely and Thoroughly
Begin by transferring your frozen duck from the freezer to the refrigerator. This is the safest method and preserves the meat’s quality. Allow at least 24 hours for a whole duck to thaw completely—never rush this process with warm water or the microwave, as this leads to uneven cooking.
You’ll know it’s ready when the duck feels pliable throughout and there are no icy spots remaining in the cavity. I always check by gently pressing the breast and legs—they should give slightly under pressure. Pat the entire surface completely dry with paper towels before proceeding; this is crucial for achieving crispy skin later.
Prepare the Duck for Even Cooking
Place the thawed duck on a clean work surface and remove any giblets from the cavity. I like to prick the skin all over with a sharp knife or fork—this helps render the fat during cooking. Be careful not to pierce the meat itself, just the skin and fat layer beneath it.
Season the cavity generously with salt and pepper, then tie the legs together with kitchen twine. This compact shape promotes even cooking and prevents the legs from drying out. Let the seasoned duck sit at room temperature for 30 minutes before cooking—this ensures more even results.
Start with Low Heat to Render Fat
Preheat your oven to 300°F. Place the duck breast-side up on a rack set in a roasting pan. This elevation allows air to circulate and fat to drip away. Roast uncovered for 2 hours, which gently renders the fat while cooking the meat through.
During this time, you’ll see fat collecting in the pan below. I recommend basting the duck occasionally with its own juices—this helps develop flavor and keeps the meat moist. The skin will start to tighten and turn golden, but we’ll crisp it further in the next step.
Finish with High Heat for Crispy Skin
Increase the oven temperature to 425°F. Continue roasting for another 30-45 minutes, until the skin turns deep golden brown and becomes crisp to the touch. You’ll hear it sizzling—that’s the sound of perfect crispiness developing.
The duck is done when an instant-read thermometer inserted into the thickest part of the thigh (without touching bone) reads 165°F. I always check multiple spots to ensure even doneness. The legs should wiggle easily when pulled, and the juices should run clear when pierced.
Rest and Carve for Maximum Juiciness
Transfer the cooked duck to a cutting board and let it rest for 15-20 minutes before carving. This waiting period allows the juices to redistribute throughout the meat instead of spilling out when you cut into it. Tent the duck loosely with foil to keep it warm.
To carve, first remove the legs by cutting through the joint where they meet the body. Then separate the thighs from the drumsticks. For the breast, make a long cut along the breastbone and slice against the grain. Each piece should reveal moist, tender meat beneath that crispy skin you worked so hard to achieve.
Tips and Common Mistakes
Cooking duck perfectly requires attention to detail—here’s what I’ve learned from years of practice to help you avoid common pitfalls.
Thawing Technique: The 24 hours of refrigerator thawing in Step 1 isn’t just about safety—it’s about texture. Rushing with warm water creates uneven thawing where the outer layers start cooking while the center stays frozen. I once tried to speed this up and ended up with rubbery breast meat and icy legs. Trust the slow thaw for even, juicy results throughout.
Fat Rendering Secret: During the 2 hours at 300°F in Step 3, don’t let that rendered fat go to waste. I collect it in a jar as it drips—it’s liquid gold for roasting potatoes or sautéing vegetables later. Just be sure to baste the duck occasionally with its own juices; this is what creates that rich, self-basting effect that keeps the meat incredibly moist.
Crispy Skin Test: When you increase to 425°F in Step 4, listen for the sizzle. That sound tells you the skin is properly rendering and crisping. The 30-45 minutes at this temperature isn’t just about color—it’s about texture. Press the skin gently with tongs; it should feel firm and resist your touch slightly when it’s truly crisp. This is where that perfect crunch develops.
Resting Wisdom: The 15-20 minutes rest in Step 5 might feel like torture when your duck smells so good, but it’s non-negotiable. I learned this the hard way when I carved too soon and watched all those beautiful juices pool on my cutting board instead of staying in the meat. Tent it loosely with foil—this keeps it warm while allowing steam to escape so the skin stays crisp.
Pro Tips for Cook Frozen Duck
- Cooking duck perfectly requires attention to detail—here’s what I’ve learned from years of practice to help you avoid…
- Thawing Technique: The 24 hours of refrigerator thawing in Step 1 isn’t just about safety—it’s about texture. Rushing…
- Fat Rendering Secret: During the 2 hours at 300°F in Step 3, don’t let that rendered fat go to waste. I collect it in…
Frequently Asked Questions
Got questions about cooking frozen duck? You’re not alone! Here are the most common concerns—and quick answers—to help you nail that perfect meal.
Do I need to thaw frozen duck before cooking?
Not necessarily! You can roast or braise duck straight from frozen, but add 50% more cooking time. For even cooking and crispier skin, thaw it overnight in the fridge (12–24 hours for a whole duck). Avoid microwave thawing—it can dry out the meat.
How long does it take to cook a frozen duck?
A whole frozen duck (4–6 lbs) takes 3–4 hours at 325°F (165°C). For duck breasts or legs, plan for 1.5–2 hours. Always use a meat thermometer—internal temp should hit 165°F (74°C) at the thickest part.
Can I cook frozen duck in an air fryer?
Yes! Air fry at 300°F (150°C) for 40–50 minutes, flipping halfway. Spray the skin with oil for extra crispiness. Best for smaller cuts (breasts, legs)—whole ducks won’t fit in most air fryers.
Why is my duck skin rubbery instead of crispy?
Rubbery skin usually means too much moisture or low heat. Pat the duck very dry before cooking, score the skin, and roast at 375°F+ (190°C+) for the last 30 minutes. A wire rack helps air circulate!
What’s the best alternative if I don’t have time to thaw?
Try sous vide (cook at 150°F (65°C) for 8–12 hours) or slow-cooker braising (6–8 hours on low). Both methods keep meat juicy. For a quick fix, sear frozen duck legs in a pan with oil and finish in the oven.
Cooking frozen duck doesn’t have to be intimidating—with the right prep and techniques, you can achieve crispy skin and tender meat every time! 🍽️ Whether you roast, pan-sear, or slow-cook it, patience and temperature control are your best friends. Now that you’ve got the know-how, grab that duck from the freezer and give it a try!
Ready to impress? Pair your perfectly cooked duck with a bold sauce or seasonal sides, and don’t forget to experiment with herbs and spices to make it your own. Happy cooking—your next delicious meal is just a thaw away! 🦆✨

Trained in classic French technique but raised on slow-cooked ribs and spicy rubs, she blends culinary skill with smoke and soul.
- Recipe for Boneless Pork Chops in Cast Iron Skillet: Sear and Baste to Juicy Perfection - October 3, 2026
- Recipe for Boneless Cross Rib Roast: Slow-Roasted Beef with Herb Crust - October 3, 2026
- Hamburgers in Sauce Recipe Crock Pot: Slow-Cooked Savory Delight - October 3, 2026