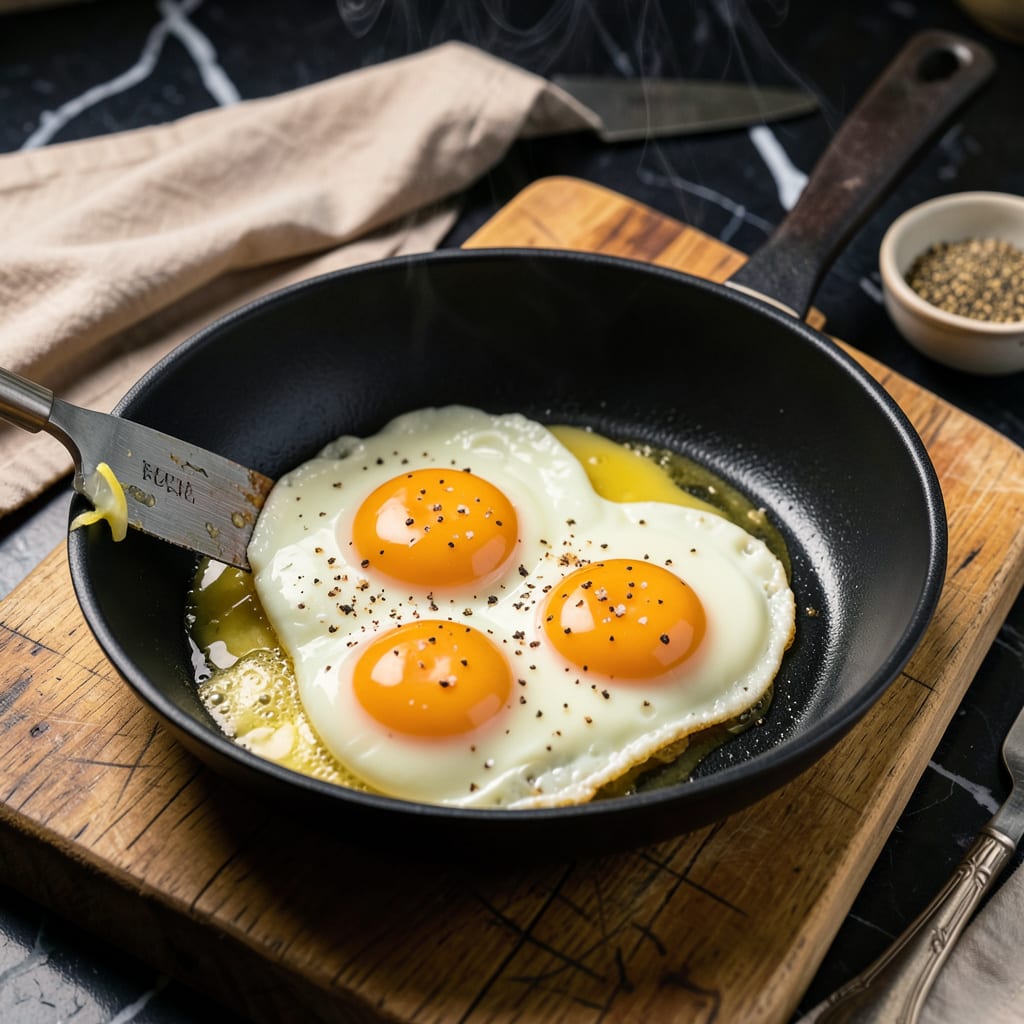
Mastering the art of flipping eggs transforms a simple breakfast into something extraordinary. As a chef who’s cooked thousands of eggs, I’ve refined this technique to ensure perfectly cooked yolks every time—whether you prefer them runny, jammy, or fully set. The difference between a broken yolk and a restaurant-quality egg comes down to precise timing and proper pan control.
The foundation of success lies in three critical elements: the right pan temperature, quality fat, and confident spatula work. A medium-hot nonstick skillet with a thin layer of butter or oil creates the ideal cooking surface. I learned early in my training that patience at this stage prevents sticking and ensures clean flips. The moment you see the egg whites set around the edges but the yolk still glistens, you’re ready for the most important step.
Flipping requires one swift, deliberate motion with a thin-edged spatula. Slide it under the egg, tilt the pan slightly toward you, then flip with a quick wrist flick. The egg should land gently—no tossing required. This method maintains yolk integrity while allowing you to control the final doneness. For over-easy eggs, cook just 15-20 seconds after flipping; for over-hard, let it set completely.
Common mistakes like breaking yolks or undercooked whites often stem from impatience or incorrect heat levels. My professional tip: practice with a sacrificial egg first to gauge your pan’s heat. Once mastered, this technique becomes second nature, elevating your breakfast game permanently. The satisfaction of a perfectly flipped egg with an intact, golden yolk is unmatched.
📚 In This Guide
- What You’ll Need
- Instructions
- Tips and Common Mistakes
What Youll Need
- ● Eggs: 2–4 large, fresh eggs (room temperature for best results 🥚).
- ● Cooking oil or butter: 1–2 tbsp (unsalted butter for richer flavor, neutral oil for high heat).
- ● Non-stick skillet: 8–10 inches (lightweight for easy flipping).
- ● Spatula: Thin, flexible edge (silicone or metal—no sharp corners!).
- ○ Bowl: Small, for cracking eggs (optional but handy).
- ● Salt & pepper: To taste (freshly ground works best).
- ● Plate: Pre-warmed (keeps eggs from cooling too fast).
- ○ Paper towels: For quick oil/butter cleanup (optional).
- ○ Timer: For precision (optional, but great for beginners ⏰).
- ● Confidence! A can-do attitude (the secret ingredient 😉).
Step-by-Step Instructions for Flipping Eggs
Mastering this simple technique will transform your breakfast game forever. Here’s exactly how to achieve perfect results every time.
Heat Your Pan Properly
Select a nonstick skillet that’s 8-10 inches in diameter and place it over medium-low heat. The right temperature is crucial—you want the pan hot enough to cook the eggs but not so hot that they burn. I always test the heat by sprinkling a few drops of water onto the surface. If they dance around and evaporate quickly, your pan is ready.
Add about 1 tablespoon of butter or neutral oil and swirl to coat the bottom evenly. Watch for the butter to melt completely and just begin to foam—that’s your visual cue that the pan is at the perfect temperature. Never let the butter turn brown, as this indicates the pan is too hot and your eggs will cook too quickly.
Crack and Cook the Eggs Gently
Crack your eggs into the pan one at a time, holding the shell close to the surface to prevent splattering. For perfect flipping, I recommend cooking no more than 2-3 eggs at once in a standard skillet—this gives you enough room to maneuver your spatula. Immediately reduce the heat to low to prevent the bottoms from overcooking before the tops set.
Observe the whites as they transform from translucent to opaque. You’ll notice the edges beginning to set first, then gradually working toward the center. This is when you should start preparing for the flip—when the whites are about 70% set but the yolks are still completely runny. The exact timing depends on your pan and heat, but this usually takes 2-3 minutes.
Execute the Perfect Flip
Here’s the moment that matters: Slide a thin, flexible spatula under one egg, getting as close to the yolk as possible without touching it. Tilt the pan slightly away from you at about a 30-degree angle—this helps prevent the yolk from breaking. With a quick but controlled wrist motion, flip the egg in one smooth movement, landing it back in the pan yolk-side up.
If you’re nervous about flipping, here’s my pro tip: Practice with a sacrificial egg first to gauge the right motion. The key is confidence—hesitation leads to broken yolks. Once flipped, let the eggs cook for just 30-60 seconds more. You want the whites fully set but the yolks still soft and jiggly. The residual heat will continue cooking them slightly after you plate them.
Plate and Serve Immediately
Transfer the eggs to your plate while they’re still slightly underdone—they’ll reach perfect doneness as they sit. I like to tilt the pan and use the spatula to guide each egg onto the plate in one motion, preserving that beautiful sunny-side-up presentation. Season immediately with flaky sea salt and freshly ground black pepper to enhance the flavors.
Serve your perfectly flipped eggs right away while the yolks are still warm and runny. The ideal result should have fully set whites with no browned edges, and yolks that are creamy but not completely liquid. If you’ve timed it right, cutting into the yolk should release a rich, golden center that’s warm but not hot—perfect for dipping toast or mixing into the whites.
Tips and Common Mistakes
Perfecting your egg-flipping technique comes down to mastering a few key details that most home cooks overlook.
Heat Control: The transition from medium-low heat in Step 1 to low heat in Step 2 is critical. I’ve found that reducing the heat immediately after adding the eggs prevents that frustrating scenario where the bottoms burn before the tops set. Watch for the butter to foam but never brown—that’s your visual cue you’ve nailed the temperature. Too many cooks rush this step and end up with rubbery whites and undercooked yolks.
The Technique That Changed Everything: When you’re preparing to flip in Step 3, the 30-degree pan tilt isn’t just for show—it creates a gentle slope that guides the egg onto the spatula without breaking the yolk. I practice this motion with an empty pan first to build muscle memory. The confidence comes from repetition, not luck. Remember, hesitation is the enemy of perfect eggs.
Timing Secret: Those 2-3 minutes in Step 2 aren’t arbitrary. The whites should be about 70% set when you flip—look for a thin layer of still-translucent egg in the very center. This is where most people go wrong by waiting too long. The residual heat will finish cooking the whites while keeping the yolks creamy, which is exactly what you want for that restaurant-quality result.
Equipment Recommendation: A thin, flexible spatula makes all the difference in Step 3. The ones with sharp edges let you slide right under the egg without disturbing the yolk. I keep a dedicated egg spatula in my kitchen—it’s that important. Pair it with an 8-10 inch nonstick skillet, and you’ve got the perfect setup for flawless flips every time.
Pro Tips for Flip Eggs
- Perfecting your egg-flipping technique comes down to mastering a few key details that most home cooks overlook.
- Heat Control: The transition from medium-low heat in Step 1 to low heat in Step 2 is critical. I’ve found that reduci…
- The Technique That Changed Everything: When you’re preparing to flip in Step 3, the 30-degree pan tilt isn’t just for…
Frequently Asked Questions
Got questions about flipping eggs like a pro? You’re not alone! Here are the most common concerns—and quick answers—to help you master the flip every time.
How do I know when it’s time to flip the egg?
Watch for the whites to set (no longer translucent) but the yolk to still jiggle slightly—usually 2-3 minutes on medium heat. If the edges crisp or the yolk firms up, you’ve waited too long! Flip just before the yolk loses its wobble for that perfect runny center.
What’s the best spatula for flipping eggs?
A thin, flexible stainless-steel or silicone spatula (like a fish spatula) works best. Avoid bulky plastic—it’ll tear the delicate yolk. Pro tip: Tilt the pan slightly to slide the spatula under the egg smoothly.
Can I flip eggs without a spatula?
Yes! Try the pan-toss method: Swirl the pan in a quick circular motion to loosen the egg, then flick your wrist upward to flip it in the air. Practice with a well-heated nonstick pan and low heat first—it takes confidence (and maybe a few scrambled eggs)!
Why do my eggs break when I flip them?
Three common culprits: high heat (causes sticking), insufficient oil/butter, or a dull spatula. Heat should be medium-low, and the pan must be properly greased. Let the egg release naturally before flipping—don’t force it!
Is flipping necessary? Can I cover the pan instead?
Flipping isn’t mandatory! For over-easy or sunny-side-up eggs, cover the pan with a lid for 1-2 minutes to cook the top with steam. Skip the flip if you’re nervous—but you’ll miss that classic diner-style sear on the yolk.
Mastering the art of flipping eggs is all about confidence, timing, and practice. With the right technique—whether you prefer sunny-side-up, over-easy, or medium yolks—you’re now ready to create restaurant-quality eggs at home every time. 🍳
Don’t stop here! Grab a spatula, heat up your pan, and start flipping. The more you practice, the more effortless (and delicious) your breakfasts will become. Happy cooking!

Trained in classic French technique but raised on slow-cooked ribs and spicy rubs, she blends culinary skill with smoke and soul.
- Recipe for Boneless Pork Chops in Cast Iron Skillet: Sear and Baste to Juicy Perfection - October 3, 2026
- Recipe for Boneless Cross Rib Roast: Slow-Roasted Beef with Herb Crust - October 3, 2026
- Hamburgers in Sauce Recipe Crock Pot: Slow-Cooked Savory Delight - October 3, 2026