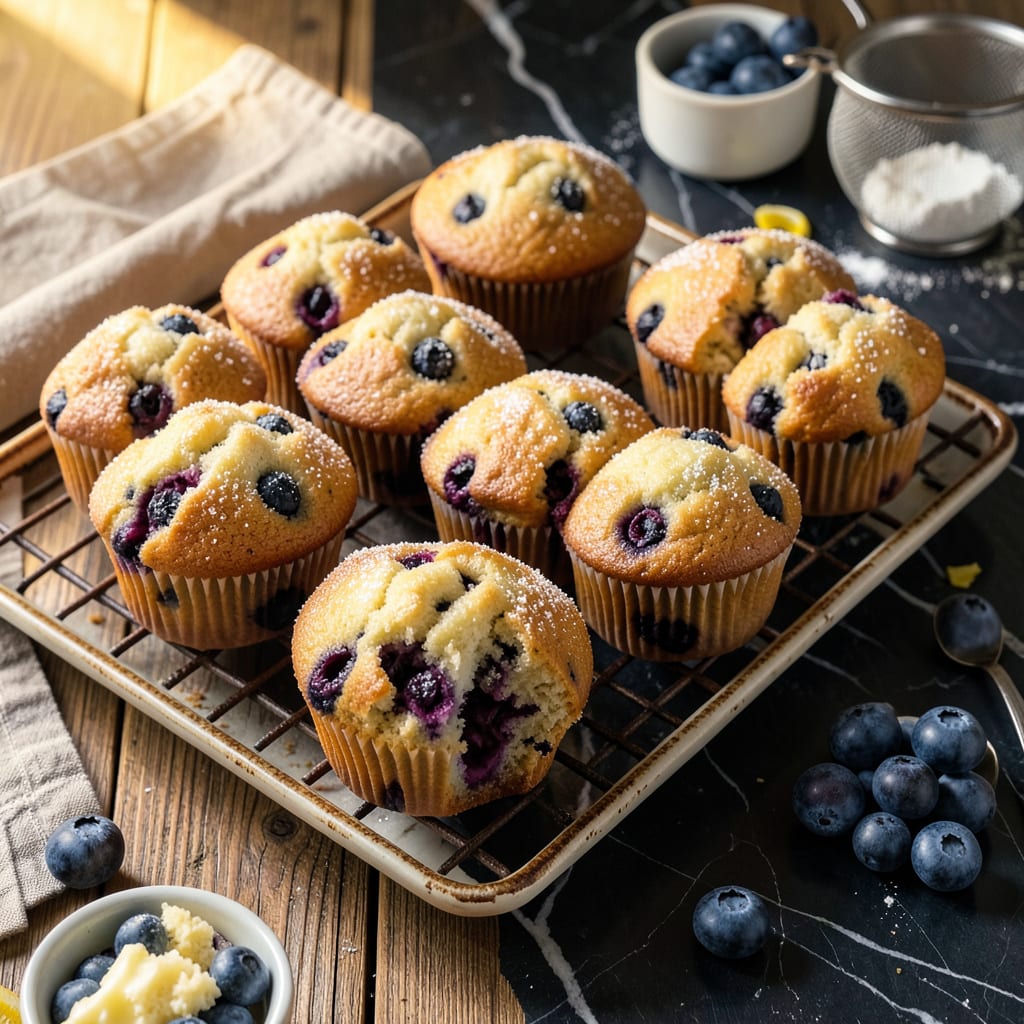
Nothing ruins a perfect blueberry muffin faster than all those juicy berries sinking to the bottom like little purple anchors. I’ve lost count of how many batches I’ve pulled from the oven only to find a sad, fruitless top layer with all the good stuff hiding at the base. The fix is simpler than you’d think—no fancy equipment or weird ingredients required.
After burning through more test batches than I care to admit, I landed on a foolproof method that keeps blueberries perfectly suspended. It comes down to two key moves: a quick flour toss for the berries and getting your batter thickness just right. The flour creates a light coating that helps the berries grip the batter instead of sliding through it like marbles in a jar.
What you’ll get is bakery-worthy muffins with berries distributed from top to bottom in every bite. No more sad, naked muffin tops or surprise fruit jackpots at the bottom. The texture stays tender, the berries stay put, and you’ll actually see those gorgeous purple specks throughout the entire muffin—not just in the first bite.
This works with fresh or frozen berries, and the technique translates to any muffin recipe you love. Let’s bake muffins that look as good as they taste—with blueberries exactly where they should be.
📚 In This Guide
- What You’ll Need
- Instructions
- Tips and Common Mistakes
What Youll Need
- ● Fresh or frozen blueberries – 1 to 1½ cups (rinsed, dried, and patted very dry if fresh 💧).
- ● All-purpose flour – 2 cups (plus 1–2 tbsp extra for coating blueberries).
- ● Baking powder – 2 tsp (fresh, not expired! ⏳).
- ● Salt – ½ tsp (fine sea salt or table salt).
- ● Granulated sugar – ¾ to 1 cup (adjust to taste).
- ● Unsalted butter – ½ cup (1 stick), melted and cooled or vegetable oil.
- ● Eggs – 2 large, room temperature.
- ● Vanilla extract – 1 tsp (pure for best flavor!).
- ● Milk or buttermilk – ½ cup (whole milk or plant-based alternatives work too).
- ● Mixing bowls – 2 medium (one for dry ingredients, one for wet).
- ● Whisk & spatula – For gentle folding (no overmixing! 🚫🥄).
- ● Muffin tin – Standard 12-cup, greased or lined with paper liners.
- ○ Fine-mesh sieve (optional) – For dusting blueberries with flour.
- ○ Kitchen scale (optional but helpful) – For precise flour measuring.
- ● Toothpick – To test doneness (clean = ready!).
Step-by-Step Instructions for Perfectly Distributed Blueberries in Muffins
Here’s the method I swear by—no more sunken berries, just beautiful muffins every time.
Prepare Your Blueberries Properly
Start by rinsing your blueberries gently under cool water, then pat them completely dry with paper towels. This removes any dirt and helps the coating stick better. I like to spread them out on a clean kitchen towel to air-dry for 5 minutes while I prep the other ingredients.
Here’s the thing—wet berries won’t hold the coating well, and excess moisture can throw off your batter’s consistency. You want them bone-dry before moving to the next step. This small effort makes a huge difference in preventing sinking.
Toss Blueberries in Flour Before Adding to Batter
Place your dried blueberries in a small bowl and sprinkle them with 1-2 tablespoons of flour from your muffin recipe. Gently toss them with your fingers until each berry is lightly coated—you should see a faint white dusting on all sides.
The flour creates a protective barrier that absorbs some of the berry’s moisture, preventing it from bleeding into the batter. This coating also helps the berries “grip” the surrounding muffin structure as it bakes, keeping them suspended instead of sinking to the bottom.
Fold Berries into Batter at the Right Moment
Prepare your muffin batter as usual, but wait until the very end to add your coated blueberries. I like to mix my wet and dry ingredients until they’re just combined—you should still see a few flour streaks. Then, using a silicone spatula, gently fold in the blueberries with no more than 8-10 strokes.
Overmixing at this stage will knock the air out of your batter and cause the berries to break, releasing their juice. The batter should look slightly lumpy with berries evenly distributed throughout. If you notice any berries clumping together, separate them gently with your spatula.
Fill Muffin Cups Strategically
Scoop your batter into prepared muffin cups, filling each about ¾ full. Here’s my trick: after filling all the cups, I go back and gently press any visible blueberries that are floating on top down into the batter with a clean fingertip. This ensures they’re distributed throughout the muffin rather than all ending up on the surface.
Don’t press too hard—you don’t want to deflate the batter. Just a light touch to nudge any exposed berries below the surface. This step takes 10 seconds per muffin but makes a noticeable difference in the final distribution.
Bake Immediately and Check for Doneness
Place your muffins in the preheated oven and bake according to your recipe’s instructions. I’ve found that 375°F works well for most blueberry muffin recipes, producing a golden top without overcooking the berries. Begin checking for doneness at the 15-minute mark by inserting a toothpick into the center.
Your muffins are done when the toothpick comes out clean or with just a few moist crumbs (no wet batter). The tops should be light golden brown, and the muffins should spring back when gently pressed. Let them cool in the pan for 5 minutes before transferring to a wire rack—this brief rest helps set the structure so your beautifully distributed berries stay put when serving.
Tips and Common Mistakes
These small but mighty adjustments will transform your muffins from berry-bottomed disappointments to bakery-worthy treats every time.
Drying is Everything: I can’t stress enough how critical those 5 minutes of air-drying in Step 1 really are. Confession: I used to skip this step and wondered why my berries still sank. Wet blueberries create pockets of moisture in your batter that weigh them down during baking. Spread them on a clean towel and let them dry completely—you should see no visible moisture when you proceed to coating.
Flour Coating Technique: When tossing berries with that 1-2 tablespoons of flour in Step 2, use your fingers to gently roll each berry rather than just stirring. You want an even, barely-there dusting on every surface. Here’s what nobody tells you—the flour doesn’t just prevent sinking; it creates microscopic “anchors” that help berries cling to the batter as it rises. Don’t be tempted to use more flour thinking it’ll work better; too much creates gummy pockets in your muffins.
Folding Method Matters: Those 8-10 strokes mentioned in Step 3 aren’t arbitrary. Real talk: I ruined three batches before realizing that overmixing releases too much starch from the flour, creating a dense batter that can’t support the berries. Use a silicone spatula (it’s more gentle than metal) and fold just until the berries are distributed. The batter should still look slightly uneven—that’s perfect. If you see streaks of flour, you’re doing it right.
Oven Position Tip: For that ideal 375°F bake in Step 5, position your rack in the center of the oven. Here’s the thing: top rack can cause berries near the surface to overcook before the muffin sets, while bottom rack might leave you with soggy bottoms. Center placement ensures even heat distribution so your berries stay suspended throughout baking. If your oven runs hot, start checking at 13 minutes instead of 15 to prevent over-browning.
Pro Tips for Keep Blueberries From Sinking In Muffins
- These small but mighty adjustments will transform your muffins from berry-bottomed disappointments to bakery-worthy t…
- Drying is Everything: I can’t stress enough how critical those 5 minutes of air-drying in Step 1 really are. Confessi…
- Flour Coating Technique: When tossing berries with that 1-2 tablespoons of flour in Step 2, use your fingers to gentl…
Frequently Asked Questions
Can I use frozen blueberries instead of fresh ones?
Just don’t thaw them first—toss frozen blueberries directly in flour (or your chosen coating) to prevent bleeding and sinking. They may slightly extend baking time, so keep an eye on your muffins after the minimum bake time.
What if I don’t have flour to coat the blueberries? What are other options?
No flour? No problem! Try these swaps:
- Cornstarch or arrowroot powder (lightest texture)
- Instant pudding mix (adds flavor + thickness)
- Crushed cornflakes or oat flour (for a crunchy twist)
Avoid heavy coatings like breadcrumbs—they can weigh berries down.
How far in advance can I prep the blueberries before baking?
For best results, coat blueberries right before folding into the batter (max 10 minutes ahead). If prepped too early, moisture from the berries can make the coating soggy, reducing its anti-sinking power.
Why did my blueberries still sink even after coating them?
Three common culprits:
- Overmixing the batter—stir just until combined to avoid dense muffins.
- Underfilled muffin cups—fill ¾ full so berries don’t sink to the thin bottom.
- Old leavening agents—check your baking powder/soda’s expiry date!
Do I need to adjust baking time if I use the flour-coating trick?
Not usually! The thin flour layer won’t affect bake time, but always test doneness with a toothpick. If using extra juice-heavy berries, add 1–2 minutes to ensure the centers set properly.
Now you’ve got the secret to perfectly suspended blueberries in every muffin batch! 🫐✨ By tossing them in flour, using fresh berries, or adjusting your batter’s thickness, you’ll say goodbye to sunken fruit forever. The best part? These simple tweaks take almost no extra time but make a huge difference in texture and presentation.
Ready to put your new skills to the test? Grab your mixing bowl and try the flour-coating method on your next batch—your muffins (and anyone lucky enough to taste them) will thank you! For even more baking hacks, check out our guide on making muffins extra moist.

Trained in classic French technique but raised on slow-cooked ribs and spicy rubs, she blends culinary skill with smoke and soul.
- Recipe for Boneless Pork Chops in Cast Iron Skillet: Sear and Baste to Juicy Perfection - October 3, 2026
- Recipe for Boneless Cross Rib Roast: Slow-Roasted Beef with Herb Crust - October 3, 2026
- Hamburgers in Sauce Recipe Crock Pot: Slow-Cooked Savory Delight - October 3, 2026