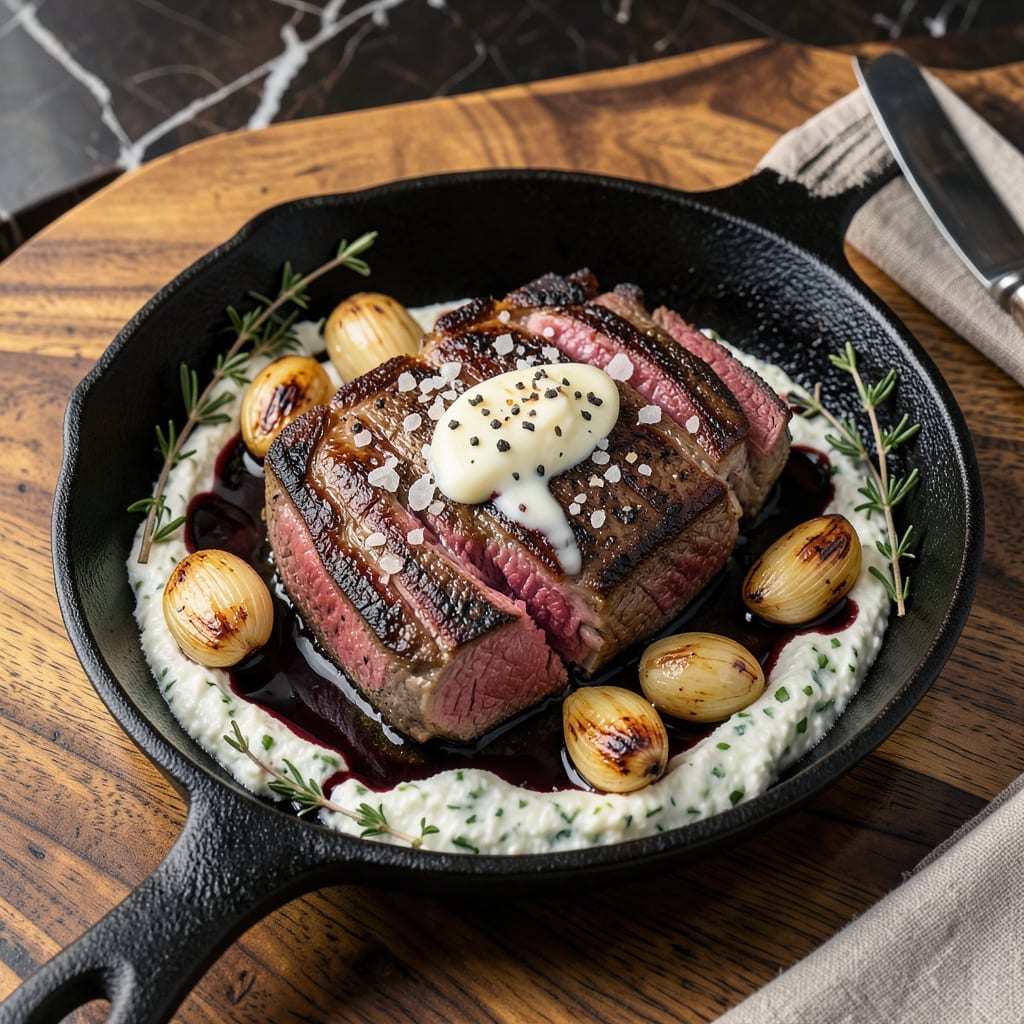
Let me tell you something about grass-fed beef—it’s leaner, cleaner, and packed with more omega-3s than grain-fed, but that leanness can make it taste bland if you don’t know how to handle it. I’ve cooked my fair share of tough, dry grass-fed steaks before figuring out the secrets to unlocking its best flavor. The difference comes down to understanding its unique characteristics and working with them, not against them.
First rule: never treat grass-fed beef like conventional beef. It cooks faster and benefits from lower heat because of its lower fat content. I’ve found that dry brining for at least 12 hours (sometimes 24) makes all the difference—it seasons deep into the meat while helping it retain moisture. And here’s the thing—grass-fed beef actually responds better to bold marinades with acidic components like vinegar or citrus, which help break down its tighter muscle fibers.
The cooking method matters just as much as the prep. I swear by reverse searing for thicker cuts—start low in the oven, then finish with a quick sear in a screaming hot pan. This gives you that perfect crust while keeping the inside tender. For burgers or ground beef, mixing in a bit of fat (like butter or tallow) prevents dryness and adds richness that grass-fed beef naturally lacks.
Don’t forget the finishing touches. A pat of herb butter melting over a hot steak or a sprinkle of flaky salt right before serving elevates the natural beefy flavor. I’ve also found that umami boosters—think soy sauce in marinades or mushrooms as a side—make grass-fed beef taste even more satisfying. Once you nail these techniques, you’ll wonder why you ever settled for less flavorful meat.
📚 In This Guide
- What You’ll Need
- Instructions
- Tips and Common Mistakes
What Youll Need
- ● Grass-fed beef cuts – 1–2 lbs per meal (choose ribeye, sirloin, or ground beef for best results). Pro tip: Opt for USDA-certified grass-fed with marbling for tenderness. 🥩
- ● High-quality salt – Kosher or sea salt (1–2 tbsp for seasoning). Avoid iodized table salt!
- ● Freshly ground black pepper – 1–2 tsp (coarse grind preferred for texture).
- ● High-smoke-point oil – Avocado, ghee, or refined coconut oil (2–3 tbsp for searing).
- ● Butter or tallow – 2–4 tbsp (unsalted butter or beef tallow for basting).
- ○ Aromatics (optional but recommended) – Garlic (3–4 cloves), rosemary, thyme, or crushed red pepper flakes (1 tsp).
- ○ Acidic tenderizer (optional) – Lemon juice, apple cider vinegar, or red wine (2–3 tbsp for marinating).
- ● Cast-iron skillet or heavy pan – 10–12″ for even heat distribution.
- ● Meat thermometer – Instant-read (critical for perfect doneness).
- ● Tongs or meat fork – Avoid piercing the beef to retain juices!
- ● Resting plate or cutting board – With grooves to catch juices.
- ● Aluminum foil or butcher paper – For resting post-cook (5–10 mins).
- ● Sharp chef’s knife – 8″ for slicing against the grain. 🔪
Instructions for Enhancing Grass-Fed Beef Flavor
These simple but powerful techniques will transform your grass-fed beef into a tender, flavorful masterpiece.
Dry Brine for Maximum Flavor Penetration
Begin by patting the beef completely dry with paper towels. This removes surface moisture that would otherwise dilute your seasoning and prevent proper browning. I use a triple layer of paper towels and press firmly on all surfaces until no dampness remains.
Apply kosher salt generously to all sides of the beef—about 1 teaspoon per pound works well. The salt will draw out moisture initially, then reabsorb with the dissolved proteins, creating a flavorful crust. Place the salted beef on a wire rack set over a plate and refrigerate uncovered for 12-24 hours. This dry brining process seasons the meat deeply while also improving its ability to retain juices during cooking.
Bring to Room Temperature and Apply Fat
Remove the beef from the refrigerator 1-2 hours before cooking to allow it to come to room temperature. Cold meat cooks unevenly and can develop a gray band just beneath the surface. While it warms, prepare your seasoning blend—freshly ground black pepper, garlic powder, and smoked paprika work beautifully with grass-fed beef’s natural flavor.
Just before cooking, rub the beef with a thin layer of high-smoke-point oil like avocado or grapeseed oil. This creates an initial barrier that helps prevent the lean meat from drying out during cooking. The oil also promotes better browning and crust formation. Apply your seasoning blend generously, pressing it into the meat so it adheres well during cooking.
Use the Reverse Sear Method for Perfect Doneness
Preheat your oven to 250°F. Place the beef on a wire rack set over a baking sheet and cook until the internal temperature reaches 10-15°F below your target doneness (about 110°F for medium-rare). This low-and-slow approach gently cooks the meat without overcooking the exterior, which is especially important for lean grass-fed beef.
While the beef cooks, heat a heavy skillet (cast iron works best) over high heat until it’s smoking hot. Add butter and aromatic herbs like rosemary and thyme. When the beef reaches the target internal temperature, transfer it to the hot skillet and sear for 1-2 minutes per side until a deep, flavorful crust forms. Baste the beef with the herb butter continuously during searing for added richness.
Rest Properly and Slice Against the Grain
Transfer the cooked beef to a cutting board and tent loosely with foil. Let it rest for 10-15 minutes—this crucial step allows the muscle fibers to relax and reabsorb the juices that have been driven to the center during cooking. For grass-fed beef, proper resting makes an even bigger difference in juiciness than with conventional beef.
Before slicing, identify the direction of the grain (the lines of muscle fiber running through the meat). Using a sharp knife, slice perpendicular to these lines into ¼-inch thick pieces. Cutting against the grain shortens the muscle fibers, making each bite more tender. Serve immediately while still warm, accompanied by any pan juices or a simple sauce made from the searing butter and herbs.
Tips and Common Mistakes
These techniques will elevate your grass-fed beef from good to extraordinary, with insights I’ve gathered from years of working with leaner cuts.
Dry Brining Precision: The 12-24 hour dry brine window in Step 1 isn’t just about time—it’s about transformation. I’ve found that 24 hours yields the most dramatic flavor enhancement, as the salt has time to fully penetrate and restructure the meat’s proteins. For thicker cuts (over 1.5 inches), don’t hesitate to extend to the full 24 hours. The surface will develop a tacky texture called a pellicle, which creates that coveted crispy crust during searing.
Temperature Transition: That 1-2 hour rest at room temperature in Step 2 makes all the difference with grass-fed beef’s lean nature. Here’s what nobody tells you—this isn’t just about even cooking. As the meat warms, the muscle fibers relax slightly, which means they’ll contract less violently when hit with heat, preserving more juices. I use this time to prepare my seasoning blend and get my oven preheating to that crucial 250°F mark mentioned in Step 3.
Reverse Sear Mastery: The 1-2 minute sear in Step 3 requires your full attention. Grass-fed beef’s lower fat content means it can go from perfectly seared to overcooked in seconds. Watch for the moment when the butter stops bubbling violently and starts to brown—that’s your cue to start basting. I like to tilt the pan slightly to pool the butter, then spoon it continuously over the beef to build layers of flavor. This technique creates a crust that rivals any prime cut.
Resting Revelation: Those 10-15 minutes of resting time in Step 4 aren’t just a suggestion—they’re your insurance policy against dry beef. I learned this the hard way after slicing into a beautiful roast too soon and watching all the juices run out. For grass-fed beef, I err toward the full 15 minutes. The meat will actually continue cooking internally during this time (carryover cooking), rising about 5°F, so factor that into your target temperature.
Pro Tips for Make Grass Fed Beef Taste Better
- These techniques will elevate your grass-fed beef from good to extraordinary, with insights I’ve gathered from years …
- Dry Brining Precision: The 12-24 hour dry brine window in Step 1 isn’t just about time—it’s about transformation. I’v…
- Temperature Transition: That 1-2 hour rest at room temperature in Step 2 makes all the difference with grass-fed beef…
Frequently Asked Questions
How long should I dry-brine grass-fed beef before cooking?
For best results, dry-brine (salt) grass-fed beef for at least 1 hour per inch of thickness—ideally overnight (12-24 hours). This gives the salt time to penetrate deeply, tenderize the meat, and enhance flavor. For steaks, 2-4 hours works in a pinch!
Why does grass-fed beef taste “gamey” or tough compared to grain-fed?
Grass-fed beef has less fat marbling and a richer, earthier flavor due to its diet. To reduce toughness, avoid overcooking (aim for medium-rare) and use acidic marinades (like lemon or vinegar) to break down fibers. Slow-cooking methods (braising, sous vide) also work wonders!
Can I use the same seasoning for grass-fed beef as grain-fed?
Yes, but bold flavors work better! Grass-fed beef’s leaner profile benefits from robust seasonings like garlic, rosemary, smoked paprika, or coffee rubs. Don’t skimp on fat—baste with butter or tallow while cooking to add richness.
What’s the best cooking method for grass-fed burgers to keep them juicy?
Mix in 1-2 tbsp cold butter or grated onion per pound of meat to add moisture. Cook over medium-high heat (not scorching) for 3-4 minutes per side, and avoid pressing the patties. Let rest 5 minutes before serving!
Are there quick fixes if my grass-fed steak turns out dry or bland?
Slice it thin, then drizzle with warm herb butter, chimichurri, or a red wine reduction. For dryness, serve with a side of au jus or a creamy sauce (like béarnaise). Next time, try a reverse sear (low oven first, then sear) for even doneness!
With the right techniques—like proper seasoning, low-and-slow cooking, and smart marinades—you can turn grass-fed beef into a juicy, flavor-packed masterpiece every time. 🌿🔥 Remember, its leaner profile just needs a little extra love to shine!
Ready to put these tips to the test? Grab a cut of grass-fed beef, pick your favorite method, and get cooking. Your taste buds (and dinner guests) will thank you!

Trained in classic French technique but raised on slow-cooked ribs and spicy rubs, she blends culinary skill with smoke and soul.
- Recipe for Boneless Pork Chops in Cast Iron Skillet: Sear and Baste to Juicy Perfection - October 3, 2026
- Recipe for Boneless Cross Rib Roast: Slow-Roasted Beef with Herb Crust - October 3, 2026
- Hamburgers in Sauce Recipe Crock Pot: Slow-Cooked Savory Delight - October 3, 2026