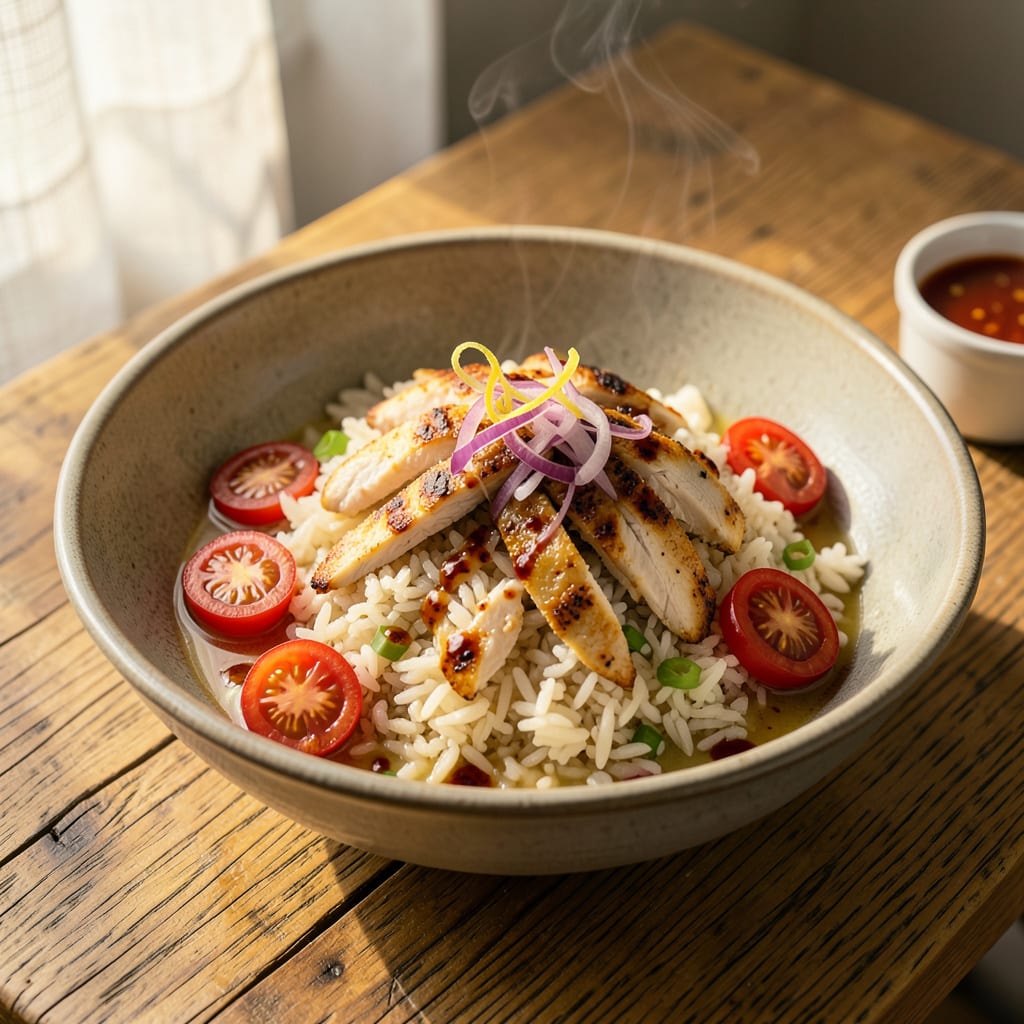
I’ll be real with you—instant rice doesn’t have to taste like a sad afterthought. After years of doctoring up quick meals (including many late-night kitchen experiments), I’ve cracked the code for turning those plain grains into something actually exciting. The fix starts before you even add water: toasting the rice for just 2 minutes in a dry pan unlocks nutty depth you didn’t know was possible.
Here’s where it gets interesting—your cooking liquid makes all the difference. Swap water for chicken broth (or veggie broth for plant-based versions) and add a splash of soy sauce or miso paste while it simmers. I toss in minced garlic and onion powder too, because why waste a perfectly good pot of rice on blandness? These small moves create layers of flavor without extra effort.
The real magic happens after cooking. Fluff with a fork, then fold in toasted nuts for crunch or fresh herbs for brightness. I’ve been known to stir in lemon zest or chili crisp depending on the meal—because instant rice should work as hard as you do. Suddenly, you’ve got a side dish that steals the show from whatever main you’re serving.
This isn’t just for sides either. Use your upgraded rice as a base for grain bowls, stuff it into peppers, or serve it under stir-fries. The best part? All these tweaks still keep it ready in under 15 minutes—just with way better results. No fancy equipment, no complicated steps, just smart upgrades for rice that actually tastes like something.
📚 In This Guide
- What You’ll Need
- Instructions
- Tips and Common Mistakes
What Youll Need
- ● Required: 1 cup instant white or brown rice (check package for cook time—5-10 mins is ideal)
- ● 1–1¼ cups water or broth (low-sodium if using broth)
- ● 1 tbsp butter, oil, or ghee (for richness)
- ● ½ tsp salt (adjust to taste)
- ● Medium saucepan with a tight-fitting lid (or a rice cooker)
- ● Fork (for fluffing—no sticky clumps here!)
- ○ Optional (but game-changing!): 1 clove garlic (minced) or ½ tsp garlic powder
- ● 1 tbsp soy sauce, lemon juice, or vinegar (for depth)
- ● ¼ tsp turmeric, paprika, or cumin (for color/flavor)
- ● 2 tbsp chopped herbs (cilantro, parsley, or green onions)
- ● Cheese grater (if adding Parmesan or citrus zest)
Step-by-Step Instructions for Perfect Instant Rice
Let me show you how to transform basic instant rice into something restaurant-worthy in minutes.
Choose the Right Cooking Liquid
First, replace the water with something more flavorful. I always use low-sodium chicken broth or vegetable stock in a 1:1 ratio with the rice. This simple swap adds depth without overpowering the dish. For even more flavor, try using coconut milk (diluted with water) for Asian-inspired dishes or tomato juice for Spanish-style rice.
Bring your chosen liquid to a rolling boil before adding the rice. The hotter the liquid when you start, the better the rice will absorb it. I’ve found this prevents that gummy texture that sometimes happens with instant rice. Don’t skip this step—it makes a noticeable difference in the final texture.
Toast the Rice for Nutty Flavor
Here’s the secret step most people miss: toast your rice first. Heat 1 tablespoon of butter or oil in your pot over medium heat. Add the rice and stir constantly for 2-3 minutes until you smell a nutty aroma and see the grains become slightly translucent at the edges.
This toasting process creates a protective barrier around each grain, preventing mushiness while adding incredible depth of flavor. Watch carefully—you want light golden color, not brown. The moment you catch that first whiff of toasted rice, you’re ready for the next step. This technique works particularly well with basmati or jasmine instant rice varieties.
Master the Cooking Process
Once your rice is toasted, immediately add your boiling liquid. Give it one quick stir, then cover with a tight-fitting lid. Here’s the critical part: reduce the heat to low and set your timer for 1 minute less than the package instructions. Instant rice cooks faster when toasted first.
Resist the urge to peek or stir during cooking. Every time you lift that lid, you’re letting out precious steam that’s essential for fluffy rice. When the timer goes off, remove from heat but keep covered for an additional 5 minutes. This resting period allows the grains to fully absorb any remaining liquid and steam to perfection.
Fluff and Finish Like a Pro
After resting, uncover the rice and use a fork to gently fluff it from the bottom up. I prefer a fork over a spoon because it separates the grains without crushing them. As you fluff, drizzle in 1 teaspoon of lemon juice or rice vinegar—this brightens the flavor and prevents sticking.
For extra richness, fold in 1 tablespoon of butter or olive oil at the end. This final step adds a luxurious mouthfeel and helps the rice hold its texture longer. Taste and adjust seasoning with salt if needed, but remember your cooking liquid already contained salt, so go easy.
Add Fresh Elements for Brightness
Right before serving, stir in fresh elements to contrast with the rice’s soft texture. I love adding chopped cilantro, green onions, or toasted nuts. For herby rice, mix in finely chopped parsley or dill. These fresh additions make the dish taste like you spent hours cooking.
If you’re serving this as a side, consider topping with crispy fried shallots or toasted coconut flakes for crunch. The contrast in textures elevates the entire dish. Remember, these finishing touches should be added just before serving to maintain their freshness and crunch.
Tips and Common Mistakes
These small but powerful techniques will transform your instant rice from basic to extraordinary.
Toasting Technique: When toasting the rice in Step 2, don’t rush those 2-3 minutes over medium heat. The goal is to develop a delicate nutty aroma without browning the grains. I’ve found that constantly stirring with a wooden spoon prevents hot spots while allowing the rice to toast evenly. This step creates a flavor foundation that makes your rice taste like it simmered for hours.
Liquid Temperature: In Step 1, bringing your cooking liquid to a full rolling boil before adding the rice is non-negotiable. The rapid absorption of hot liquid is what prevents that dreaded gummy texture. I always use a clear glass measuring cup to monitor the boil—you should see steady bubbles breaking the surface before adding your toasted rice.
Resting Period: The 5 minutes of resting time in Step 3 might seem unnecessary, but it’s when the magic happens. Keep the lid on tight—this allows the residual steam to finish cooking the rice gently from the inside out. I’ve tested skipping this step, and the difference in texture is dramatic: rested rice is uniformly fluffy, while rushed rice has unevenly cooked grains.
Final Fluffing: When fluffing in Step 4, use a fork and work from the bottom up in gentle lifting motions. This separates the grains without compressing them. I like to tilt the pot slightly while fluffing to create more air pockets, which gives that coveted light, restaurant-quality texture. The lemon juice or vinegar at this stage isn’t just for flavor—it actually helps prevent the grains from sticking together as they cool.
Pro Tips for Make Instant Rice Better
- These small but powerful techniques will transform your instant rice from basic to extraordinary.
- Toasting Technique: When toasting the rice in Step 2, don’t rush those 2-3 minutes over medium heat. The goal is to d…
- Liquid Temperature: In Step 1, bringing your cooking liquid to a full rolling boil before adding the rice is non-nego…
Frequently Asked Questions
Can I use broth instead of water for instant rice?
Swapping water for chicken, vegetable, or beef broth adds depth of flavor. Use the same 1:1 ratio (e.g., 1 cup broth per 1 cup rice). For extra richness, mix half broth and half water. Just watch for added salt in store-bought broths—adjust seasoning accordingly!
Why does my instant rice turn out mushy or sticky?
Overcooking or using too much liquid is usually the culprit. Stick to the package’s water-to-rice ratio (typically 1:1 or 1:1.25), and let it rest covered for 5–10 minutes off heat. Fluff with a fork before serving. If it’s still gummy, rinse the rice before cooking to remove excess starch.
How can I make instant rice taste like restaurant-style fried rice?
Sauté cooked rice in a hot pan with 1–2 tbsp oil, garlic, veggies, and soy sauce (or oyster sauce). Push the rice to one side, scramble an egg in the empty space, then mix everything together. Finish with green onions and a dash of sesame oil for that takeout flavor!
Is there a way to make instant rice healthier?
Boost nutrition by stirring in quinoa, riced cauliflower, or lentils (cook separately). Add fiber with chopped veggies (spinach, peas, or carrots) or protein like beans or shredded chicken. Opt for low-sodium broth and skip butter—use olive oil or avocado oil instead.
Can I cook instant rice in a microwave?
Yes! Combine rice and water (or broth) in a microwave-safe bowl, cover with a damp paper towel, and microwave on high for 5–7 minutes (check package instructions). Let it sit covered for 2–3 minutes, then fluff. Pro tip: Add a splash of lemon juice to prevent dryness!
With just a few simple tweaks, your instant rice can go from meh to amazing! 🎉 Whether it’s adding broth, toasting the grains, or mixing in fresh herbs, small changes make a big difference in flavor and texture. Now that you’ve got the secrets, it’s time to put them to the test—your next meal could be the best one yet!
Ready to level up? Try one of these tricks tonight and taste the difference for yourself. Happy cooking! 🍚✨

Trained in classic French technique but raised on slow-cooked ribs and spicy rubs, she blends culinary skill with smoke and soul.
- Recipe for Curried Lamb Chops: Spice-Rubbed and Pan-Seared to Succulence - October 3, 2026
- Recipe for Boneless Leg of Lamb Roast in the Oven: Herb-Crusted and Rosy Pink Inside - October 3, 2026
- Meat Loaf Recipe With Beef And Pork: Homestyle Blend With Rich Gravy - October 3, 2026