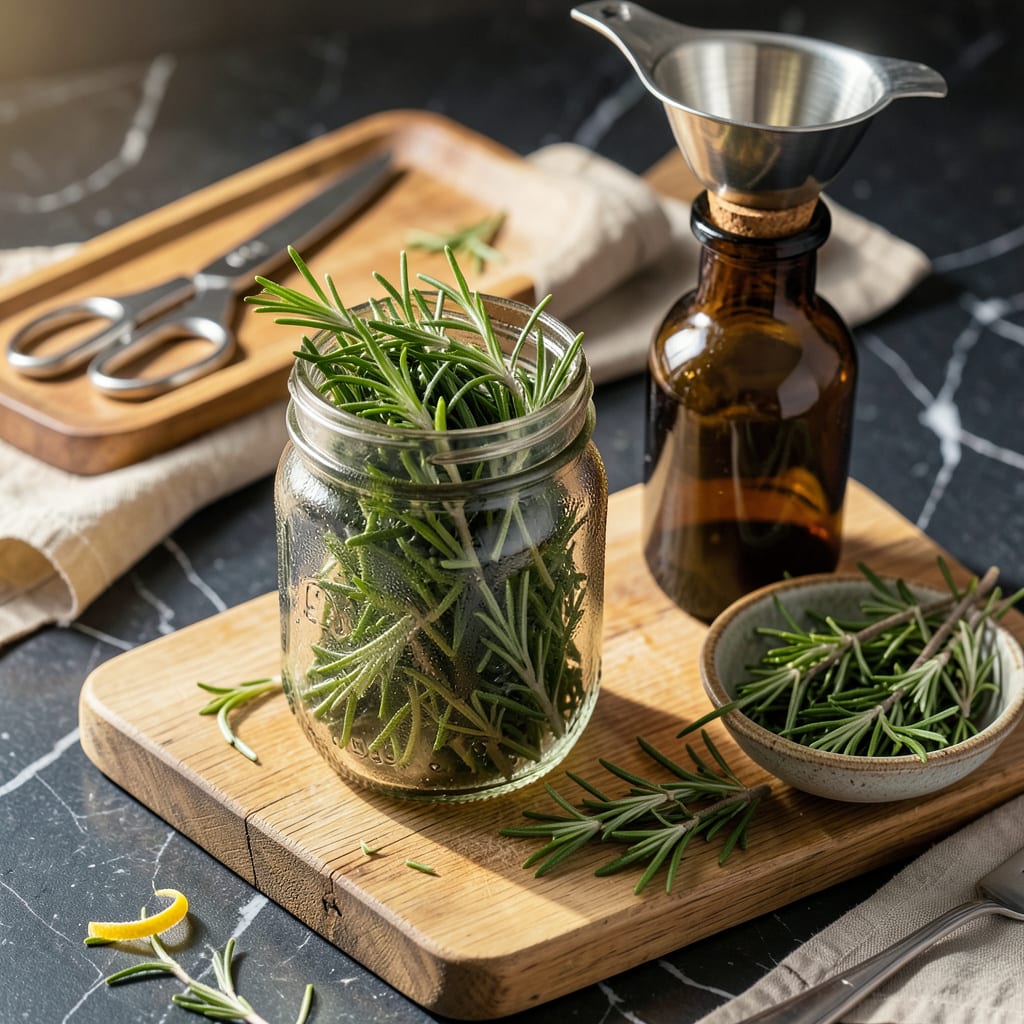
I’ll be real with you—store-bought rosemary extract can’t hold a candle to the potent, aromatic version you can make at home. After years of foraging wild herbs for my rubs and marinades, I’ve perfected a method that captures rosemary’s piney essence in a concentrated form. This isn’t just another infused oil; it’s a game-changing condiment that’ll elevate everything from roasted meats to cocktails.
The beauty of this extract lies in its simplicity: fresh rosemary, a quality solvent (I prefer vodka for its neutral flavor), and time. I’ve tested ratios and steeping times to create a versatile infusion that’s strong enough to use by the teaspoon but balanced enough for everyday cooking. No fancy equipment needed—just a jar, patience, and the right technique.
What you’ll end up with is a golden liquid that packs all the herbal complexity of fresh rosemary without the woody texture. It keeps for months in your pantry, ready to transform marinades, dressings, or even a simple glass of sparkling water. Between you and me, once you try this, you’ll wonder how you ever cooked without it.
Whether you’re grilling steaks, roasting vegetables, or mixing cocktails, this extract delivers restaurant-quality flavor with minimal effort. Here’s how to make a batch that’ll last you through countless meals—no special skills required.
📚 In This Guide
- What You’ll Need
- Instructions
- Tips and Common Mistakes
What Youll Need
- ● Fresh rosemary sprigs – 1 cup (packed), organic preferred for best flavor
- ● High-proof alcohol – 1 cup (80-proof vodka or grain alcohol like Everclear for stronger extraction)
- ● Glass jar – 16 oz, airtight with a lid (mason jars work perfectly!)
- ● Fine-mesh strainer or cheesecloth – for filtering out plant material
- ○ Dark glass dropper bottle – 4 oz, for storage (optional but ideal for long-term use)
- ● Sharp knife or kitchen shears – to chop rosemary finely
- ● Label & marker – to date and identify your extract (trust us, you’ll forget otherwise!)
- ○ Optional: Vegetable glycerin – ½ cup (for alcohol-free versions)
Instructions
Making your own rosemary extract is simpler than you might think—just follow these straightforward steps.
Select and Prepare Fresh Rosemary
Start by choosing fresh rosemary sprigs that are vibrant green and free from any brown spots or wilting. You’ll need enough to fill a standard mason jar about halfway when loosely packed. I always give the sprigs a quick rinse under cool water to remove any dirt or debris, then pat them completely dry with paper towels.
The key here is absolute dryness—any moisture left on the leaves will dilute your extract and potentially lead to mold. I like to lay the sprigs out on a clean kitchen towel for about 10 minutes after patting to ensure they’re bone dry. Once dry, gently bruise the leaves by rolling them between your palms—this releases the essential oils that will infuse into your liquid.
Choose Your Extraction Liquid
For cooking purposes, I recommend using either high-proof vodka (at least 80 proof) or food-grade vegetable glycerin as your extraction medium. Vodka creates a more potent extract that blends easily into recipes, while glycerin produces a milder, alcohol-free version that’s great for desserts. Fill your clean mason jar about three-quarters full with your chosen liquid.
If using vodka, there’s no need to heat it first—the alcohol will naturally draw out the rosemary’s flavor compounds over time. For glycerin, I warm it gently in a saucepan until it’s just barely warm to the touch (about 100°F), which helps speed up the extraction process. Never boil the glycerin, as high heat can degrade its quality.
Combine and Infuse the Mixture
Place your prepared rosemary sprigs into the jar with your extraction liquid, making sure they’re completely submerged. Use a clean spoon to press down gently on the herbs, releasing any air bubbles that might be trapped. Seal the jar tightly with its lid—this prevents evaporation and keeps out any contaminants during the infusion process.
Store the jar in a cool, dark place like your pantry or a kitchen cabinet. Shake it gently every other day for the first week to help distribute the rosemary oils. The infusion process takes 4-6 weeks for full potency, though you can start using it after 2 weeks if you’re in a pinch. You’ll know it’s ready when the liquid takes on a distinct golden-green hue and carries a strong rosemary aroma.
Strain and Store Your Extract
After the infusion period, strain the liquid through a fine-mesh sieve lined with cheesecloth into a clean glass bottle or jar. I like to press gently on the rosemary with the back of a spoon to extract every last drop of flavor, but don’t squeeze too hard or you might get bitter compounds from the plant material.
Your homemade rosemary extract will keep for 6-12 months when stored in a cool, dark place. I recommend using dark glass bottles if you have them, as they provide the best protection against light degradation. Label your bottle with the date so you can track its freshness. The flavor will be most potent in the first 3 months, after which it will gradually mellow but remain usable.
Tips and Common Mistakes
Creating your own rosemary extract is rewarding, but a few key details make all the difference between a weak infusion and a potent, aromatic concentrate.
Drying is Everything: In Step 1, those 10 minutes of air-drying aren’t just a suggestion—they’re critical. I’ve ruined batches by rushing this step, only to find mold developing later. Lay the sprigs in a single layer on a clean towel, and if your kitchen is humid, give them an extra 5 minutes to be safe. The drier the herbs, the more concentrated your final extract will be.
Liquid Choice Matters: When selecting your extraction medium in Step 2, remember that high-proof vodka (80 proof or higher) extracts flavors more efficiently than lower-proof options. If using glycerin, that gentle warming to 100°F isn’t just helpful—it’s essential for proper infusion. I once skipped this step and ended up with a disappointingly weak extract after the full 4-6 weeks.
Patience Pays Off: While you can use the extract after 2 weeks, the difference between that and the full 6-week infusion is remarkable. The longer wait develops deeper, more complex flavors that simply aren’t present in the shorter version. I mark my calendar when I start a batch—it’s the only way I remember to wait for that optimal window.
Storage Secrets: Those 6-12 months of shelf life depend entirely on proper storage. Dark glass bottles aren’t just for looks—they block light that degrades the extract’s potency. I learned this the hard way after storing a batch in clear glass; within 3 months, the flavor had noticeably faded. Always keep it in a cool cabinet, never the fridge, as condensation can introduce moisture.
Pro Tips for Make Rosemary Extract
- Creating your own rosemary extract is rewarding, but a few key details make all the difference between a weak infusio…
- Drying is Everything: In Step 1, those 10 minutes of air-drying aren’t just a suggestion—they’re critical. I’ve ruine…
- Liquid Choice Matters: When selecting your extraction medium in Step 2, remember that high-proof vodka (80 proof or h…
Frequently Asked Questions
How long does homemade rosemary extract last, and how should I store it?
Your homemade rosemary extract can last 4-6 months if stored properly! Keep it in a cool, dark place (like a pantry) in an airtight glass bottle. For longer shelf life, refrigerate it—this can extend freshness up to 8-12 months. Always check for changes in smell or color before use.
Can I use dried rosemary instead of fresh for the extract?
Yes! Dried rosemary works, but adjust the ratio: use 1 tablespoon dried for every 2 tablespoons fresh. Since dried herbs are more concentrated, steep them for half the time (e.g., 1–2 weeks) to avoid bitterness. Fresh rosemary yields a brighter flavor, though.
Why does my rosemary extract taste bitter or harsh?
Bitterness usually means over-extraction or high heat. Stick to room-temperature infusion (no boiling!) and don’t steep longer than 4 weeks. If it’s already bitter, dilute it with a neutral oil (like grapeseed) or use it sparingly in hearty dishes like stews.
What’s the best alcohol to use for rosemary extract?
Vodka (80-proof) is the top choice—it’s neutral and extracts flavors well. For alcohol-free options, try glycerin (food-grade) or apple cider vinegar, but note the flavor and shelf life will differ. Avoid rubbing alcohol; it’s not food-safe!
Can I speed up the extraction process?
For a quicker extract, gently heat the rosemary and alcohol/vineil mixture in a double boiler (under 140°F) for 2–3 hours. Strain and use immediately—though the flavor won’t be as deep as a 4-week infusion. Never microwave!
Making your own rosemary extract is easier than you think—and far more rewarding! 🌿 With just a few simple ingredients and a little patience, you can create a potent, aromatic infusion to elevate your cooking, natural remedies, or DIY skincare. Whether you’re preserving fresh rosemary or experimenting with flavors, this homemade version beats store-bought every time.
Ready to put your extract to use? Try adding a few drops to roasted vegetables, marinades, or even homemade bread for a burst of herby goodness. Happy infusing! 😊

Trained in classic French technique but raised on slow-cooked ribs and spicy rubs, she blends culinary skill with smoke and soul.
- Recipe for Boneless Pork Chops in Cast Iron Skillet: Sear and Baste to Juicy Perfection - October 3, 2026
- Recipe for Boneless Cross Rib Roast: Slow-Roasted Beef with Herb Crust - October 3, 2026
- Hamburgers in Sauce Recipe Crock Pot: Slow-Cooked Savory Delight - October 3, 2026