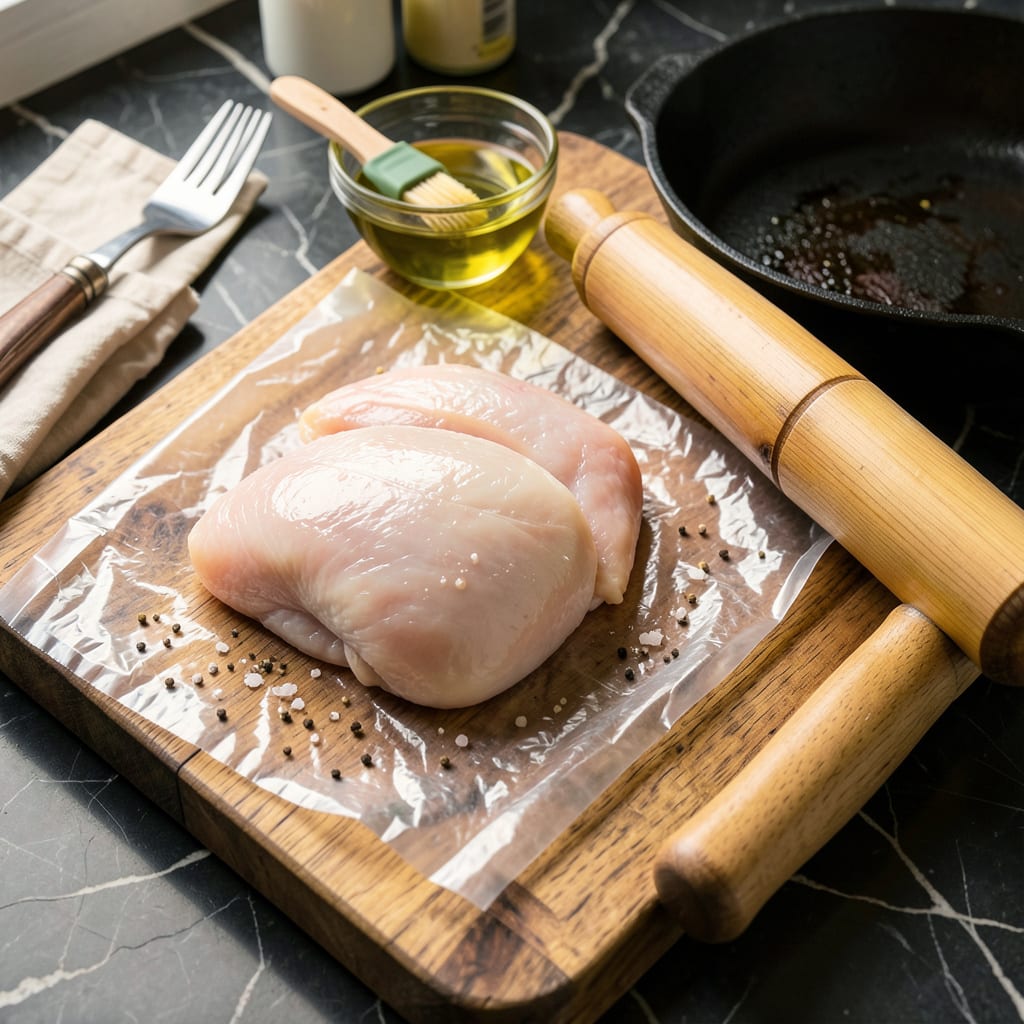
I’ll be real with you: pounding chicken breast without a mallet used to stress me out until I discovered this game-changing kitchen hack. No fancy equipment needed—just a few household items and the right technique. After years of making chicken parmesan and chicken piccata in professional kitchens, I’ve perfected the method for getting perfectly even ¼-inch cutlets every time.
Here’s the thing—you probably already have everything you need. A rolling pin, heavy skillet, or even a sturdy water bottle can stand in for that mallet. The key is controlling your pressure and protecting the chicken with plastic wrap or parchment. I’ve used this method more times than I can count when prepping for family dinners or last-minute meals.
Why bother pounding at all? Even thickness means even cooking—no more dry edges and raw centers. This technique unlocks recipes like chicken schnitzel or saltimbocca that require thin, uniform pieces. Plus, tenderizing the meat makes every bite more enjoyable. Once you master this, you’ll wonder why you ever stressed about not having a mallet.
Fair warning: your first attempt might feel awkward, but stick with it. By the second try, you’ll be pounding out restaurant-quality cutlets like a pro. The confidence this skill builds in the kitchen is worth its weight in gold—no special tools required.
📚 In This Guide
- What You’ll Need
- Instructions
- Tips and Common Mistakes
What Youll Need
- ● 1–2 boneless, skinless chicken breasts (6–8 oz each, pounded to ½-inch thickness)
- ● Plastic wrap or parchment paper (2 sheets, 12×12 inches—prevents splatter and keeps things clean!)
- ● Heavy, flat-bottomed substitute (pick one): Rolling pin (wooden or marble)
- ● Heavy skillet (cast iron works best!)
- ● Thick cookbook or hardcover book
- ● Empty wine bottle (clean + sturdy)
- ● Cutting board or stable surface (non-slip if possible)
- ○ Optional but helpful: Meat tenderizer powder (for extra tenderness)
- ● Cooking spray (to reduce sticking)
- ● Ruler or calipers (to check even thickness)
Instructions
Here’s the simple method I use to get perfectly even chicken breasts every time—no special tools required.
Prepare Your Work Surface and Chicken
Start by placing a large cutting board on a stable, flat surface. I prefer using a wooden board for this because it provides better grip than plastic. Lay out a sheet of plastic wrap that’s about 12 inches longer than your chicken breast on both sides—this prevents any tearing during pounding.
Place your chicken breast in the center of the plastic wrap. If you’re working with multiple breasts, pound them one at a time for best control. Fold the plastic wrap over the top to completely enclose the chicken, creating a protective barrier. This technique not only keeps your workspace clean but also prevents the chicken from sticking to your pounding tool.
Choose and Prepare Your Pounding Tool
For this method, I recommend using either a heavy skillet (cast iron works beautifully) or a rolling pin. If using a skillet, select one with a flat bottom that’s at least 8 inches in diameter—this gives you good surface area contact. For a rolling pin, choose one that’s solid (not hollow) and made of wood or marble for optimal weight.
Before you begin pounding, wrap your chosen tool in plastic wrap as well. This creates a double layer of protection and makes cleanup effortless. The wrapped tool should feel firm in your hand—if it’s too light, the pounding process will take much longer. I’ve found that a 10-inch cast iron skillet provides the perfect balance of weight and control for this technique.
Pound the Chicken Using Proper Technique
Position your wrapped tool over the thickest part of the chicken breast. Start pounding with firm, even pressure, working from the center outward toward the edges. Use smooth, controlled motions rather than aggressive hits—think of it as pressing rather than striking. The goal is to create uniform thickness throughout the entire breast.
After every 3-4 presses, lift the plastic wrap to check your progress. You’re aiming for an even thickness of about ½ inch throughout. Pay special attention to the thicker end of the breast, as this is typically where most of the adjustment is needed. Rotate the chicken occasionally to ensure you’re maintaining consistent thickness on all sides.
As you work, you’ll notice the chicken breast spreading outward. This is exactly what you want—just make sure you’re maintaining that even thickness. The process should take about 2-3 minutes per breast, depending on the size. You’ll know you’re done when the entire breast lies flat without any raised areas when viewed from the side.
Inspect and Make Final Adjustments
Once you’ve achieved what appears to be even thickness, do a final inspection. Gently press on different areas of the breast with your fingers—it should feel uniformly firm with no soft spots indicating thicker sections. Hold the breast up to eye level and look at it from the side to confirm it’s perfectly flat.
If you find any areas that still need thinning, place the chicken back between the plastic wrap and give those spots a few more targeted presses. Be careful not to overdo it at this stage—you want to maintain the integrity of the meat. The finished breast should be flexible enough to roll or fold without cracking, indicating you’ve achieved the ideal texture.
At this point, your chicken is ready for whatever recipe you have planned. I like to season it immediately after pounding while the surface is still slightly tacky from the process—this helps any dry rubs or marinades adhere better. The evenly pounded breast will now cook uniformly, preventing the common problem of dry edges and undercooked centers.
Tips and Common Mistakes
Mastering this technique comes down to a few key details that make all the difference in texture and consistency.
The Technique That Changed Everything: When working through Step 3, remember that smooth, controlled presses yield better results than aggressive pounding. I learned this after ruining several breasts by being too forceful—the meat fibers tear rather than flatten when you strike too hard. Think of it as gently pressing dough rather than hammering nails. The 3-4 presses between checks mentioned in the instructions are your opportunity to assess progress without overworking the meat.
Tool Selection Tip: For Step 2, the weight of your tool matters more than you might expect. A 10-inch cast iron skillet provides ideal heft, but if you’re using a rolling pin, choose one that weighs at least 2 pounds. Lighter tools require significantly more effort and can lead to uneven thickness. I’ve found that marble rolling pins work particularly well because their density mimics the weight distribution of a skillet.
Thickness Verification: The ½-inch target thickness in Step 3 isn’t arbitrary—it’s the sweet spot for even cooking. Here’s how to check it accurately: place your flattened breast on a flat surface and view it from the side at eye level. You should see consistent height throughout with no raised areas. If you’re unsure, use the “finger test”: press gently on different spots—the resistance should feel uniform across the entire surface.
Final Preparation: Don’t underestimate the importance of that slightly tacky surface mentioned in Step 4. This is your golden opportunity to season effectively. I recommend applying dry rubs or marinades immediately after pounding while the surface is still moist from the process. The seasoning will adhere better, and you’ll get more flavor penetration during cooking. For best results, let seasoned chicken rest 10-15 minutes before cooking to allow flavors to absorb.
Pro Tips for Pound Chicken Breast Without Mallet
- Mastering this technique comes down to a few key details that make all the difference in texture and consistency.
- The Technique That Changed Everything: When working through Step 3, remember that smooth, controlled presses yield be…
- Tool Selection Tip: For Step 2, the weight of your tool matters more than you might expect. A 10-inch cast iron skill…
Frequently Asked Questions
Can I use a rolling pin instead of a mallet to pound chicken?
A rolling pin works great—just wrap the chicken in plastic wrap or parchment paper to prevent sticking. Use gentle, even pressure to avoid tearing the meat. Pro tip: A wine bottle (wrapped) can also work in a pinch!
How thin should I pound chicken breast for recipes like chicken parmesan?
Aim for an even ¼-inch to ½-inch thickness for most recipes. This ensures even cooking and tender results. If the breast is too thick in spots, focus on those areas first. Too thin? It may dry out faster—adjust cooking time!
What if I don’t have plastic wrap or parchment paper?
No problem! Use a resealable plastic bag (cut open) or even aluminum foil as a barrier. Avoid pounding directly on the counter—it’s messy and unsafe. Bonus: Lightly oil the chicken to reduce sticking further.
Why does my chicken breast tear or fall apart when pounding?
Tearing happens if you pound too hard or unevenly. Start from the thickest part and work outward with gentle, overlapping strokes. If the breast is very cold, let it sit at room temp for 10 minutes first. Still struggling? Try slicing it horizontally into cutlets instead.
Can I pound frozen chicken breast without thawing it first?
Nope—never pound frozen chicken! It’s risky (hello, food safety ) and nearly impossible to flatten evenly. Thaw it in the fridge overnight or use the cold-water bath method (30 mins) before pounding. Short on time? Microwave-defrost, then pat dry before pounding.
No mallet? No problem! 🎯 With a few simple tools—like a rolling pin, skillet, or even a wine bottle—you can easily pound chicken breast to perfect, even thickness. This hack saves time, ensures tender results, and proves you don’t need fancy gadgets to cook like a pro.
Now that you’ve mastered this technique, put it to the test with your favorite recipe! Try breading the pounded chicken for crispy cutlets or grilling it for a quick weeknight dinner. Happy cooking—your perfectly prepped chicken awaits! 🍗

Trained in classic French technique but raised on slow-cooked ribs and spicy rubs, she blends culinary skill with smoke and soul.
- Recipe for Boneless Pork Chops in Cast Iron Skillet: Sear and Baste to Juicy Perfection - October 3, 2026
- Recipe for Boneless Cross Rib Roast: Slow-Roasted Beef with Herb Crust - October 3, 2026
- Hamburgers in Sauce Recipe Crock Pot: Slow-Cooked Savory Delight - October 3, 2026