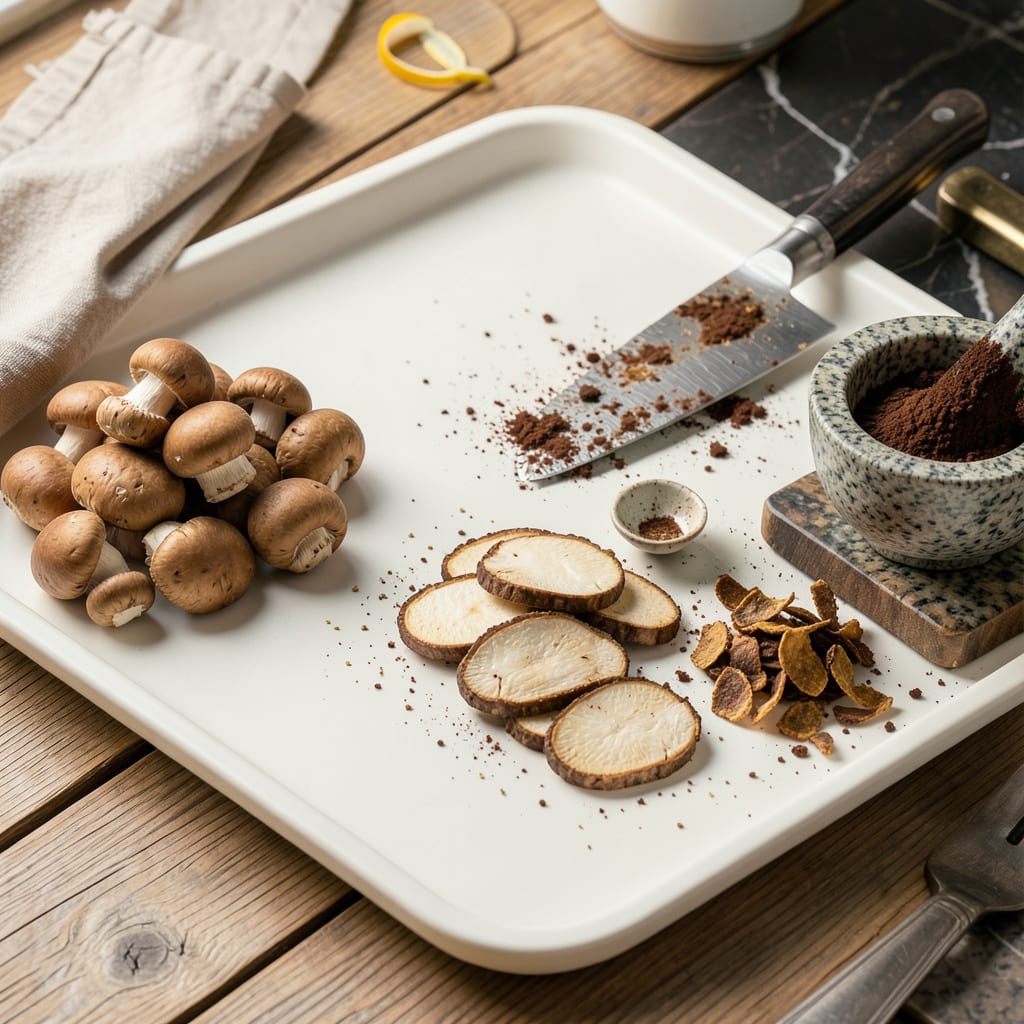
I’ll be real with you: mushroom powder is the secret weapon I keep in my spice cabinet for instant umami bombs. No fancy equipment needed—just dried mushrooms and a way to grind them. This stuff transforms everything from soups to steak rubs with that deep, earthy richness you can’t get from anything else.
Here’s the thing—most people overcomplicate it. I’ve been making this for years, and the simplest method works best. Dry your mushrooms thoroughly (oven or dehydrator both work), then pulse them into fine powder. The key is patience—rush it, and you’ll end up with chunks instead of that perfect, silky texture.
What you’re left with is pure flavor concentrate. A pinch of this powder adds depth to gravies, enhances marinades, and even gives popcorn a gourmet upgrade. I forage wild mushrooms when I can, but store-bought shiitakes or porcinis work just as well. The flavor difference is night and day compared to store-bought powders.
Make a big batch and keep it in an airtight container—it’ll stay potent for months. Between you and me, once you start using this, you’ll wonder how you ever cooked without it. Ready to unlock that umami powerhouse?
📚 In This Guide
- What You’ll Need
- Instructions
- Tips and Common Mistakes
What Youll Need
- ● Dried mushrooms – 1–2 cups (any variety: shiitake, porcini, or cremini work great! 🍄). Fresh mushrooms won’t work—drying is essential!
- ● High-speed blender or food processor – A 300W+ motor ensures a fine, clump-free powder.
- ○ Fine-mesh sieve or sifter – For sifting out larger bits (optional but recommended for ultra-smooth texture).
- ● Air-tight container – Glass jars or BPA-free plastic (4–8 oz capacity) to store your powder long-term.
- ● Dehydrator or oven – If drying fresh mushrooms first (lowest temp setting, ~115°F/46°C).
- ● Parchment paper – For oven-drying (prevents sticking).
- ● Measuring spoons – For precise recipe use later (1 tsp = big flavor!).
- ○ Gloves (optional) – If handling wild mushrooms (some can irritate skin).
- ○ Spice grinder (optional) – For small batches (less than ½ cup).
Instructions
Transforming mushrooms into powder is simpler than you think—just follow these straightforward steps for maximum flavor impact.
Select and Clean Your Mushrooms
Choose fresh mushrooms that are firm and free of blemishes. I prefer cremini or shiitake for their deep umami flavor, but button mushrooms work well too. Avoid washing them with water—this makes them soggy and difficult to dry properly.
Instead, gently brush off any dirt with a soft mushroom brush or damp paper towel. Trim away any tough stems, especially for shiitake mushrooms. The cleaner your mushrooms are at this stage, the better your final powder will be. You want completely dry mushrooms before moving to the next step.
Slice and Dry the Mushrooms
Slice the cleaned mushrooms into thin, even pieces—about 1/8-inch thick. The thinner you slice them, the faster and more evenly they’ll dry. For best results, use a sharp knife or mandoline slicer to maintain consistent thickness.
Arrange the slices in a single layer on a baking sheet or food dehydrator trays, making sure they don’t overlap. Set your oven to its lowest temperature (ideally 170°F or lower) and prop the door open slightly with a wooden spoon. This allows moisture to escape while drying the mushrooms slowly. It typically takes 2-4 hours depending on thickness and humidity.
Test for Complete Dryness
Check your mushrooms after 2 hours of drying. They should be completely brittle and snap cleanly when broken—no bend or moisture should remain. If they’re not fully dry, continue drying in 30-minute increments until crisp.
Here’s the thing—any remaining moisture will cause your powder to clump or develop mold during storage. I always test a few pieces from different areas of the tray to ensure even drying. When fully dry, let them cool completely at room temperature before moving to the next step.
Grind into Fine Powder
Transfer the cooled, dried mushroom slices to a high-powered blender, food processor, or clean coffee grinder. Pulse in 5-second bursts until you achieve a fine, consistent powder. Don’t overfill your machine—work in batches if needed to ensure even grinding.
After grinding, let the powder settle for a minute before opening the lid to avoid a mushroom dust cloud. Sift the powder through a fine-mesh sieve to remove any larger pieces, then re-grind those bits. The final texture should be as fine as flour, with no visible mushroom pieces remaining.
Store for Maximum Freshness
Transfer your mushroom powder to an airtight container—glass jars with tight-fitting lids work best. Store in a cool, dark place like your pantry for up to 6 months, or in the freezer for up to 1 year for maximum potency.
Real talk: this powder loses flavor over time, so I recommend making small batches every few months. Label your container with the date and mushroom type. Now you’re ready to boost soups, sauces, rubs, and even popcorn with that incredible umami punch whenever you need it.
Tips and Common Mistakes
Here’s what I’ve learned from making countless batches of mushroom powder—small details that make a big difference in flavor and texture.
Drying Technique: The 170°F oven temperature in Step 2 is crucial for preserving flavor while removing moisture. If your oven doesn’t go that low, set it to the lowest possible temperature and prop the door open wider. I’ve found that even 180°F works if you reduce the drying time slightly, but don’t exceed this or you’ll risk burning before the mushrooms are fully dry. The 2-4 hour range accounts for humidity differences—on rainy days, I always plan for the full 4 hours.
Slicing Consistency: In Step 2, that 1/8-inch thickness isn’t arbitrary. Thinner slices dry faster but can burn easily, while thicker pieces may dry unevenly. I use a mandoline slicer for perfect consistency, but if cutting by hand, stack two mushrooms together and slice—they’ll support each other for more even cuts. Remember to check different areas of your tray at the 2-hour mark since edges dry faster than centers.
Grinding Strategy: When pulsing in 5-second bursts during Step 4, don’t overfill your grinder. I limit each batch to about 1 cup of dried slices—this prevents heat buildup that can degrade flavor. Between pulses, shake the container to redistribute pieces. If you notice the powder starting to clump, add a few uncooked rice grains to absorb excess moisture before continuing. The sifting step isn’t optional; those larger pieces will rehydrate unevenly in recipes.
Storage Wisdom: That 6-month pantry life in Step 5 assumes perfect storage conditions. I’ve pushed this to 8 months by adding a silica gel packet to the jar (the kind that comes in vitamin bottles). For freezer storage, portion the powder into small containers—repeatedly opening a large container exposes all the powder to temperature fluctuations. Always let frozen powder come to room temperature in the sealed container before opening to prevent condensation.
Pro Tips for Powder Mushrooms
- Here’s what I’ve learned from making countless batches of mushroom powder—small details that make a big difference in…
- Drying Technique: The 170°F oven temperature in Step 2 is crucial for preserving flavor while removing moisture. If y…
- Slicing Consistency: In Step 2, that 1/8-inch thickness isn’t arbitrary. Thinner slices dry faster but can burn easil…
Frequently Asked Questions
Can I powder fresh mushrooms, or do they need to be dried first?
Always dry mushrooms thoroughly before powdering! Fresh mushrooms contain too much moisture, which can clump in your grinder or spoil the powder. Use a dehydrator (115°F for 6–12 hours) or oven (lowest setting, door cracked) until brittle. Test by snapping a piece—it should break cleanly, not bend.
How long does homemade mushroom powder last, and how should I store it?
Stored properly, mushroom powder stays potent for 6–12 months. Keep it in an airtight container (glass jars work best) in a cool, dark place—like your pantry or fridge. For extra freshness, add a silica packet or store in the freezer. Avoid humidity, which turns powder into a clumpy mess!
What’s the best grinder for mushroom powder—blender, coffee grinder, or mortar and pestle?
A dedicated coffee/spice grinder is ideal for fine, even texture. Blenders work but may leave chunks unless high-powered. Mortar and pestle? Only for small batches (and strong arms!). Pro tip: Pulse in short bursts to avoid overheating, which can degrade flavor.
My mushroom powder turned out chunky. How do I fix it?
No worries! Sift the powder through a fine-mesh sieve to remove larger bits, then re-grind the leftovers. If your grinder struggles, freeze dried mushrooms for 10 minutes before grinding—the cold makes them more brittle. Still stubborn? Add a pinch of cornstarch (1 tsp per cup) to absorb moisture.
Are there any mushrooms I shouldn’t powder?
Avoid wild mushrooms unless 100% identified by an expert—some are toxic even when dried! Stick to store-bought varieties like shiitake, porcini, or cremini. Also, skip slimy or spoiled mushrooms; off flavors concentrate in powder form. When in doubt, toss it out!
Now that you’ve mastered how to powder mushrooms, you’re ready to unlock a world of savory depth in your cooking! 🌟 Whether you sprinkle it into soups, rubs, or sauces, this umami-packed ingredient will elevate every bite. Start small—experiment with a pinch in your next dish and taste the difference.
Ready to dive deeper? Try blending your mushroom powder with other dried herbs or spices to create custom seasoning mixes. Happy cooking—your flavor adventures are just beginning! 🍄✨

Trained in classic French technique but raised on slow-cooked ribs and spicy rubs, she blends culinary skill with smoke and soul.
- Recipe for Boneless Pork Chops in Cast Iron Skillet: Sear and Baste to Juicy Perfection - October 3, 2026
- Recipe for Boneless Cross Rib Roast: Slow-Roasted Beef with Herb Crust - October 3, 2026
- Hamburgers in Sauce Recipe Crock Pot: Slow-Cooked Savory Delight - October 3, 2026