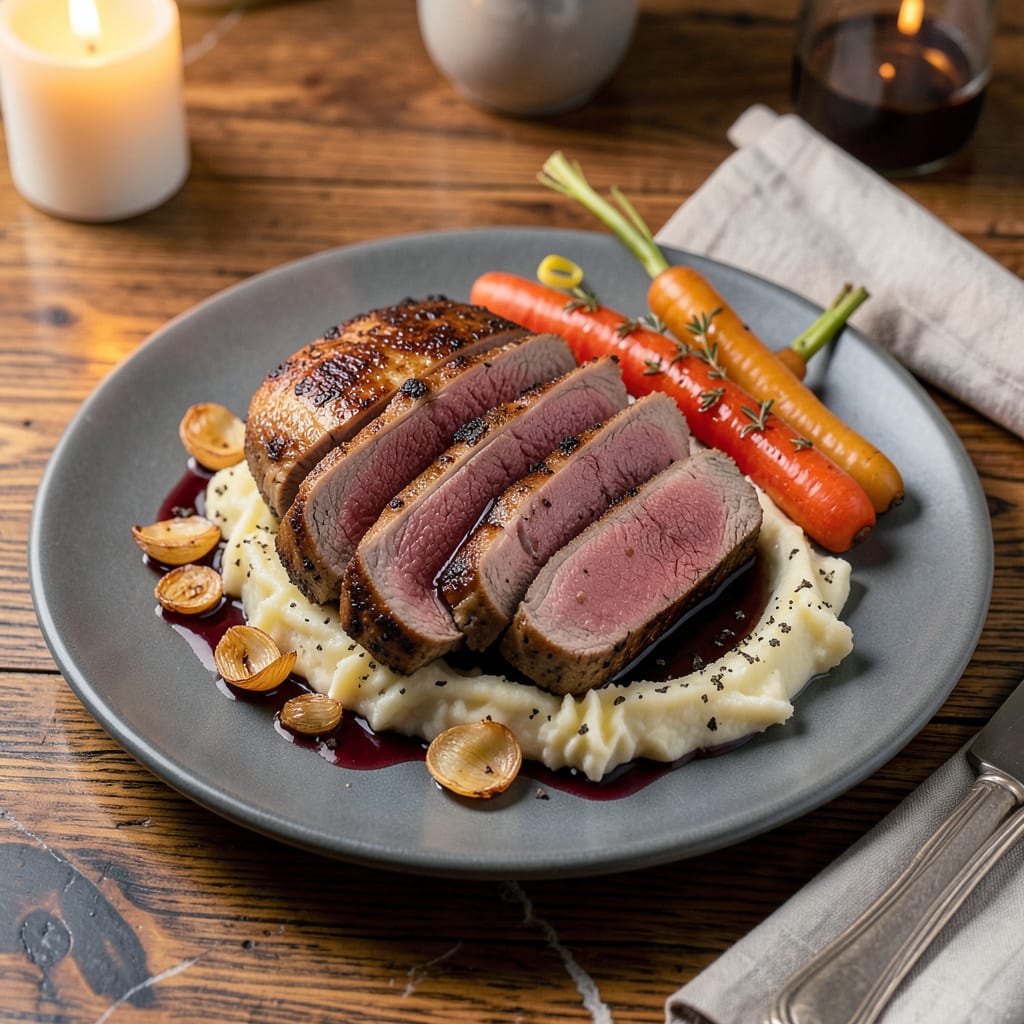
Nothing breaks my heart more than watching a perfectly cooked beef tenderloin turn into dry, chewy leftovers. I’ve ruined my fair share by reheating too fast or at the wrong temperature—lessons learned the hard way. The good news? There’s a foolproof way to bring that tenderloin back to life with the same juicy, melt-in-your-mouth texture it had fresh from the oven.
After years of experimenting (and a few disappointing meals), I landed on methods that actually work. The key is low-and-slow heat combined with moisture control—whether you’re using an oven, sous vide, or even an air fryer. I’ll walk you through exactly which temperatures and times preserve that buttery tenderness without overcooking, plus when to slice and when to keep it whole.
Here’s what you can expect: beef that reheats evenly from edge to center, with no gray bands or dried-out edges. The meat will stay rosy and juicy, ready to shine alongside your favorite sides. I even include my go-to trick for adding back that just-cooked aroma that makes everyone think it’s fresh from the oven.
No more sad, overcooked leftovers. This method turns yesterday’s dinner into a meal worth looking forward to—maybe even better than the first time around. Let’s get that tenderloin back on the table right.
📚 In This Guide
- What You’ll Need
- Instructions
- Tips and Common Mistakes
What Youll Need
- ● Leftover beef tenderloin roast – 1–2 lbs (pre-cooked, sliced or whole; ensure it’s refrigerated at 40°F or below)
- ● Oven-safe baking dish or skillet – 9×13-inch (for even heat distribution; cast iron works best!)
- ● Aluminum foil – Heavy-duty, 12-inch sheet (to trap moisture and prevent drying)
- ● Meat thermometer – Instant-read (critical for precision—no guesswork!)
- ○ Butter or beef broth – 2–3 tbsp (optional, for added moisture and flavor)
- ● Tongs or spatula – Heat-resistant (to handle the roast gently)
- ● Oven or sous vide setup – Oven method: Preheated to 250°F (low and slow is key!)
- ○ Sous vide (optional): Water bath at 120–130°F + vacuum-sealed bag
- ● Resting time – 5–10 minutes (patience pays off for juicy slices!)
- ○ Optional garnishes – Fresh herbs (rosemary, thyme), cracked black pepper, or a drizzle of au jus
Instructions
Here’s the foolproof method I use to bring your tenderloin back to life without sacrificing moisture or tenderness.
Prepare for Gentle Reheating
Remove your beef tenderloin from the refrigerator and let it sit at room temperature for 20-30 minutes. This gradual temperature change prevents thermal shock that can cause the meat to seize up and become tough. I always place mine on a wire rack set over a plate to allow air circulation on all sides.
While the meat comes to room temperature, preheat your oven to 250°F—this low temperature is crucial for even reheating without overcooking. The goal is to warm the meat gently from edge to center. Position your oven rack in the middle for the most consistent heat distribution throughout the cooking process.
Protect the Meat with Moisture
Place the tenderloin on a wire rack set inside a rimmed baking sheet. This elevation allows hot air to circulate completely around the meat, preventing any steaming that could occur if it sat directly on the pan. I like to brush the surface lightly with beef broth or melted butter to create a protective moisture barrier.
For an extra layer of protection against drying out, tent the entire setup loosely with aluminum foil. The foil should form a dome over the meat without touching it, creating a microclimate that retains just enough moisture. This step is what separates dry, disappointing leftovers from meat that tastes freshly cooked.
Reheat Slowly and Evenly
Place the prepared tenderloin in your 250°F oven and let it warm for 20-30 minutes, depending on its thickness. You’re aiming for an internal temperature of 110-120°F—just warm enough to serve without continuing to cook the meat. I recommend using an instant-read thermometer to monitor the temperature at the thickest part.
The meat is ready when the thermometer reads 110°F for medium-rare results. Remember that the temperature will continue to rise about 5-10 degrees during resting, a phenomenon called carryover cooking. This gentle approach ensures the proteins don’t tighten up and squeeze out all those precious juices we worked so hard to preserve.
Rest and Serve Immediately
Remove the tenderloin from the oven and let it rest, still tented with foil, for 10 minutes. This resting period allows the muscle fibers to relax and reabsorb any juices that may have been pushed to the surface during reheating. I’ve found this makes the difference between meat that’s merely warm and meat that’s perfectly juicy.
After resting, slice the tenderloin against the grain into ½-inch thick pieces. The slices should glisten slightly at the edges—a sure sign you’ve maintained the moisture. Serve immediately while still warm. If you’ve done everything correctly, each bite should have that same buttery tenderness as when it was first cooked, with no dry edges or tough spots.
Tips and Common Mistakes
The secret to perfectly reheated beef tenderloin lies in understanding the science behind gentle heat and moisture retention. Here’s what I’ve learned from years of perfecting this technique.
Temperature Precision: That 250°F oven setting in Step 1 isn’t arbitrary—it’s the sweet spot where proteins relax without contracting. I’ve found that even 25°F higher can start pushing moisture out of the meat. Use an oven thermometer to verify your actual temperature, as many ovens run hot or cool. The gradual warmth at this exact temperature ensures the tenderloin reheats evenly from edge to center without developing that dreaded gray band of overcooked meat.
Moisture Barrier Technique: When brushing with beef broth or melted butter in Step 2, don’t just dab it on—apply an even, thin coat that covers the entire surface. I use a pastry brush and work quickly to prevent the meat from cooling. This layer creates a microscopic shield that reduces evaporation during reheating. The foil tent then traps just enough steam to keep the surface supple without making the meat soggy. Between us, this two-layer approach is what makes the difference between “good enough” leftovers and meat that tastes freshly cooked.
Carryover Cooking Awareness: That 5-10 degree rise during resting mentioned in Step 3 is why we pull the meat at 110°F instead of the usual serving temperature. I learned this the hard way after serving overcooked tenderloin that hit 130°F during resting. Now I monitor the thickest part religiously and remove it the moment it reaches that target. The meat will continue cooking on the tray, so factor this into your timing—it’s better to underestimate than overdo it.
Slicing Strategy: The ½-inch thick slices in Step 4 aren’t just for presentation—they’re crucial for maintaining perceived juiciness. Thinner slices would lose moisture too quickly on the plate, while thicker slices might feel cold in the center. I always use a long, thin-bladed slicing knife and cut with one confident motion rather than sawing, which can squeeze out juices. Serve immediately after slicing; even those perfect slices will start to dry out after 10 minutes on the plate.
Pro Tips for Reheat Beef Tenderloin Roast Without Overcooking
- The secret to perfectly reheated beef tenderloin lies in understanding the science behind gentle heat and moisture re…
- Temperature Precision: That 250°F oven setting in Step 1 isn’t arbitrary—it’s the sweet spot where proteins relax wit…
- Moisture Barrier Technique: When brushing with beef broth or melted butter in Step 2, don’t just dab it on—apply an e…
Frequently Asked Questions
Can I reheat beef tenderloin in the microwave without drying it out?
You can, but it’s risky! Use low power (30-50%) and short bursts (20-30 seconds), flipping the meat between intervals. Add a splash of beef broth or cover with a damp paper towel to retain moisture. For best results, opt for oven or sous vide methods instead.
How long does it take to reheat beef tenderloin in the oven?
At 250°F (120°C), plan for 15–25 minutes , depending on thickness. Use a meat thermometer—pull it at 120–130°F (49–54°C) for medium-rare. Wrap in foil with a pat of butter or broth to keep it juicy!
What’s the best way to reheat sliced beef tenderloin?
For slices, a skillet works best! Heat a tablespoon of oil or butter over medium-low, add slices for 30–60 seconds per side. Avoid crowding the pan—work in batches for even warming. A sprinkle of salt post-reheat boosts flavor!
Can I reheat beef tenderloin twice?
We don’t recommend it—each reheat degrades texture and safety. If you must, ensure it reaches 165°F (74°C) internally the second time, but expect drier results. Store leftovers properly (airtight, <40°F/4°C) to minimize the need for double reheating.
What’s a good alternative if I don’t have an oven or microwave?
Try the stovetop steam method! Place slices in a steamer basket over simmering water (or broth) for 2–3 minutes. Or, wrap the roast in foil and warm it in a slow cooker on low with liquid for 30–45 minutes. Both keep moisture intact!
Reheating beef tenderloin doesn’t have to mean dry, overcooked meat—just low heat, moisture, and patience! Whether you choose the oven, sous vide, or stovetop, the key is gentle warmth to preserve that melt-in-your-mouth texture. 🎯
Now that you’ve got the know-how, put it to the test with your leftovers! Try the method that fits your kitchen setup, and don’t forget to slice against the grain for the best bite. Hungry for more? Check out our guide on carving tenderloin like a pro next!

Trained in classic French technique but raised on slow-cooked ribs and spicy rubs, she blends culinary skill with smoke and soul.
- Recipe for Crock Pot Lasagna Using Ravioli: No-Boil Cheese Layers - October 3, 2026
- Recipe for Cut Up Chicken: One-Pan Crispy Bites - October 3, 2026
- Recipe For Oven Baked Haddock: Buttery Crumbs With Zesty Lemon Topping - October 3, 2026