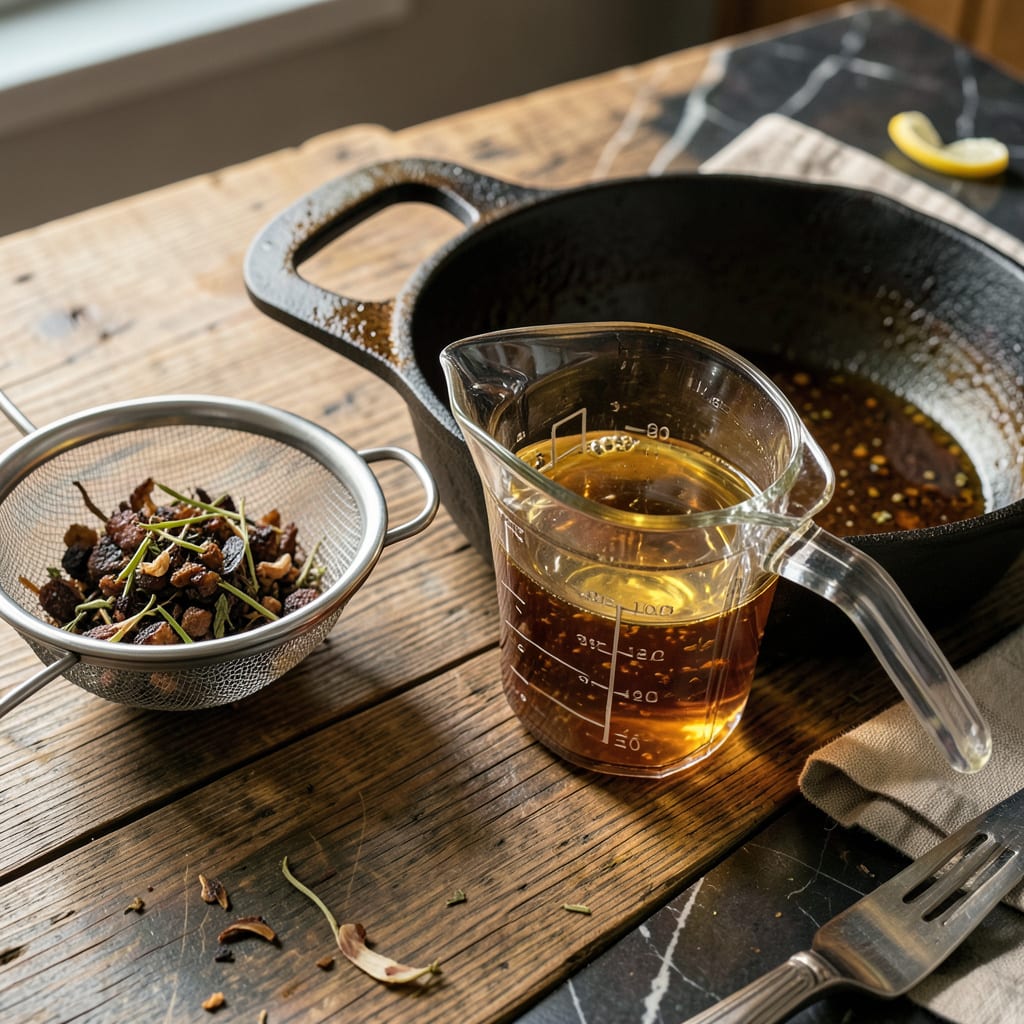
Every great gravy or pan sauce starts with properly separated drippings—this simple technique transforms greasy liquid into rich, flavorful gold. After years of perfecting smoked meats and French sauces, I’ve found that mastering fat separation elevates everything from holiday gravy to weeknight pan sauces. The difference between murky, greasy results and velvety, restaurant-quality sauces comes down to this one essential skill.
The process requires minimal equipment but precise timing. Whether you’re working with turkey drippings after Thanksgiving or the fond from a seared steak, the method remains consistent. I prefer using a fat separator for efficiency, though the refrigerator method works equally well when time allows. Both approaches ensure you capture every drop of flavor without the unwanted grease.
What you’re left with is pure, concentrated flavor—the essence of your roasted meat or vegetables, ready to become the base for gravy, sauce, or reduction. This technique isn’t just about removing fat; it’s about preserving the caramelized bits and aromatic compounds that give your sauces depth and complexity. The results speak for themselves in the first taste.
From classic turkey gravy to pan sauces for steak or chicken, this method adapts to any protein. The separated fat isn’t waste either—save it for cooking potatoes, sautéing vegetables, or adding richness to future dishes. Here’s how to do it properly every time.
📚 In This Guide
- What You’ll Need
- Instructions
- Tips and Common Mistakes
What Youll Need
- ● Fresh drippings – At least 1–2 cups from roasted meat (turkey, chicken, beef, etc.). The more, the better for separating! 🍖
- ● Heat-safe glass or metal container – A measuring cup (2–4 cups), fat separator, or mason jar works best. Avoid plastic—it can warp!
- ○ Fine-mesh strainer – To remove solids (optional but highly recommended for smooth gravy).
- ● Spoon or ladle – For skimming fat if not using a separator.
- ○ Ice cubes (optional) – 2–3 cubes to speed up fat solidification (handy trick!). ❄️
- ○ Cheesecloth or coffee filter – For extra-clear drippings (optional).
- ● Timer – A phone or kitchen timer to track 5–10 minutes of settling time. ⏰
- ● Storage containers – Small jars or bowls for separated fat and juices.
Instructions
This method delivers perfectly clarified drippings every time with minimal effort and maximum precision.
Collect and Strain the Drippings
Begin by carefully pouring all pan drippings from your roasting vessel into a heatproof measuring cup or fat separator. Use a fine-mesh strainer to remove any solid bits—herbs, meat particles, or seasoning remnants—that could interfere with the separation process.
I recommend using a clear glass measuring cup for this step, as it allows you to monitor the separation visually. The drippings should still be warm but not boiling, as excessive heat can emulsify the fat and liquid, making separation more difficult. If working with a large quantity, divide the drippings between two containers to prevent overflow during handling.
Allow Natural Separation Through Gravity
Place the container of strained drippings in a warm, draft-free location. Fat rises to the surface naturally due to its lower density, but this process requires patience. For optimal results, allow the drippings to rest undisturbed for 10-15 minutes—you’ll observe a distinct layer of translucent fat forming at the top.
The ideal separation creates two clearly defined layers: a golden fat cap on top and darker, flavorful juices beneath. Avoid refrigerating at this stage, as rapid cooling can cause the fat to solidify prematurely and trap valuable juices. If your kitchen is particularly cold, place the container near (but not on) a warm stovetop to maintain the liquid state.
Execute the Fat Removal Technique
For small quantities, use a large spoon to gently skim the fat layer from the surface, tilting the container slightly to pool the fat for easier removal. For larger volumes, a fat-separating pitcher with a spout at the bottom becomes invaluable—simply pour the defatted juices out from below while retaining the fat layer above.
Work methodically to avoid disturbing the boundary between layers. If using a spoon, press it against the container’s edge to create a clean scraping motion. The goal is to remove as much fat as possible while preserving every drop of the flavorful juices beneath. I typically achieve 90-95% fat removal with this technique when executed carefully.
Final Clarification and Storage
Examine the defatted juices for any remaining fat globules or impurities. If present, pass the liquid through a cheesecloth-lined strainer or use a gravy separator for a final polishing. The resulting liquid should appear nearly transparent with a rich amber hue—this is your concentrated flavor base for gravy or sauces.
For immediate use, proceed with your gravy recipe using these clarified drippings. For storage, transfer to an airtight container and refrigerate for up to 3 days or freeze for 3 months. The fat you’ve removed can be reserved for cooking or discarded, depending on your preferences and the original protein source.
Tips and Common Mistakes
Mastering fat separation requires attention to detail and understanding the science behind the process. These professional techniques will ensure maximum yield and clarity every time.
Temperature Management: The ideal working temperature for drippings is warm but not hot—around 120-140°F. Excessive heat causes emulsification, where fat and liquid bind permanently. I maintain this temperature by placing the container in a warm (not hot) water bath if my kitchen runs cool. This prevents premature solidification while allowing proper separation during the 10-15 minute resting period.
Equipment Selection: A clear glass measuring cup with angled sides provides superior visibility for monitoring separation. The angled walls create a natural collection point for fat, making skimming more efficient. For larger batches, I recommend a commercial-grade fat separator with a precision spout—it allows for single-handed operation while maintaining perfect layer integrity.
Layer Preservation Technique: When removing fat in Step 3, use a spoon with a perfectly flat edge rather than a rounded one. Press the flat edge against the container wall at a 15-degree angle to create a clean shear between layers. This surgical approach prevents the turbulence that would otherwise mix the layers back together, ensuring you maintain that 90-95% fat removal efficiency mentioned in the instructions.
Final Clarification Protocol: For restaurant-quality results in Step 4, line your strainer with two layers of cheesecloth rather than one. The double layer catches microscopic fat particles that single layers miss. I also chill the clarified liquid for exactly 30 minutes before final use—this causes any remaining trace fat to solidify at the surface for easy removal while preserving the liquid’s flavor integrity.
Pro Tips for Separate Fat From Drippings
- Mastering fat separation requires attention to detail and understanding the science behind the process. These profess…
- Temperature Management: The ideal working temperature for drippings is warm but not hot—around 120-140°F. Excessive h…
- Equipment Selection: A clear glass measuring cup with angled sides provides superior visibility for monitoring separa…
Frequently Asked Questions
How long does it take for fat to separate from drippings?
Most fats rise to the top within 10–20 minutes if left undisturbed at room temperature. For faster results, chill the drippings in the fridge (30–60 minutes) or freezer (15–20 minutes). Avoid rushing—patience ensures cleaner separation!
Can I use a separator without a fat-separating tool?
Absolutely! Try these hacks:
- A measuring cup with a spout (pour slowly from the bottom).
- A turkey baster to suck up fat from the top.
- An ice cube tray—fat solidifies first when chilled!
Why does my gravy still look greasy after separating fat?
If fat sneaks back in, you likely poured too fast or didn’t chill long enough. Fix it by:
- Re-chilling the gravy and skimming again.
- Adding a cornstarch slurry (1 tbsp cornstarch + 2 tbsp water) to bind residual fat.
Is it safe to reuse the separated fat for cooking?
Yes! Strained, clarified fat (like schmaltz or bacon grease) adds rich flavor to roasted veggies, eggs, or even pie crusts. Store it in the fridge (up to 1 month) or freezer (3 months). Pro tip: Label it to avoid mix-ups!
What’s the best way to dispose of leftover fat?
Never pour fat down the drain—it clogs pipes! Instead:
- Let it solidify in a can/jar, then toss in the trash.
- Mix with kitten litter or coffee grounds to absorb it.
- Check local recycling programs (some accept cooking fat).
Separating fat from drippings doesn’t have to be a messy challenge—now you’ve got the tools to make rich, flavorful gravy or broths with ease! 🍲 Whether you use a fat separator, ice cubes, or the trusty spoon method, clarity is just a few simple steps away. Next time you roast a turkey or sear a steak, put these tricks to the test and taste the difference.
Ready to level up your cooking game? Try making homemade pan gravy with your freshly skimmed drippings—your taste buds will thank you! 😉

Trained in classic French technique but raised on slow-cooked ribs and spicy rubs, she blends culinary skill with smoke and soul.
- Recipe for Boneless Pork Chops in Cast Iron Skillet: Sear and Baste to Juicy Perfection - October 3, 2026
- Recipe for Boneless Cross Rib Roast: Slow-Roasted Beef with Herb Crust - October 3, 2026
- Hamburgers in Sauce Recipe Crock Pot: Slow-Cooked Savory Delight - October 3, 2026