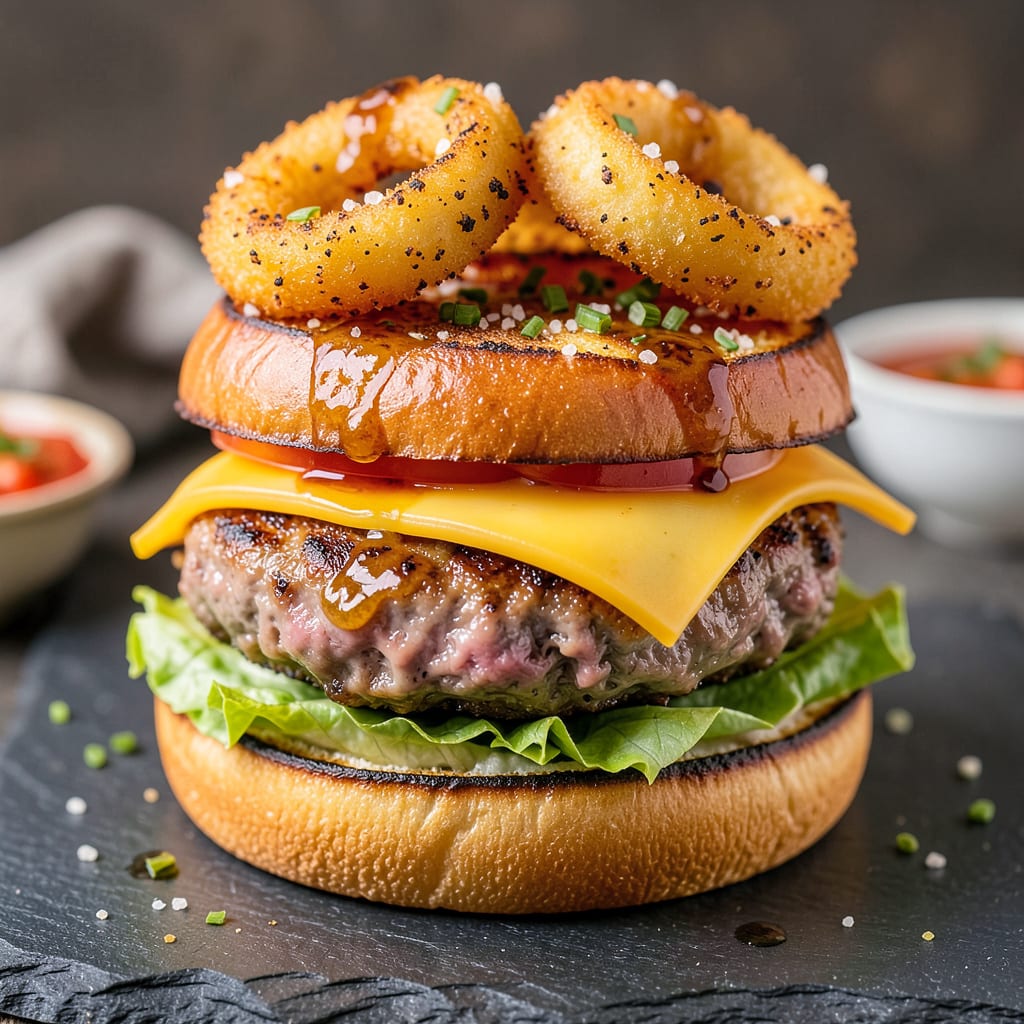
There’s an art to stacking a burger that turns a good sandwich into something legendary. I’ve spent years perfecting this technique—from backyard cookouts to professional kitchens—and the difference is in how you layer. A well-built burger stays together, balances flavors, and looks as good as it tastes. No more toppings sliding out with every bite.
The secret starts with the bun. Toast it just enough to create structure without making it crunchy. Then comes the sauce—always on both cut sides of the bun to prevent sogginess. I learned this the hard way after too many collapsed burgers. The patty goes next, followed by cheese if you’re using it, then toppings in order of sturdiest to most delicate.
What you end up with is a burger that holds its shape from first bite to last. The flavors meld perfectly because each ingredient has its proper place. No more ketchup-soaked lettuce or cheese that’s slipped off to the side. This method works for classic cheeseburgers, loaded bacon burgers, or even veggie patties.
Here’s where it gets interesting—this technique adapts to any burger style. Whether you’re building a towering diner-style burger or a simple smash burger, the principles stay the same. The right order and balance make all the difference between a messy meal and a masterpiece.
📚 In This Guide
- What You’ll Need
- Instructions
- Tips and Common Mistakes
What Youll Need
- ● Burger patties – 1 per burger (4–6 oz each, 80% lean/20% fat for juiciness)
- ● Buns – 1 per burger (toasted brioche or potato buns work best)
- ● Cheese slices – 1–2 per patty (cheddar, American, or pepper jack)
- ● Toppings – Lettuce (iceberg or romaine), tomato (2–3 slices), onion (thinly sliced or caramelized), pickles (3–4 slices)
- ● Condiments – Ketchup, mustard, mayo, or special sauce (2 tbsp total per burger)
- ○ Extras (optional) – Bacon (2 strips), avocado (¼ sliced), sautéed mushrooms, or jalapeños
- ● Spatula (for flipping patties)
- ● Tongs (for precise stacking)
- ● Knife & cutting board (for prep)
- ● Grill, skillet, or griddle (preheated to medium-high)
- ● Toaster or butter brush (for buns)
Step-by-Step Instructions for Stacking a Burger
Building the perfect burger is all about balance and technique—let me show you how to layer it like a pro.
Start with the Right Bun Foundation
Begin by lightly toasting your bottom bun on a dry skillet or grill for 30-45 seconds until it’s warm and slightly crisp. This creates a sturdy base that won’t get soggy from the juices. I always use the cut side down to get that perfect golden color without burning the edges.
Place the toasted bun on your plate with the flat side facing up. This gives you a stable platform for stacking. If your bun is too domed, you might need to gently press it down to create a flatter surface. The goal is to have all ingredients sit level, not slide off to the side.
Build the Moisture Barrier Layer
Spread a thin layer of your chosen sauce or condiment directly on the toasted bun. I recommend starting with something tangy like mustard or aioli—about 1 teaspoon is plenty. This creates a flavorful barrier that prevents the bun from getting soggy while adding immediate taste impact.
Next, add your crispest vegetable elements. I like to place pickles or raw onions directly on the sauce—their acidity and crunch will cut through the richness of what comes next. Arrange them in a single, even layer rather than piling them up, which helps maintain structural integrity.
Add the Protein and Cheese Strategically
Place your cooked patty (or patties) centered on the vegetable layer. For double burgers, I add a thin slice of cheese between the patties to act as a glue that holds them together. The bottom patty should be your juiciest one, while the top can be slightly more well-done for textural contrast.
If using melted cheese, add it immediately after the patty so it’s still warm enough to melt slightly from the residual heat. For cold cheeses like blue cheese or feta, sprinkle them now so they don’t slide around later. The protein layer should be the densest part of your burger—this is what gives it substance and satisfaction.
Layer the Toppings with Purpose
Now add your softer, more delicate toppings like lettuce, tomatoes, or avocado. Place them in this order: sturdiest on bottom (like crisp lettuce), then more delicate items (like tomato slices) on top. This prevents the softer ingredients from getting crushed under the weight of what’s above.
For saucy toppings like caramelized onions or bacon jam, spoon them over the center of the patty rather than spreading to the edges. This containment strategy keeps everything neater when you take that first bite. Remember, each topping should serve a purpose—adding flavor, texture, or visual appeal.
Crown and Secure the Masterpiece
Add your top bun, again with the cut side facing down. Gently press down with your palm to compress the burger slightly—this helps everything adhere together. The ideal pressure is firm but not squashing; you should feel some resistance from the structured layers beneath.
For the final touch, I like to skewer the burger with a long toothpick or small burger pin at a 45-degree angle. This not only holds everything together but also serves as a visual guide for how to approach eating it. The perfect burger should hold its shape when lifted, with all layers visible from the side—no leaning towers or ingredient avalanches!
Tips and Common Mistakes for Perfect Burger Stacking
Mastering the art of burger stacking comes down to a few key techniques I’ve perfected over years of grilling. Here’s what makes the difference between a good burger and one that holds together beautifully with every bite.
Bun Preparation: In Step 1, those 30-45 seconds of toasting are crucial for preventing sogginess later. I always use a completely dry skillet—no oil needed—because you want the bun to crisp up, not fry. The moment you see the edges turn just barely golden and can smell that toasty aroma, it’s done. Don’t walk away during this short window, as it’s easy to burn the edges if left unattended.
Sauce Strategy: When applying that 1 teaspoon of mustard or aioli in Step 2, spread it right to the edges of the bun. This creates a complete moisture barrier that protects every bite. I learned this the hard way after too many burgers with soggy centers. The acidity in these sauces also helps cut through the richness of the patty, balancing each bite.
Cheese Placement: For Step 3, if you’re using melted cheese, place it directly on the hot patty immediately after cooking. The residual heat will melt it perfectly without needing extra time under a broiler. For double burgers, that thin slice of cheese between patties acts like edible glue—this is what prevents your tower from sliding apart when you lift it. I’ve found American cheese melts best for this purpose, but any good melting cheese works.
Final Compression: The gentle press in Step 5 is more important than it seems. Apply firm but controlled pressure—you should feel the layers settle together without squashing the toppings. I use my palm and press for about 3 seconds. This step ensures your burger holds its shape when lifted and prevents that frustrating first-bite avalanche of toppings.
Pro Tips for Stack A Burger
- Mastering the art of burger stacking comes down to a few key techniques I’ve perfected over years of grilling. Here’s…
- Bun Preparation: In Step 1, those 30-45 seconds of toasting are crucial for preventing sogginess later. I always use …
- Sauce Strategy: When applying that 1 teaspoon of mustard or aioli in Step 2, spread it right to the edges of the bun….
Frequently Asked Questions
Got questions about stacking the ultimate burger? You’re not alone! Here are the most common head-scratchers—answered fast so you can get back to grilling.
How many layers should a well-stacked burger have?
Aim for 3–5 layers max (patty, cheese, veggies, sauce, bun) to avoid a wobbly tower. Overloading makes bites messy—balance texture and height! Pro tip: Press layers gently as you stack to “glue” them together.
Should I toast the bun before stacking?
Always! A quick toast (30 sec on a hot pan or grill) adds crunch and prevents sogginess from sauces/juices. Skip this, and your bun turns into a sad, mushy sponge. Butter the cut sides for extra flavor!
What’s the best order to stack ingredients?
Start with the bottom bun → sauce → lettuce (as a barrier) → cheese/melted toppings → patty → tomatoes/onions → top bun. Sauces on the bottom prevent a slippery base, and lettuce acts like a “shield” against sogginess.
How do I keep my burger from falling apart when I pick it up?
Use one central toothpick (remove before eating!) or skewer layers vertically for 10 seconds to compact them. Also, avoid overstuffing—think “tight hug,” not “squished sandwich.”
Can I stack a burger ahead of time for a party?
Partially! Pre-cook patties and toast buns, but assemble last-minute (max 10 mins ahead). Store components separately: patties warm (200°F oven), veggies/sauces chilled. Stacking early = soggy disaster.
Stacking the perfect burger is all about balance, texture, and creativity—layer by layer! 🍔✨ Whether you’re a home cook or a grill master, the right technique turns a good burger into an unforgettable one. Now that you’ve got the know-how, grab your ingredients, fire up the grill, and start experimenting with your own signature stack. Don’t forget to snap a pic and tag us—we’d love to see your mouthwatering masterpiece! Ready to level up? Try pairing your burger with homemade sauces or fresh-baked buns next.

Trained in classic French technique but raised on slow-cooked ribs and spicy rubs, she blends culinary skill with smoke and soul.
- Recipe for Boneless Pork Chops in Cast Iron Skillet: Sear and Baste to Juicy Perfection - October 3, 2026
- Recipe for Boneless Cross Rib Roast: Slow-Roasted Beef with Herb Crust - October 3, 2026
- Hamburgers in Sauce Recipe Crock Pot: Slow-Cooked Savory Delight - October 3, 2026