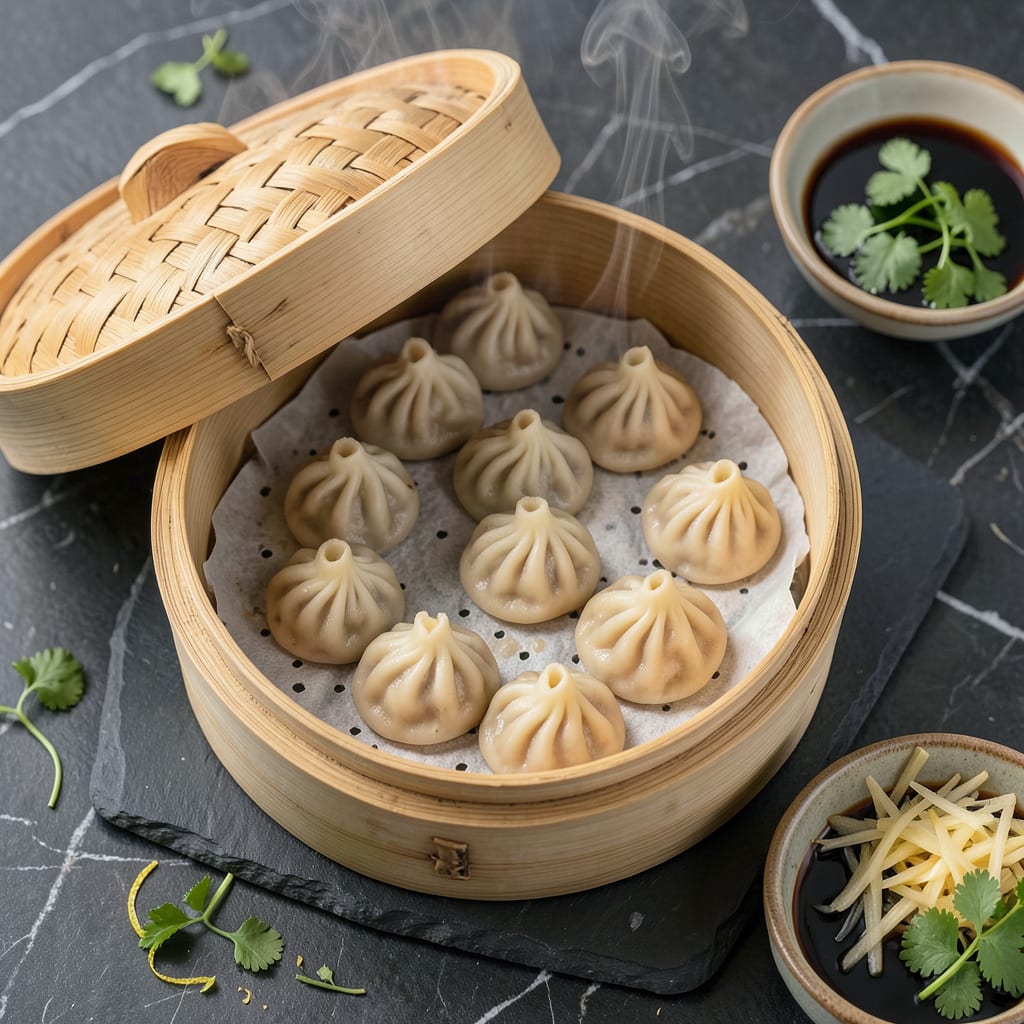
There’s nothing quite like that first bite into a perfectly steamed soup dumpling—juicy broth flooding your mouth, tender meat filling, all wrapped in delicate pleated dough. I spent years chasing that restaurant-quality XLB experience at home, burning through batches until I cracked the code for perfect results every time.
The secret starts with the broth. You can’t just pour liquid into dumplings—it needs to be transformed into a gelatin that melts back into soup when steamed. I use a combination of chicken stock and unflavored gelatin, chilled until it sets like firm Jell-O. This is what creates that signature burst of hot, savory liquid when you bite in.
Then comes the pleating, which intimidated me for years. Here’s the thing—it’s easier than it looks. With practice, you’ll develop a rhythm: pinch, fold, twist, repeat. The dough should be thin enough to see light through it, but sturdy enough to hold the filling. I’ll walk you through the exact technique that finally worked for me.
Steaming is where most home cooks go wrong. Too much water and your dumplings turn soggy. Too little and they dry out. The solution? A bamboo steamer lined with parchment paper (with holes poked in it) and exactly 1 inch of boiling water in the pot. Eight minutes later, you’ll have dumplings that look—and taste—like they came from your favorite dim sum spot.
📚 In This Guide
- What You’ll Need
- Instructions
- Tips and Common Mistakes
What Youll Need
- ● Fresh or frozen soup dumplings (XLB): 12–16 dumplings per batch (ensure they’re thawed if frozen! ❄️).
- ● Bamboo steamer: 10-inch diameter (or larger for bigger batches). Pro tip: Line with parchment paper (cut into circles with ½-inch holes) or cabbage/napa leaves to prevent sticking! 🌿
- ● Wok or deep pot with lid: Wide enough to fit the steamer (12+ inches ideal). A steamer rack (if your pot lacks one) is a must!
- ● Water: 2–3 cups for steaming (adjust based on pot size—don’t let it dry out!).
- ● Tongs or chopsticks: For safe dumpling transfer (no pierced skins!).
- ● Timer: ⏰ Essential for precise 8–10 minutes of steaming.
- ● Vinegar + soy sauce mix: For dipping (2 tbsp black vinegar + 1 tbsp soy sauce + chili oil to taste).
- ● Kitchen scissors: To trim parchment paper liners neatly.
- ● Instant-read thermometer: Check water temp (aim for 212°F/100°C before adding dumplings).
- ● Extra dumplings: Because you will want seconds. 😉
Instructions
Here’s the method I use to achieve those delicate pleats and juicy interiors that make soup dumplings legendary.
Prepare Your Steaming Setup
Line your bamboo steamer with parchment paper or cabbage leaves, making sure to poke small holes for steam circulation. I prefer parchment because it’s more consistent and won’t impart flavor. Fill a wok or large pot with about 2 inches of water – enough to create steady steam but not so much that it touches the dumplings when boiling.
Bring the water to a rolling boil over high heat. You want aggressive steam from the very beginning to prevent the dumplings from sticking. Place your steamer over the boiling water and cover with the lid. Let it preheat for 2-3 minutes to build up that initial burst of steam before adding your dumplings.
Arrange the Dumplings Properly
Carefully place your soup dumplings in the steamer, leaving at least 1 inch of space between each one. This spacing is crucial – it allows the steam to circulate freely around each dumpling, ensuring even cooking. I like to arrange them in a circular pattern starting from the outer edge and working inward.
Don’t overcrowd the steamer. For a standard 10-inch steamer, I recommend no more than 8-10 dumplings per batch. Overcrowding leads to uneven cooking and increases the risk of dumplings sticking together or to the steamer. Work in batches if needed to maintain that perfect spacing.
Steam with Precision Timing
Once your dumplings are arranged, cover the steamer tightly with the lid. The steam should be escaping steadily from the sides – this indicates proper heat and pressure. Steam over high heat for exactly 8-10 minutes. This timing is critical for achieving that perfect texture where the wrapper is tender but still holds its shape.
Resist the temptation to peek during steaming. Every time you lift the lid, you lose valuable heat and steam, which can cause the dumplings to cool and the wrappers to toughen. I set a timer and don’t open the steamer until it goes off. You’ll know they’re ready when the wrappers appear slightly translucent and the dumplings have puffed up slightly.
Rest and Serve with Care
When the timer goes off, turn off the heat but leave the dumplings in the covered steamer for an additional 1-2 minutes. This brief rest period allows the internal temperature to equalize and the gelatinous broth inside to stabilize. It’s the secret to preventing those disappointing bursts when you first bite in.
To serve, use a thin spatula to gently lift each dumpling from the steamer. Transfer to a plate lined with a fresh cabbage leaf or parchment to prevent sticking. Serve immediately with traditional accompaniments like black vinegar and thinly sliced ginger. Warn your guests about the hot broth inside – the mark of a perfectly steamed soup dumpling is that glorious first burst of flavorful liquid.
Tips and Common Mistakes
These small but crucial details will transform your steaming game and help you avoid the most common pitfalls I’ve seen even experienced cooks make.
Steam Quality is Everything: The 2-3 minutes of preheating your steamer in Step 1 isn’t just a suggestion—it’s what creates that initial burst of aggressive steam that prevents sticking. I’ve found that using filtered water reduces mineral buildup in your steamer over time, and the 2 inches specified gives you steady steam without risking water contact. The moment you see continuous steam escaping from under the lid, you’re ready to add your dumplings.
The Spacing Secret: That 1-inch gap between dumplings in Step 2 isn’t arbitrary. When I first started making XLB, I’d crowd them in to save time, but the results were always uneven—some wrinkled, others split. The circular arrangement mentioned creates an airflow vortex that cooks each dumpling uniformly. For a 10-inch steamer, I’ve found 8 dumplings is the sweet spot; 10 works if they’re on the smaller side.
Timing Precision: Those 8-10 minutes in Step 3 are non-negotiable for that perfect wrapper texture. I set two timers—one for 8 minutes as my minimum, and another for 10 as my absolute maximum. The wrappers should look slightly translucent with a subtle sheen, and you’ll notice they’ve puffed up just a bit. If you’re using frozen dumplings, you’ll want the full 10 minutes to ensure the center thaws completely.
Resting Period Matters: The 1-2 minutes of resting in Step 4 might seem insignificant, but it’s what prevents that disappointing broth explosion when you bite in. I learned this the hard way after serving dumplings straight from the steamer—half the broth ended up on the plate, not in the dumpling. This brief pause lets the gelatinized broth redistribute and the wrapper firm up just enough to hold everything in.
Pro Tips for Steam Soup Dumplings
- These small but crucial details will transform your steaming game and help you avoid the most common pitfalls I’ve se…
- Steam Quality is Everything: The 2-3 minutes of preheating your steamer in Step 1 isn’t just a suggestion—it’s what c…
- The Spacing Secret: That 1-inch gap between dumplings in Step 2 isn’t arbitrary. When I first started making XLB, I’d…
Frequently Asked Questions
Can I steam soup dumplings without a bamboo steamer?
A metal steamer insert or even a heatproof colander lined with parchment paper works. Place it over a pot with 1-2 inches of boiling water, ensuring the dumplings don’t touch the water. Cover tightly with a lid to trap steam. Avoid plastic—it can melt!
How long should I steam frozen soup dumplings?
Frozen XLB need 12-15 minutes over medium-high heat (vs. 8-10 minutes for fresh). Key tip: Don’t thaw them first—steam directly from frozen to prevent the wrappers from sticking. Add 2 extra minutes if steaming in batches.
Why did my soup dumplings stick to the parchment paper?
Too little oil or uneven steam is usually the culprit. Fix it: Brush the parchment with neutral oil (like avocado or vegetable) before placing dumplings, and ensure your water is boiling vigorously before steaming. Poke holes in the parchment for better airflow!
Can I reheat leftover soup dumplings?
Yes, but steam them again—microwaving makes wrappers soggy. Re-steam for 5-6 minutes until hot. For crispy bottoms, pan-fry after steaming (add 1 tbsp water to the pan, cover, and cook 2 minutes). Avoid refrigerating more than 24 hours—the broth gelifies!
What’s the best way to prevent dumplings from breaking while steaming?
Three golden rules:
- Space them out: Leave 1-inch gaps to avoid sticking.
- Use high heat: A rolling boil creates consistent steam.
- No peeking! Lifting the lid drops temperature and causes wrinkles/cracks.
Mastering how to steam soup dumplings is all about patience and precision—from pleating the wrappers to nailing that perfect steam time. With the right tools, technique, and a little practice, you’ll be serving up juicy, burst-in-your-mouth XLB that rival your favorite dim sum spot! 🥟✨
Now that you’ve got the know-how, why not gather your ingredients and give it a try? Start with a small batch, tweak as you go, and soon you’ll be a soup dumpling pro. Happy steaming—and even happier eating!

Trained in classic French technique but raised on slow-cooked ribs and spicy rubs, she blends culinary skill with smoke and soul.
- Recipe for Boneless Pork Chops in Cast Iron Skillet: Sear and Baste to Juicy Perfection - October 3, 2026
- Recipe for Boneless Cross Rib Roast: Slow-Roasted Beef with Herb Crust - October 3, 2026
- Hamburgers in Sauce Recipe Crock Pot: Slow-Cooked Savory Delight - October 3, 2026