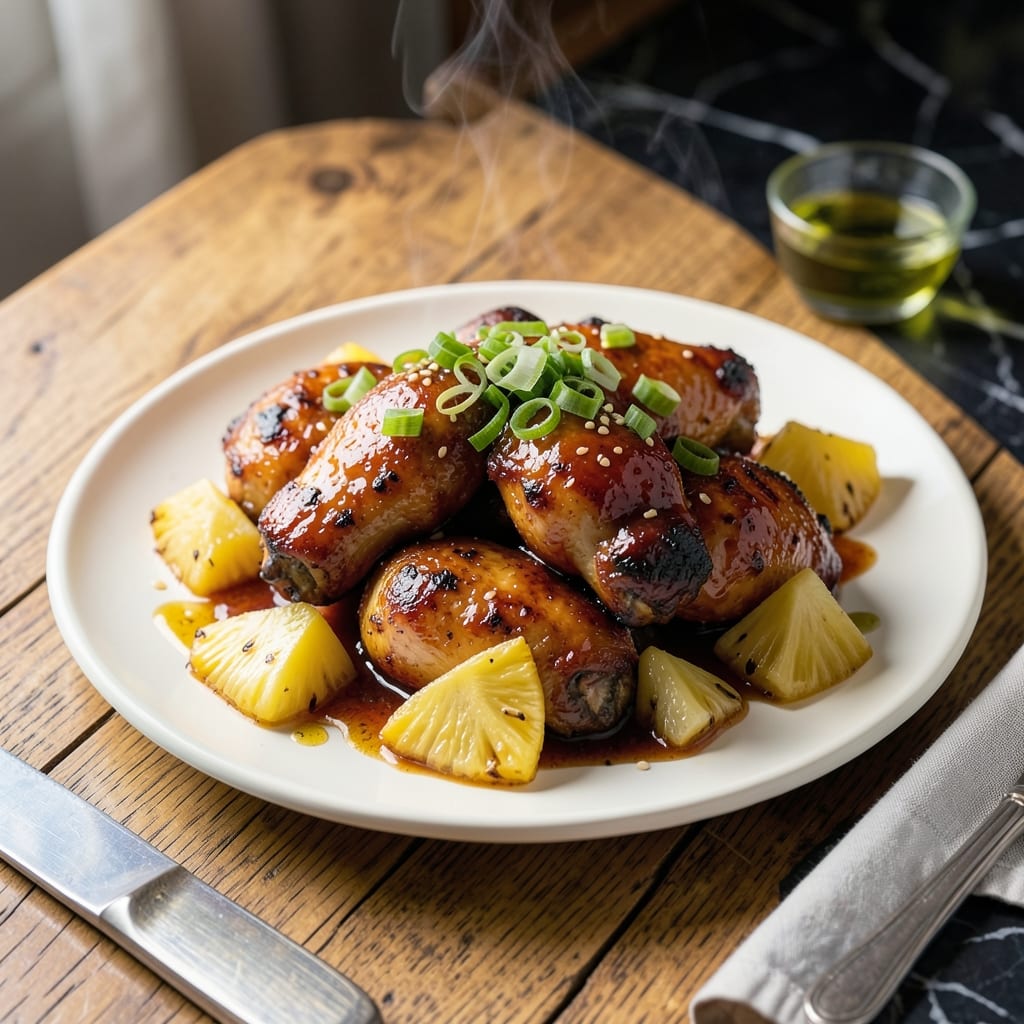
I developed this method after testing multiple approaches in my Boston apartment kitchen, where space and time are always limited. The Instant Pot transforms this Hawaiian favorite into a weeknight-friendly meal with minimal effort.
The key is balancing sweet and tangy in the marinade, then letting the pressure cooker work its magic. 30 minutes is all you need for tender, flavorful chicken that tastes like it came from a beachside grill.
You’ll achieve that signature caramelized glaze without babysitting a grill. The sauce reduces perfectly under pressure, coating each piece with tropical sweetness.
Serve this over rice with pineapple slices for the full experience. This streamlined approach delivers authentic flavor without the traditional hassle.
Ingredients for Huli Huli Chicken Recipe Instant Pot
Pantry staples and fresh pineapple bring this Hawaiian classic to your kitchen.
| Ingredient | Amount | Notes |
|---|---|---|
| Boneless Chicken Thighs 🍗 | 2 lb | Skin-on for extra flavor |
| Pineapple Juice 🍍 | 1 cup | 100% juice, no added sugar |
| Soy Sauce 🫒 | ½ cup | Low-sodium preferred |
| Brown Sugar 🍚 | ½ cup | Light or dark works |
| Ketchup 🍅 | ½ cup | For tangy sweetness |
| Fresh Ginger 🌿 | 1 tbsp | Minced or grated fine |
| Garlic Cloves 🧄 | 4 cloves | Minced for maximum flavor |
| Rice Vinegar 💧 | ¼ cup | Adds necessary acidity |
| Sesame Oil 🫒 | 1 tbsp | Toasted for depth |
| Fresh Pineapple 🍍 | 1 cup | Diced, for serving |
| Green Onions 🧅 | ½ cup | Sliced thin for garnish |
| Cornstarch 🌾 | 2 tbsp | For thickening sauce |
| Water 💧 | ¼ cup | For Instant Pot pressure |
[recipe_ingredient_scaler]
The chicken is everything here. Boneless, skin-on thighs stay juicy under pressure—breasts can dry out. I grab mine from Market Basket (Boston locals know) or Whole Foods if I’m feeling fancy. Look for thighs with good marbling—fat equals flavor. For the pineapple juice, check the label for 100% juice (Dole is reliable). The soy sauce should be low-sodium so you can control the salt.
No pineapple juice? Orange juice plus a splash of lime gets you 80% there. Out of brown sugar? Honey or maple syrup at half the amount (the liquid difference evens out). The ketchup is non-negotiable for that signature tang—Heinz or Hunts work. Want extra depth? Add 1 tsp fish sauce (vegetarian version if needed). The ginger and garlic can be from jars in a pinch, but fresh is worth the effort.
This keeps beautifully. Chicken and sauce stay good for 4 days in the fridge, or freeze for 3 months. The glaze thickens more as it cools—just stir in a little water when reheating. Pro tip: save some sauce before adding cornstarch for dipping (trust me on this).
Why You’ll Love This Recipe
- Set and Forget: I toss everything in the Instant Pot and walk away—no babysitting, no flipping, just perfectly saucy chicken when the timer dings.
- Sweet & Tangy Magic: That combo of pineapple juice, brown sugar, and ketchup? It caramelizes into a glossy glaze that’s sticky, sweet, and just a little zingy.
- Feeds My Busy Week: I double the batch on Sunday and we’re set for lunches, tacos, or rice bowls—no sad desk salad in sight.
- Budget Thigh Winner: Boneless thighs stay juicy and cost half what breasts do, and one recipe stretches to feed us twice.
Step-by-Step Instructions for Huli Huli Chicken Instant Pot
This method delivers tender chicken with a glossy, finger-licking tropical glaze in record time.
Step 1: Sear Chicken Thighs for Depth
Set your Instant Pot to Sauté on Normal heat. Add the 2 lb Boneless Chicken Thighs in a single layer, skin-side down if using skin-on. I like to work in batches to avoid crowding the pot—this ensures each piece gets a good sear rather than steaming.
Cook undisturbed for 4-5 minutes until the chicken develops a deep golden brown crust and releases easily from the bottom. Flip and sear the other side for 2-3 minutes. The fond (browned bits) left behind will deepen the sauce’s flavor significantly.
Remove the chicken to a plate and set aside. Don’t wipe the pot—those browned bits are flavor gold.
Step 2: Build the Huli Huli Sauce Base
In the same pot, add 1 tbsp Fresh Ginger, 4 cloves Garlic Cloves, 0.5 cup Soy Sauce, 0.5 cup Brown Sugar, 0.5 cup Ketchup, 0.25 cup Rice Vinegar, and 1 cup Pineapple Juice. Stir well to dissolve the brown sugar, scraping up any browned bits from the bottom.
Bring the mixture to a gentle simmer and let it cook for 2-3 minutes. You’ll notice the sauce starting to thicken slightly and the aroma becoming intensely fragrant. The pineapple juice adds natural sweetness that balances the salty soy and tangy vinegar perfectly.
Step 3: Pressure Cook to Perfection
Return the seared chicken to the pot along with any accumulated juices. Pour in the 0.25 cup Water, which provides the necessary liquid for pressure cooking. Stir gently to coat the chicken in the sauce, making sure no pieces are sticking to the bottom.
Secure the lid, set the valve to Sealing, and cook on High Pressure for 8 minutes. The chicken will become fall-apart tender while soaking up all those incredible tropical flavors. Once cooking completes, allow a 5-minute natural release, then quick-release any remaining pressure.
Step 4: Thicken and Finish the Glaze
Carefully remove the chicken to a serving platter. Set the Instant Pot to Sauté on Low heat. In a small bowl, whisk together 2 tbsp Cornstarch with 2 tablespoons of cold water to create a slurry. Stir this into the sauce and cook for 3-4 minutes, stirring constantly, until the sauce thickens to a glossy, syrup-like consistency that coats the back of a spoon.
Drizzle this luscious sauce over the chicken. For extra shine and depth, I always stir in 1 tbsp Sesame Oil at the end—it adds a nutty aroma that takes the dish to the next level.
Step 5: Garnish and Serve
Sprinkle with 0.5 cup Green Onions and top with 1 cup Fresh Pineapple for a burst of color and freshness. The contrast of the bright pineapple against the rich, sticky chicken is what makes this dish so special.
Serve immediately over steamed rice to soak up every last bit of that incredible sauce. The chicken should be tender enough to cut with a fork, with a glossy glaze that’s both sweet and tangy with a hint of umami from the soy.
Pro Tips For Making Huli Huli Chicken Recipe Instant Pot
- Sear First: I learned this the hard way—browning the chicken thighs in the Instant Pot before pressure cooking adds a depth of flavor the sauce alone can’t deliver. Two minutes per side on sauté mode is all it takes.
- Trim the Fat: Skip the excess fat on the thighs or you’ll end up with a greasy sauce. A quick trim with kitchen shears takes 30 seconds and makes the dish cleaner and more balanced.
- Thicken the Sauce: After pressure cooking, switch to sauté mode and let the sauce reduce for 5-7 minutes. It transforms from watery to glossy and clings perfectly to the chicken.
- Use Fresh Pineapple Juice: Sounds weird, but it works: bottled pineapple juice lacks the brightness of fresh. A quick blend of canned pineapple chunks and a splash of water gives the sauce a vibrant, natural sweetness.
Pro Cooking Tips for This Dish
Searing for Maximum Flavor
Don’t skip the searing step—it builds the fond that makes your sauce rich and complex. I use Normal heat on my Instant Pot and cook the 2 lb chicken thighs in batches to avoid steaming. 4-5 minutes per side gives that perfect golden crust. 💡
Sauce Simmering Trick
After building your sauce base, let it simmer for 2-3 minutes before pressure cooking. This helps the brown sugar dissolve completely and melds the flavors. Scrape up those browned bits—they’re pure flavor bombs for your glaze.
Pressure Timing Precision
8 minutes on High Pressure is the sweet spot for fall-apart tender chicken. I always do a 5-minute natural release followed by a quick release—this prevents the chicken from overcooking while keeping it juicy. The thighs will soak up the tropical flavors beautifully.
Glaze Thickening Hack
For that perfect glossy finish, mix 2 tbsp cornstarch with 2 tbsp cold water for your slurry. Cook on Low Sauté and stir constantly for 3-4 minutes. The sauce should coat the back of a spoon—this is how you get that signature sticky glaze. 🔥
Final Flavor Boost
Right before serving, stir in 1 tbsp sesame oil to the sauce. It adds a nutty depth that elevates the entire dish. Then drizzle that glossy glaze over the chicken—every bite will be packed with that sweet-tangy Hawaiian flavor.
Nutrition Facts
Frequently Asked Questions
Can I use chicken breasts instead of thighs?
You can, but thighs stay juicier under pressure. If using breasts, reduce cook time to 6 minutes and add 1/4 cup extra liquid to prevent drying out.
How do I make the sauce thicker?
Mix 1 tbsp cornstarch with 1 tbsp cold water, then stir into simmering sauce. Cook for 2-3 minutes until it coats a spoon.
Can I make this ahead of time?
Yes! Cook and refrigerate for up to 4 days. Reheat gently with a splash of water to loosen the sauce.
What if my sauce is too sweet?
Balance it with 1-2 tbsp rice vinegar or a splash of soy sauce. Taste as you adjust to avoid overdoing it.

Trained in classic French technique but raised on slow-cooked ribs and spicy rubs, she blends culinary skill with smoke and soul.
- Recipe for Dumplings in Crock Pot: Fluffy Pillows with Minimal Effort - October 3, 2026
- Recipe For Diced Pork In Slow Cooker: Melt-In-Your-Mouth Tenderness All Day - October 3, 2026
- Recipe for Crock Pot Lasagna Using Ravioli: No-Boil Cheese Layers - October 3, 2026