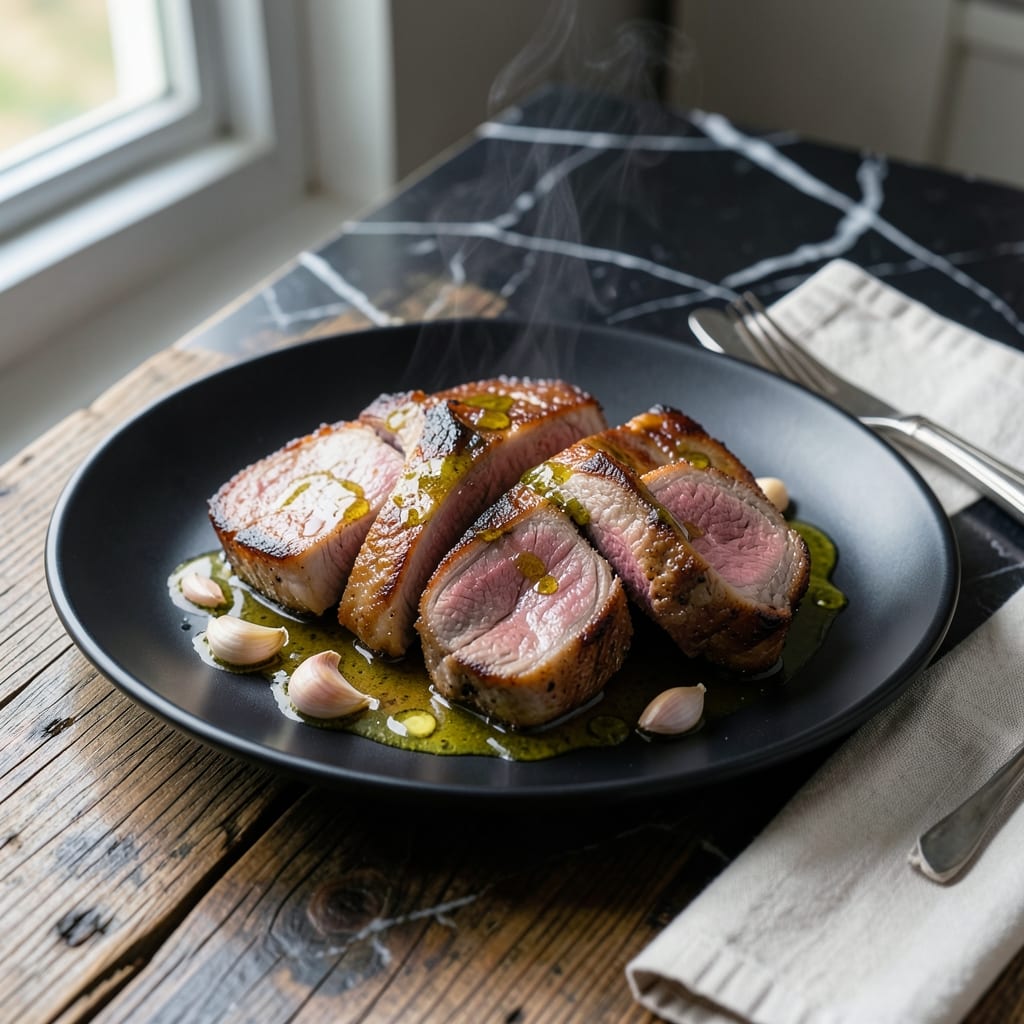
I ruined more pork chops than I care to admit before nailing this oven method. The key is starting with a searing hot pan to lock in those juices before transferring to the oven.
What makes this special is the Iberico pork itself—rich, marbled, and packed with flavor that needs little more than salt and pepper. A 400°F oven finishes the cooking perfectly without drying it out.
You’ll end up with a chop that’s tender and juicy, with a golden crust outside. The meat practically melts in your mouth, and the aroma will have everyone gathering in the kitchen.
Pair it with roasted potatoes or a simple green salad. This is the kind of dish that makes weeknight dinners feel like a celebration.
Ingredients for Iberico Pork Chop Recipe Oven
Rich, marbled Iberico pork chops and a few pantry staples create this showstopping dish.
| Ingredient | Amount | Notes |
|---|---|---|
| Iberico Pork Chops 🥩 | 4 whole | Bone-in, 1.5 inches thick |
| Kosher Salt 🧂 | 1 ½ tsp | Diamond Crystal preferred |
| Freshly Ground Black Pepper 🌶️ | 1 tsp | Coarse grind for crust |
| Extra-Virgin Olive Oil 🫒 | 2 tbsp | High smoke point variety |
| Unsalted Butter 🧈 | 2 tbsp | For basting chops |
| Garlic Cloves 🧄 | 4 cloves | Smashed, not minced |
| Fresh Rosemary Sprigs 🌿 | 2 whole | Optional for aroma |
| Fresh Thyme Sprigs 🍃 | 2 whole | Optional for aroma |
| Lemon 🍋 | 1 whole | For finishing squeeze |
| All-Purpose Flour 🌾 | ¼ cup | For light dusting |
[recipe_ingredient_scaler]
The pork chops are everything here. Iberico pork (that gorgeous Spanish stuff with deep marbling) is non-negotiable for the best results. Look for bone-in chops about 1.5 inches thick—they hold up better to the high heat. Most specialty butchers or Whole Foods carry it, but call ahead. If you can only find boneless, reduce the cooking time by a few minutes to avoid drying them out.
No Iberico? Regular bone-in pork chops at 1.5 inches thick work in a pinch (just brine them first for 30 minutes). The butter can be swapped for ghee or avocado oil if you’re avoiding dairy. Fresh herbs are ideal, but dried at half the amount gets the job done. The flour dusting is optional but gives that extra-crispy crust worth the 30 seconds it takes.
Cooked chops need to rest 10 minutes before serving—don’t skip this (the juices redistribute, trust me). Leftovers? Unlikely, but they’ll keep 3-4 days in the fridge. Reheat gently in a skillet with a splash of water to keep them moist.
Why You’ll Love This Recipe
- Set and Forget: I just season, sear, and let the oven do the work—no babysitting required.
- Buttery Crisp: The butter and olive oil create this insane golden crust while keeping the pork juicy.
- Dinner Party Star: I’ve served this to picky eaters and foodies alike, and both ask for the recipe.
- Leftovers? No Problem: Honestly, the flavors deepen overnight—if there’s any left, I’m making a sandwich.
Step-by-Step Instructions for Iberico Pork Chops in the Oven
Trust me—this method delivers a golden crust and juicy interior that highlights the pork’s rich flavor.
Step 1: Season and Dredge the Iberico Pork Chops
Pat the 4 whole Iberico Pork Chops completely dry with paper towels. Season both sides generously with the 1.5 tsp Kosher Salt and 1 tsp Freshly Ground Black Pepper. I press the seasoning in lightly to ensure it adheres well to the meat.
Lightly dredge both sides of each chop in the 0.25 cup All-Purpose Flour, shaking off any excess. This creates a delicate crust while keeping the pork tender. The flour should just barely coat the surface—too much will burn in the oven.
Step 2: Sear the Chops for a Golden Crust
Heat a large oven-safe skillet over medium-high heat and add the 2 tbsp Extra-Virgin Olive Oil. When the oil shimmers, add the chops and sear for 2-3 minutes per side until deeply golden. You’ll hear a satisfying sizzle—that’s your cue the crust is forming perfectly.
Transfer the chops to a plate and reduce the heat to medium. In the same skillet, add the 2 tbsp Unsalted Butter, 4 cloves Garlic Cloves, 2 whole Fresh Rosemary Sprigs, and 2 whole Fresh Thyme Sprigs. Let the butter foam and the garlic turn fragrant—this infuses the pan with incredible aroma.
Step 3: Finish in the Oven for Perfect Doneness
Return the chops to the skillet, spooning the garlic-herb butter over them. Place the skillet in a preheated 400°F oven and bake for 8-10 minutes. The butter will continue to baste the chops as they cook, adding rich flavor.
You’ll know they’re done when the internal temperature reaches 145°F on an instant-read thermometer. The chops should feel firm but still springy to the touch, and the crust will be a deep, appetizing brown.
Step 4: Rest and Finish with a Bright Touch
Transfer the chops to a cutting board or serving platter and let them rest for 5 minutes. This allows the juices to redistribute, ensuring every bite is moist and flavorful. Tent them loosely with foil to keep them warm.
Just before serving, squeeze the 1 whole Lemon over the chops for a bright, citrusy finish that cuts through the richness. Spoon any remaining garlic-herb butter from the skillet over the top. Serve immediately while the crust is still crisp.
Pro Tips For Making Iberico Pork Chop Recipe Oven
- Preheat the Pan: Get your oven-safe skillet screaming hot before adding the chops—I learned this the hard way after pulling out gray, sad pork more times than I care to admit.
- Dry the Chops: Pat those Iberico chops bone-dry with paper towels before seasoning; even a little moisture will steam them instead of searing, and you’ll lose that crispy crust.
- Don’t Overcrowd: Skip the urge to fit all four chops in one pan; they’ll steam and boil in their own juices instead of browning, and nobody wants that.
- Baste with Butter: Tilt the pan and spoon that melted butter, olive oil, and rendered fat over the chops for the last 2 minutes in the oven—it’s the easiest way to add flavor and shine without extra effort.
Troubleshooting This Dish
Chops Too Dry
This usually happens when they overcook. Pull them from the oven at 140°F and let carryover cooking bring them to 145°F. I always use a ThermoWorks instant-read thermometer for precision. Thin chops (under 1 inch) cook faster, so check early. 🌡️
Soggy Crust
Your pan might not be hot enough for searing. Heat it for 5 minutes before adding oil, and make sure it’s oven-safe. I learned this the hard way with a melted handle. Also, pat the chops very dry before seasoning—moisture is the enemy of crispiness.
If baking in a separate dish, transfer chops to a wire rack over a sheet pan to allow air circulation underneath.
Uneven Cooking
Thicker parts cook slower. If your chops are uneven, pound the thicker sections gently to even them out. Alternatively, rotate the pan halfway through baking for consistent heat. My Boston apartment’s finicky oven taught me this trick. 🔥
Butter Burning
Butter burns at high heat. Reduce to medium after searing before adding butter and herbs. If it starts browning too fast, add a splash of water to the pan. I also pull the skillet out for a minute to let things calm down.
Nutrition Facts
Frequently Asked Questions
What’s the best thickness for oven-cooked chops?
For this method, aim for 1.5 inch thick chops. Thinner ones dry out too quickly, while thicker may not cook evenly. Bone-in helps retain moisture too.
Can I use a different type of pork chop?
Yes, but adjust for differences. Regular bone-in chops work if brined first. Boneless cooks 2-3 minutes faster—watch closely to avoid overcooking.
Why rest the chops before serving?
Resting for 5 minutes lets juices redistribute. Slicing too soon causes all that flavor to spill onto the cutting board instead of staying in the meat.
How can I tell when they’re done without a thermometer?
Press the center—it should feel firm but springy, like the base of your thumb. For 145°F, the meat will just start to pull away from the bone.

Trained in classic French technique but raised on slow-cooked ribs and spicy rubs, she blends culinary skill with smoke and soul.
- Recipe for Boneless Pork Chops in Cast Iron Skillet: Sear and Baste to Juicy Perfection - October 3, 2026
- Recipe for Boneless Cross Rib Roast: Slow-Roasted Beef with Herb Crust - October 3, 2026
- Hamburgers in Sauce Recipe Crock Pot: Slow-Cooked Savory Delight - October 3, 2026