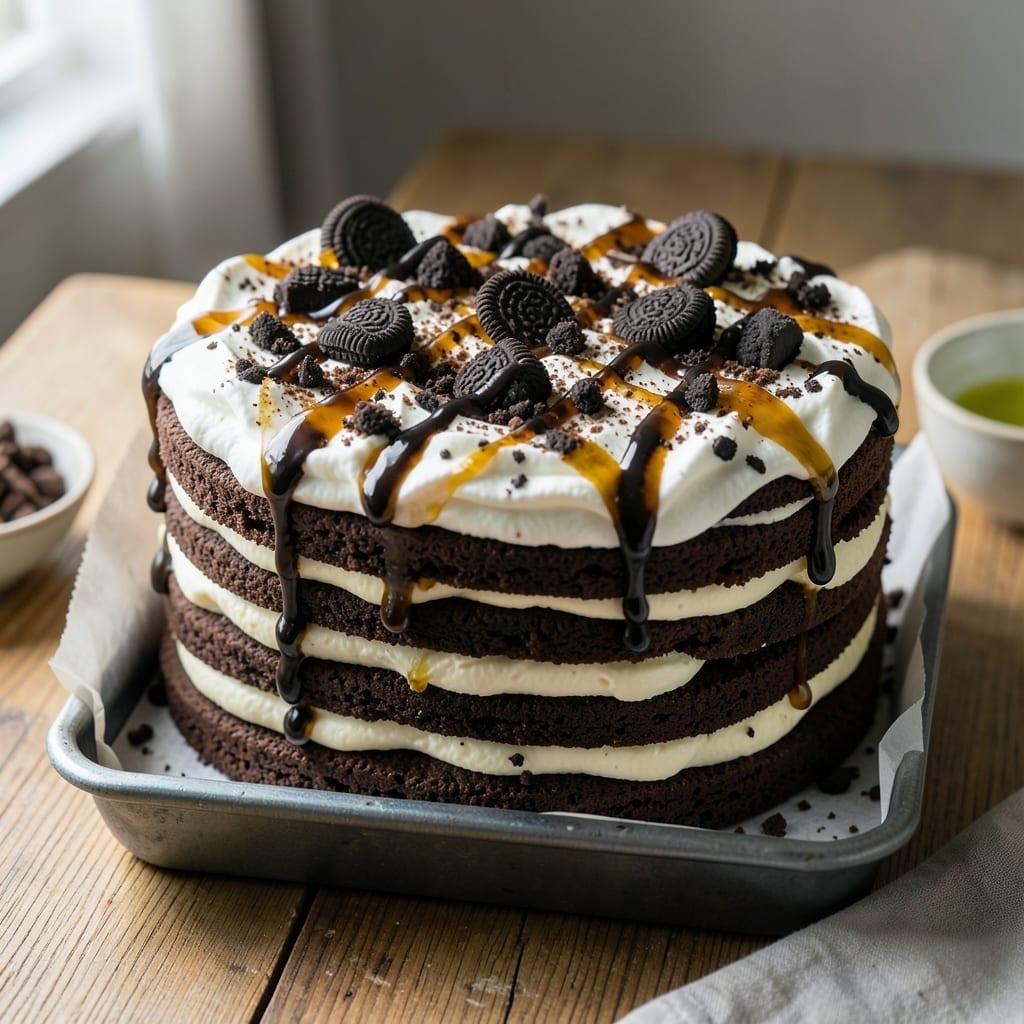
This no-bake dessert transforms store-bought ice cream sandwiches into an impressive layered cake. The secret is strategic layering and precise freezing times to achieve clean slices.
You’ll create a stunning cake with minimal effort, using simple ingredients that come together beautifully. The result is a crowd-pleasing treat that looks and tastes like it came from a bakery.
Ingredients for Ice Cream Cake Recipe with Ice Cream Sandwiches
Transform everyday ice cream sandwiches into a stunning no-bake dessert with these layers.
| Ingredient | Amount | Notes |
|---|---|---|
| Ice Cream Sandwiches 🍦 | 24 pieces | Store-bought, any flavor |
| Cool Whip 🥣 | 8 oz | Thawed, or whipped topping |
| Chocolate Syrup 🍫 | 1 cup | For drizzling between layers |
| Crushed Oreos 🍪 | 1 ½ cups | Or any chocolate cookie |
| Vanilla Ice Cream 🍦 | 4 cups | Softened, for filling gaps |
| Caramel Sauce 🧈 | ½ cup | Optional for extra richness |
| Sprinkles 🎉 | ¼ cup | For decoration on top |
| Chopped Nuts 🌰 | ½ cup | Pecans or walnuts preferred |
| Maraschino Cherries 🍒 | 8 whole | For garnish, drained |
| Graham Cracker Crumbs 🍪 | 1 cup | For pressing on sides |
[recipe_ingredient_scaler]
The ice cream sandwiches are the foundation—choose a quality brand like Nestle or Blue Bunny for best texture. Most grocery stores carry them year-round in the freezer aisle. For the Cool Whip, full-fat version holds up better in layers (trust me on this). The Oreo crumbs add structure, so don’t skip pressing them between layers. I grab mine from Walmart or Target for convenience.
No Cool Whip? Homemade whipped cream works but may weep slightly—stabilize it with a touch of cornstarch. Chocolate syrup can be swapped for hot fudge sauce (use half the amount). For a nut-free version, toasted coconut flakes add great crunch. The vanilla ice cream filling is optional but helps fill gaps between sandwiches for a seamless look.
Assemble and freeze for at least 4 hours—overnight is ideal. Store covered tightly for up to 1 week in the freezer. Slice with a warm knife for clean edges. Leftovers? They won’t last long, but they’ll keep for 2 weeks if hidden well.
Why You’ll Love This Recipe
- No-Bake Bliss: I just layer the ice cream sandwiches, spread on Cool Whip, and drizzle chocolate syrup—no oven, no stress.
- Flavor Explosion: That mix of creamy vanilla, crushed Oreos, and rich chocolate syrup? Ridiculously good in every bite.
- Crowd Pleaser: Birthday parties, BBQs, or just a Tuesday night—this cake disappears fast no matter the occasion.
- Budget Friendly: Honestly, it feeds a dozen for the cost of a few store-bought sandwiches and a tub of Cool Whip.
Step-by-Step Instructions for Ice Cream Cake With Ice Cream Sandwiches
This no-bake method delivers perfect layers with minimal effort and maximum impact.
Step 1: Layer Ice Cream Sandwiches and Chocolate Syrup
Line a 9×13-inch pan with parchment paper, leaving an overhang on the sides. Arrange 12 ice cream sandwiches in a single layer, covering the bottom completely with edges touching. You may need to cut a few to fit perfectly—this ensures a solid base for your cake.
Drizzle ½ cup chocolate syrup evenly over the ice cream sandwiches. Use a spoon to spread it into the gaps and over the edges. This creates a fudgy layer that binds the sandwiches together and adds rich flavor between each tier.
Step 2: Add Cool Whip and Crushed Oreos
Spread the entire 8 oz Cool Whip evenly over the chocolate syrup layer. Use a spatula to create a smooth, even surface. This light, creamy layer provides contrast to the dense ice cream sandwiches and helps the next components adhere properly.
Sprinkle 1.5 cups crushed Oreos uniformly over the Cool Whip. Press down lightly with your hands or the back of a spoon to ensure the crumbs stick to the Cool Whip. This adds texture and a deep chocolate flavor that complements the other layers.
Step 3: Repeat Layers and Fill Gaps
Add another layer of 12 ice cream sandwiches, again cutting pieces to fit if necessary. Drizzle the remaining ½ cup chocolate syrup over this layer, spreading it into any gaps. The syrup will seep into the sandwiches, softening them slightly for easier slicing later.
Use the 4 cups vanilla ice cream to fill any visible gaps between the sandwiches. Press it in gently with a spoon to create a flush surface. This ensures every slice has a consistent texture and appearance.
Step 4: Press Graham Cracker Crumbs on Sides
Once all layers are in place, press the 1 cup graham cracker crumbs firmly onto the sides of the cake. Use your hands or a flat utensil to ensure the crumbs adhere well and cover the sides completely. This creates a rustic, bakery-style finish.
Work quickly but carefully—if the cake starts to soften too much, pop it in the freezer for 10 minutes to firm up before continuing. The crumbs should stick to the slightly softened ice cream and Cool Whip, creating a cohesive outer layer.
Step 5: Decorate and Freeze Until Firm
Drizzle 0.5 cup caramel sauce over the top of the cake, allowing it to drip slightly down the sides. This adds a glossy finish and a sweet, buttery flavor that pairs perfectly with the chocolate.
Sprinkle 0.25 cup sprinkles, 0.5 cup chopped nuts, and 8 maraschino cherries evenly over the top for color and texture. Press them in lightly so they stay in place. Cover the pan with plastic wrap and freeze for at least 4 hours or overnight until firm.
When ready to serve, use the parchment overhang to lift the cake from the pan. Slice into 8 even portions and serve immediately. Each piece should reveal distinct, beautiful layers with a satisfying crunch from the Oreos and graham cracker crumbs.
Pro Tips For Making Ice Cream Cake Recipe With Ice Cream Sandwiches
- Softened Sandwiches First: Let the ice cream sandwiches sit out for 8-10 minutes before layering—they’ll slice cleaner and melt together better than rock-hard ones.
- Freeze Between Layers: After adding each layer (Oreos, Cool Whip, syrup), pop the cake back in the freezer for 15-20 minutes. I learned this the hard way—skipping this step turns your cake into a soupy mess.
- Crush Oreos Fine: Pulse the Oreos into near-powder in a food processor, not chunky bits. The fine crumbs stick to the ice cream better and give every bite that chocolatey crunch.
- Press the Final Layer: After the top layer of Cool Whip, press a sheet of parchment paper gently on the surface before freezing. This smooths it out and prevents ice crystals from forming—sounds weird, but it works.
Troubleshooting This Recipe
Uneven Layers
If your layers look lopsided, it’s likely because the ice cream sandwiches weren’t arranged evenly. Use a ruler to measure the pan and trim sandwiches to fit perfectly. I always press them firmly into the pan to create a flat base before adding toppings. 💡
Crumbs Not Sticking
When the graham cracker crumbs won’t adhere, the cake may be too cold. Let it sit at room temperature for 5-10 minutes to soften slightly. Then, use your hands to press the crumbs firmly into the sides. A light mist of water on the cake’s edges can also help them stick better.
Melting While Decorating
If the cake starts melting while you’re adding toppings, work in a cool kitchen and keep the pan on a tray of ice. Alternatively, freeze the cake for 15 minutes between layers. This prevents the ice cream from turning soupy and ensures clean, sharp layers.
Drizzling Issues
For smooth chocolate or caramel drizzles, warm the sauce slightly in the microwave for 10-15 seconds. Use a squeeze bottle for more control, or drizzle from a spoon in slow, steady streams. If the sauce thickens too much, thin it with 1 tsp of milk to restore a pourable consistency.
Clean Slices
To get perfect slices, dip a sharp knife in hot water and wipe it clean between cuts. Move quickly but carefully—hesitation causes the layers to shift. For best results, let the cake sit at room temperature for 5 minutes before slicing. ✨
Freezer Burn Prevention
Cover the cake tightly with plastic wrap, pressing it directly onto the surface to eliminate air gaps. For extra protection, add a layer of aluminum foil over the plastic. This keeps the cake fresh for up to 2 weeks without freezer burn or off-flavors.
Nutrition Facts
Frequently Asked Questions
Can I use different ice cream flavors?
Mix and match flavors for variety. Vanilla, chocolate, or strawberry sandwiches all work well. Just ensure they’re the same thickness for even layers.
How far in advance can I make this?
Prepare it up to 2 weeks ahead. Store tightly covered in the freezer. Let it sit for 5 minutes before serving to soften slightly for easier slicing.
Can I make this in a different size pan?
A 9×9-inch pan works for a smaller cake—use about 12 sandwiches total. For a larger crowd, a 10×15-inch pan can accommodate 30 sandwiches with adjusted toppings.
Why did my layers separate when slicing?
This usually happens if the cake wasn’t frozen long enough. Allow at least 4 hours of freezing time, preferably overnight. Also, press the layers firmly together during assembly.

Trained in classic French technique but raised on slow-cooked ribs and spicy rubs, she blends culinary skill with smoke and soul.
- Recipe for Boneless Pork Chops in Cast Iron Skillet: Sear and Baste to Juicy Perfection - October 3, 2026
- Recipe for Boneless Cross Rib Roast: Slow-Roasted Beef with Herb Crust - October 3, 2026
- Hamburgers in Sauce Recipe Crock Pot: Slow-Cooked Savory Delight - October 3, 2026