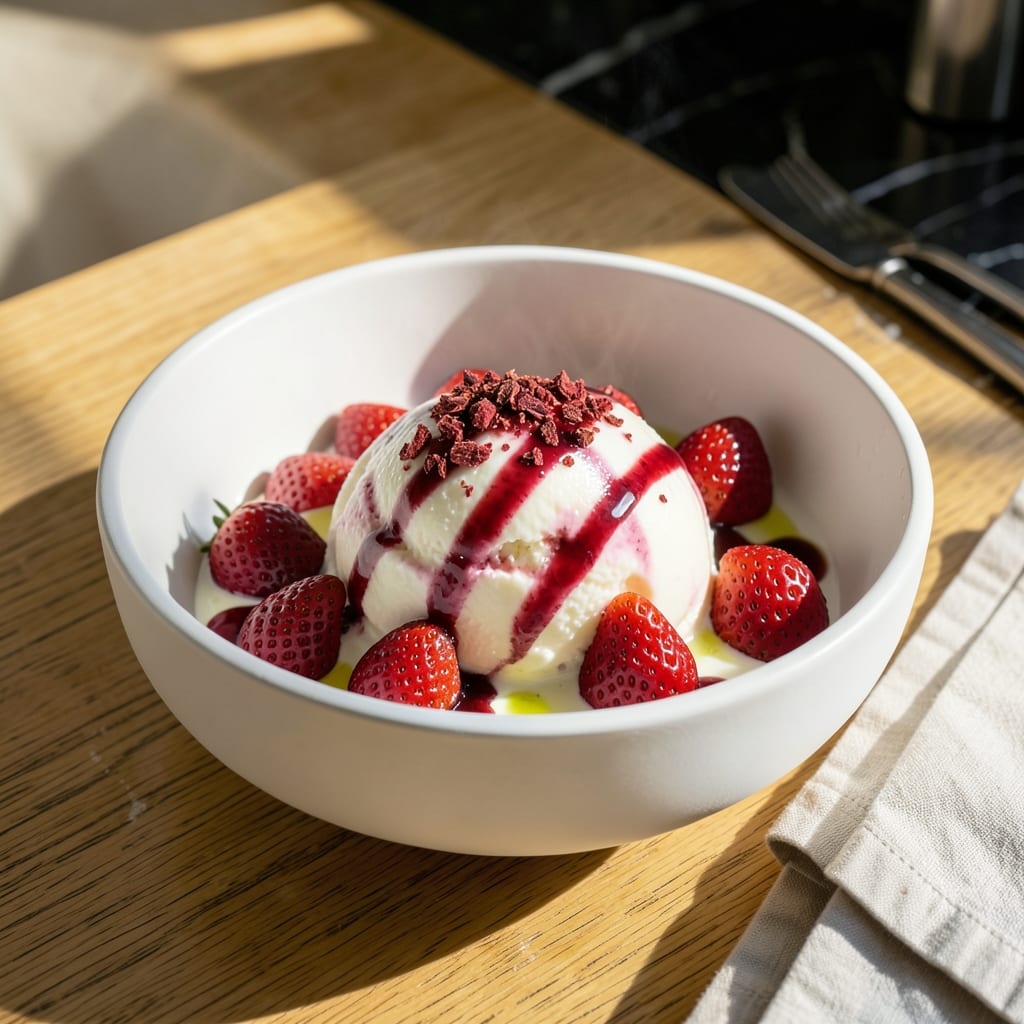
This light and airy ice cream proves you don’t need heavy cream for rich, satisfying flavor. I developed this recipe to cut the fat without sacrificing texture, and the result is surprisingly smooth and creamy.
The secret lies in the balance of low-fat milk, sugar, and a touch of vanilla, churned to perfection. A small amount of egg yolks adds body, while careful temperature control ensures no iciness.
What you get is a scoopable, velvety dessert that’s lighter on calories but still deeply satisfying. It’s the kind of treat that feels indulgent without the guilt.
Serve with fresh berries or a drizzle of chocolate for a finishing touch. Here’s how to make it.
Ingredients for Ice Cream Recipe with Low Fat Milk
Low-fat milk, egg yolks, and sugar create this silky, satisfying frozen treat with ease.
| Ingredient | Amount | Notes |
|---|---|---|
| Whole Low-Fat Milk 🥛 | 4 cups | 2% milkfat preferred for best texture |
| Granulated Sugar 🍚 | 1 cup | Fine white sugar for smoothness |
| Large Egg Yolks 🥚 | 4 whole | Adds richness and body to base |
| Pure Vanilla Extract 🌿 | 2 tsp | Real vanilla, not imitation |
| Table Salt 🧂 | ¼ tsp | Balances sweetness and enhances flavors |
| Fresh Strawberries 🍓 | 2 cups | Hulled and sliced, for serving |
| Semi-Sweet Chocolate Chips 🍫 | ½ cup | Optional, for drizzling when melted |
| Heavy Cream 🥛 | ½ cup | Optional splash for creamier texture |
| Lemon Juice 🍋 | 1 tsp | Brightens the flavor profile |
| Fresh Mint Leaves 🌿 | ¼ cup | Chopped, for garnish if desired |
[recipe_ingredient_scaler]
The milk is the foundation here—2% milkfat gives the best balance of creaminess without excess fat. Whole Foods and Trader Joe’s carry great organic options. Egg yolks are non-negotiable for that velvety texture; look for fresh, large eggs from free-range hens if possible. The vanilla should be pure extract, not the synthetic stuff. I always keep a bottle of Nielsen-Massey on hand for baking projects like this.
No egg yolks? Cornstarch at 1 tbsp per yolk works as a thickener, though the texture won’t be quite as rich. Swap granulated sugar for coconut sugar if you prefer a deeper flavor (use the same amount). Want to skip the vanilla? A splash of almond extract at half the quantity adds a different aromatic note. The strawberries can be swapped for any fresh berries or even frozen ones (thaw and drain first).
The base keeps 5-7 days in the freezer, though it’s best within the first 3 days for optimal texture. Store in an airtight container with parchment paper pressed directly on the surface to prevent ice crystals. Fresh toppings like berries or mint should be added just before serving for the best presentation and flavor.
Why You’ll Love This Recipe
- No Fuss Custard: I just whisk the egg yolks with sugar, heat the low-fat milk, and let the vanilla do its magic—no ice cream maker required.
- Rich Vanilla Comfort: The egg yolks and vanilla create this unexpectedly deep, creamy flavor that tastes way more indulgent than the ingredients suggest.
- Weekend Project: Honestly, it’s fun to make with kids on a Saturday afternoon, and the leftovers keep beautifully for a week.
- Pantry Staples: I always have these basics on hand, so I can whip up a batch whenever the craving hits without a special grocery run.
Step-by-Step Instructions for Ice Cream With Low Fat Milk
Here’s the method. Straightforward, tested, works every time.
Step 1: Heat the Milk and Infuse Flavors
In a medium saucepan, combine the 4 cups whole low-fat milk with the 1 cup granulated sugar and 0.25 tsp table salt over medium heat. Stir frequently with a silicone spatula until the sugar fully dissolves and the mixture just begins to simulate—tiny bubbles will appear at the edges.
Remove from heat and stir in the 2 tsp pure vanilla extract and 1 tsp lemon juice. This early infusion ensures the vanilla’s aromatic compounds distribute evenly throughout the base. Don’t let it boil or you’ll risk scorching the proteins in the milk.
Step 2: Temper the Egg Yolks for a Silky Base
In a separate bowl, whisk the 4 whole large egg yolks until they’re pale yellow and slightly thickened. The ribbons from your whisk should hold their shape briefly on the surface—a sign the yolks are properly emulsified.
Slowly pour about 1 cup of the hot milk mixture into the yolks while whisking constantly. This tempering step raises the egg temperature gradually, preventing curdling when you combine everything. Pour the tempered eggs back into the saucepan with the remaining milk.
Step 3: Cook to Custard Consistency
Return the saucepan to medium-low heat and cook, stirring constantly with a wooden spoon, until the mixture thickens enough to coat the back of the spoon. This should take 5-7 minutes—you’ll notice the liquid changes from thin to velvety.
When you run your finger through the custard on the spoon, it should leave a clear path that doesn’t immediately fill in. The final temperature should reach 170-175°F on an instant-read thermometer. This ensures the eggs are fully cooked but not scrambled.
Step 4: Chill and Prepare for Churning
Strain the custard through a fine-mesh sieve into a clean bowl to remove any cooked egg bits or vanilla specks. Stir in the 0.5 cup heavy cream for extra richness. Press plastic wrap directly onto the surface to prevent a skin from forming.
Refrigerate for at least 4 hours or overnight until completely chilled to 40°F or below. Cold custard churns faster and incorporates more air, resulting in that light, airy texture you’re after. I’ve found overnight chilling produces the smoothest results.
Step 5: Churn and Add Mix-Ins
Pour the chilled custard into your ice cream maker and churn according to the manufacturer’s instructions, typically 20-25 minutes. The mixture will resemble soft-serve when it’s ready—thick and creamy but still slightly fluid.
During the last 2 minutes of churning, slowly add the 0.5 cup semi-sweet chocolate chips for distribution throughout. Transfer to a freezer-safe container, smooth the top, and press plastic wrap directly against the surface. Freeze for at least 4 hours until firm.
Serve scoops of your creation topped with the 2 cups fresh strawberries and garnished with 0.25 cup fresh mint leaves for a vibrant finish.
Pro Tips For Making Ice Cream Recipe With Low Fat Milk
- Temper the Yolks: Slowly whisk about 1/2 cup of the hot milk mixture into the egg yolks before combining everything—I learned this the hard way after scrambling my first batch.
- Chill Thoroughly: Let the custard base chill in the fridge for at least 4 hours, or overnight if you can. Sounds tedious, but it prevents ice crystals and gives you that creamy texture.
- Use Fine Sugar: Swap granulated sugar for superfine or pulse it in a blender first—it dissolves faster in the milk and avoids that faint gritty texture in the final ice cream.
- Add Cornstarch: Mix 1 teaspoon of cornstarch into the sugar before heating. It stabilizes the custard and compensates for the lower fat content in the milk, giving you a smoother scoop.
Essential Equipment for This Dish
Ice Cream Maker
An ice cream maker is non-negotiable for this recipe. I use a Cuisinart ICE-21—it’s affordable, reliable, and makes 1.5 quarts at a time. The bowl needs 12-24 hours in the freezer before churning, so plan ahead. 🍦
Fine-Mesh Sieve
A fine-mesh sieve ensures your custard is silky smooth by catching any cooked egg bits. I prefer a stainless steel sieve with a 8-inch diameter—it fits over most bowls and is easy to clean. Straining is a small step that makes a big difference in texture.
Instant-Read Thermometer
Temperature precision is key for custard. I rely on a ThermoWorks ThermoPop to monitor the mixture as it thickens. Aim for 170-175°F—this range ensures the eggs are cooked but not curdled. A thermometer takes the guesswork out of the process.
Heavy-Bottomed Saucepan
Use a 2-quart heavy-bottomed saucepan to prevent scorching. My go-to is a All-Clad stainless steel pan—it distributes heat evenly and won’t react with acidic ingredients. Avoid nonstick for custard; the coating can peel over time with metal utensils. 🔥
Mixing Bowls
Have 2-3 mixing bowls ready: one for tempering eggs, one for chilling custard. I like Pyrex glass bowls because they’re microwave-safe and you can see the custard’s color as it thickens. A 4-cup bowl is perfect for this recipe’s volume.
Whisk and Spatula
A sturdy balloon whisk is ideal for tempering eggs, while a silicone spatula works best for stirring the custard as it cooks. I keep both within reach to switch tools quickly. The right utensils make the process smoother and more efficient.
Nutrition Facts
Frequently Asked Questions
Why use egg yolks in a low-fat version?
Egg yolks add richness and body without extra fat. They emulsify the mixture, creating that smooth, creamy texture even with 2% milk. Skip them, and you risk iciness.
Can I make this without an ice cream maker?
You can, but it requires more effort. Freeze the custard in a shallow dish, stirring vigorously every 30 minutes for 3-4 hours to break up ice crystals.
How do I prevent ice crystals from forming?
Press plastic wrap directly onto the custard’s surface before chilling and freezing. Also, don’t skip the 4-hour chill—cold custard churns better.
What’s the best way to serve this?
Let it sit at room temperature for 5-10 minutes before scooping. Top with fresh berries or a drizzle of melted chocolate for extra flair.

Trained in classic French technique but raised on slow-cooked ribs and spicy rubs, she blends culinary skill with smoke and soul.
- Recipe for Fully Cooked Spiral Ham: Sweet Glaze and Effortless Elegance - October 3, 2026
- Recipe for Cream of Rice: Silky Smooth Breakfast Comfort - October 3, 2026
- Old Fashioned Beef and Noodles Recipe Crock Pot: Set-It-and-Forget-It Hearty Meal - October 3, 2026