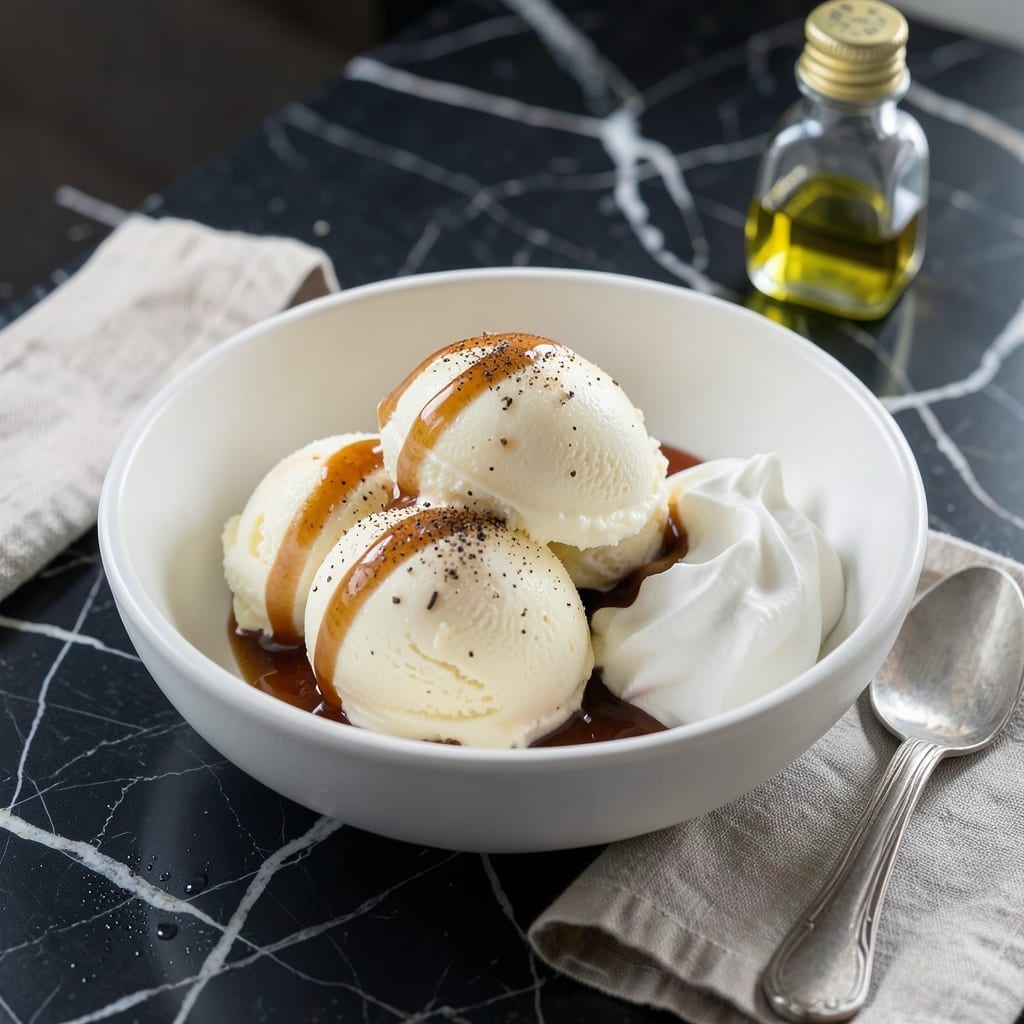
Nothing beats the rich, creamy texture of homemade ice cream fresh from the churn. This recipe delivers that classic velvety smoothness you expect from a premium dessert, without specialized equipment.
With just a few quality ingredients and proper technique, you’ll achieve professional results. The base comes together quickly, then transforms in the freezer into a silky treat worth every minute.
Ingredients for Ice Cream
Quality ingredients create that velvety texture you crave in every scoop of this treat.
| Ingredient | Amount | Notes |
|---|---|---|
| Heavy Cream 🥛 | 2 cups | Full-fat for richness |
| Whole Milk 🥛 | 1 cup | Cold, for smooth texture |
| Granulated Sugar 🍚 | ¾ cup | Fine grain preferred |
| Vanilla Extract 🌿 | 2 tsp | Pure for best flavor |
| Salt 🧂 | ¼ tsp | Enhances sweetness |
| Large Egg Yolks 🥚 | 6 whole | Room temperature for emulsification |
| Vanilla Bean 🌿 | 1 whole | Split and scraped |
| Light Corn Syrup 💧 | 2 tbsp | Prevents ice crystals |
| Unsalted Butter 🧈 | 1 tbsp | Melted, for richness |
| Pure Almond Extract 🌰 | ¼ tsp | Optional for depth |
[recipe_ingredient_scaler]
The heavy cream and whole milk are non-negotiable for that ultra-smooth texture. Organic Valley or Horizon brands are reliable for quality. Use fresh vanilla beans if possible—they make a noticeable difference in flavor complexity. The egg yolks must be fresh (check the carton date) and brought to room temperature to properly emulsify with the sugar.
No vanilla bean? Use 1 additional tablespoon of pure vanilla extract. Short on cream? Half-and-half works at a 1:1 ratio, but the texture won’t be quite as rich. The corn syrup can be swapped for honey or agave (though honey may darken the color). For a lighter version, 2% milk can replace whole milk, but expect less creaminess.
The base keeps in the fridge for up to 3 days before churning. Once churned, store in an airtight container with parchment paper pressed directly against the surface to prevent ice crystals. Best eaten within 1 week for peak texture.
Why You’ll Love This Recipe
- 5-Minute Mix: I just dump cream, milk, sugar, and vanilla in a bowl—no cooking, no fuss.
- Velvety Vanilla: The heavy cream and real vanilla extract make it rich and smooth, not icy like store-bought.
- Endless Toppings: Honestly, it’s a blank canvas for fruit, chocolate, or even a sprinkle of sea salt.
- Freezer Stash: I always have a tub ready for unexpected guests or my late-night cravings.
Step-by-Step Instructions for Ice Cream
Master the custard base and churning process for perfectly smooth, creamy results every time.
Step 1: Infuse the Cream with Vanilla Bean
In a medium saucepan, combine the 2 cups Heavy Cream and 1 cup Whole Milk. Split the 1 whole Vanilla Bean lengthwise, scrape out the seeds, and add both seeds and pod to the pan. Heat over medium heat until the mixture begins to simmer at the edges—small bubbles will form around the perimeter.
Remove from heat, cover, and let steep for 15 minutes. This infusion extracts maximum vanilla flavor and aroma. The cream should take on a pale golden hue and smell intensely fragrant. Don’t skip this step; it’s the foundation of rich vanilla character.
Step 2: Temper the Egg Yolks with the Hot Cream Mixture
In a separate bowl, whisk together the 6 whole Large Egg Yolks, 0.75 cup Granulated Sugar, 0.25 tsp Salt, 2 tbsp Light Corn Syrup, and 0.25 tsp Pure Almond Extract until the mixture is pale yellow and slightly thickened, about 2 minutes.
Slowly pour the warm cream mixture into the egg yolk mixture while whisking constantly. This tempering process prevents the eggs from curdling. Once fully combined, return the mixture to the saucepan and cook over medium-low heat until it thickens enough to coat the back of a spoon—about 8-10 minutes. Stir constantly with a wooden spoon.
Step 3: Finish the Custard Base
Remove the custard from heat and stir in the 1 tbsp Unsalted Butter and 2 tsp Vanilla Extract until the butter is fully melted and incorporated. The custard should be smooth, glossy, and have the consistency of a thin pudding.
Strain the custard through a fine-mesh sieve into a clean bowl to remove the vanilla pod and any potential cooked egg bits. Press plastic wrap directly onto the surface of the custard to prevent a skin from forming. Chill in the refrigerator for at least 4 hours or overnight until completely cold—below 40°F.
Step 4: Churn and Freeze to Perfection
Pour the chilled custard into your ice cream maker and churn according to the manufacturer’s instructions, typically 20-25 minutes. The mixture will thicken to the consistency of soft-serve ice cream and hold its shape briefly when scooped.
Transfer the ice cream to a lidded, freezer-safe container. Press parchment paper directly onto the surface to minimize ice crystals. Freeze for at least 4 hours or until firm. The final texture should be smooth, creamy, and easily scoopable with no icy patches.
Pro Tips For Making Ice Cream
- Chill the Base: Always refrigerate your cream-milk-sugar mixture for at least 4 hours before churning—I learned this the hard way after ending up with soupy, slow-to-freeze ice cream.
- Use Full-Fat Dairy: Skip the low-fat milk or half-and-half; the high fat content in whole milk and heavy cream is what gives ice cream that rich, creamy texture.
- Don’t Over-Churn: Watch the ice cream closely in the last 2-3 minutes of churning—it’ll go from perfect to rocky-hard in seconds if you walk away.
- Add Vanilla Last: Stir in the vanilla extract right before churning to preserve its bold flavor, since heat can dull its aroma over time.
Troubleshooting This Dish
Grainy Texture Fix
If your ice cream turns out icy, the custard likely wasn’t cold enough before churning. Always chill to below 40°F for at least 4 hours. Adding 1 extra tbsp corn syrup helps prevent crystals. I learned this the hard way at my first BBQ competition dessert round. 💡
Curdled Custard
Seeing scrambled eggs in your mixture? You poured the hot cream too quickly into the yolks. Always temper by adding the hot liquid in a slow drizzle while whisking constantly. If it happens, strain immediately through a fine-mesh sieve to salvage what you can.
Won’t Thicken
If your custard stays thin after cooking, it needs more time. Cook until it coats the back of a spoon and leaves a clear path when you run your finger through it—usually 8-10 minutes over medium-low heat. Stir constantly with a wooden spoon.
Freezer Burn
Press parchment paper directly against the ice cream surface before sealing the container. This creates a barrier against air. Also, use containers with tight-fitting lids and consume within 1 week for best texture. ❄️
Butter Separation
If you see oil pooling, your custard got too hot after adding the 1 tbsp butter. Remove from heat immediately when adding it. Stir until just melted and fully incorporated to maintain a smooth emulsion.
Weak Flavor
Always use real vanilla beans or pure extract—imitation vanilla tastes flat. For deeper flavor, let the custard steep overnight in the fridge before churning. I forage wild vanilla orchid flowers when I can for an extra aromatic kick.
Nutrition Facts
Frequently Asked Questions
Do I need an ice cream maker?
An ice cream maker gives the best texture, but you can use the freeze-and-stir method. Pour custard into a shallow dish, freeze for 1 hour, then stir vigorously. Repeat every 30 minutes for 3-4 hours.
Can I make this without eggs?
Yes! Use a Philadelphia-style base: mix 2 cups heavy cream, 1 cup milk, 0.75 cup sugar, and 2 tsp vanilla. No cooking needed, just churn after chilling.
Why did my custard turn into scrambled eggs?
This happens when hot cream is added too quickly to yolks. Always temper by drizzling hot liquid in slowly while whisking. If it curdles, strain immediately through a fine-mesh sieve.
How long will homemade ice cream last?
It’s best within 1 week. Store in an airtight container with parchment pressed on the surface. After that, ice crystals may form, affecting texture.

Trained in classic French technique but raised on slow-cooked ribs and spicy rubs, she blends culinary skill with smoke and soul.
- Recipe for Curried Lamb Chops: Spice-Rubbed and Pan-Seared to Succulence - October 3, 2026
- Recipe for Boneless Leg of Lamb Roast in the Oven: Herb-Crusted and Rosy Pink Inside - October 3, 2026
- Meat Loaf Recipe With Beef And Pork: Homestyle Blend With Rich Gravy - October 3, 2026