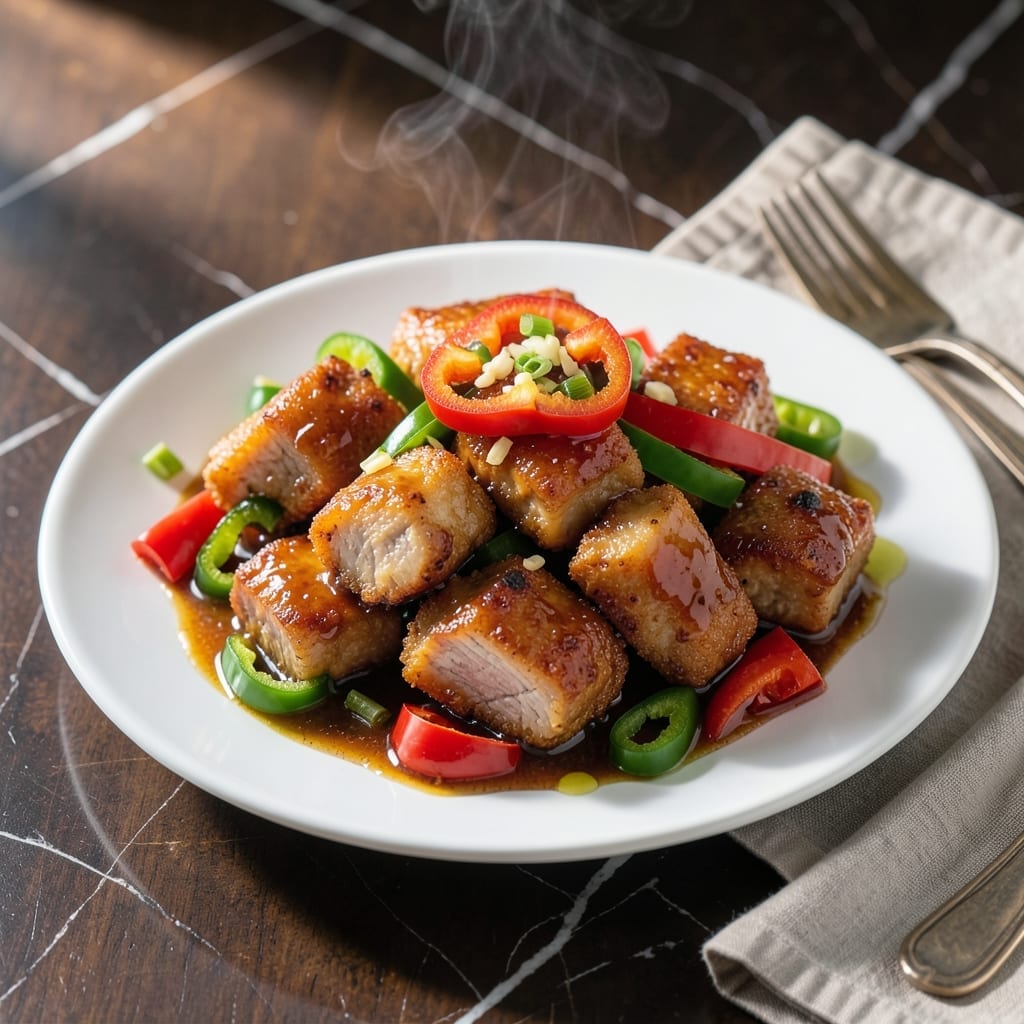
This dish brings authentic Chinese flavors to your home kitchen with its perfect balance of sweet and tangy. The crispy pork pieces paired with colorful bell peppers create a satisfying texture contrast.
I developed this recipe to deliver restaurant-quality results through precise wok-tossing techniques. The sauce achieves its signature glossy finish by carefully balancing vinegar, sugar, and ketchup.
Ingredients for Chinese Sweet and Sour Pork
Crispy pork, vibrant peppers, and that glossy sauce you crave. Nothing complicated here.
| Ingredient | Amount | Notes |
|---|---|---|
| Pork Shoulder 🍖 | 1 ½ lb | Cut into 1-inch cubes, boneless |
| Red Bell Pepper 🌶️ | 1 whole | Seeded and cut into chunks |
| Green Bell Pepper 🌿 | 1 whole | Seeded and cut into chunks |
| White Granulated Sugar 🍚 | ½ cup | For sauce sweetness |
| White Vinegar 💧 | ½ cup | Distilled white for tang |
| Ketchup 🍅 | ½ cup | For sauce base and color |
| Soy Sauce 🫒 | 2 tbsp | Low-sodium preferred |
| Cornstarch 🌾 | ½ cup | For coating pork and thickening sauce |
| Large Eggs 🥚 | 2 whole | Beaten for pork coating |
| Garlic Cloves 🧄 | 3 cloves | Minced for sauce |
| Fresh Ginger 🌿 | 1 tbsp | Finely grated or minced |
| Vegetable Oil 🫒 | 2 cups | For deep-frying pork |
| Green Onions 🧅 | 4 whole | Sliced for garnish |
| Salt 🧂 | 1 tsp | Kosher or sea salt |
| White Pepper 🌶️ | ½ tsp | Ground, for subtle heat |
[recipe_ingredient_scaler]
The pork needs to be pork shoulder—it stays juicy after frying. Costco has great pre-cut options, or ask your butcher to cube it for you (save the knife work). Look for pieces with a little fat marbling—that’s where the flavor lives. The bell peppers should be firm and bright (no soft spots). I grab mine from Whole Foods when they’re on sale, but any grocery store works.
No pork shoulder? Pork loin works but it’s leaner (drier results). Swap red or green bell peppers for pineapple chunks if you want extra sweetness. Out of white vinegar? Apple cider vinegar at the same amount is fine. The ketchup is non-negotiable for that classic flavor—Heinz or generic, doesn’t matter. Short on time? Pre-minced ginger and garlic (the jarred kind) saves a few minutes.
Fry the pork in batches so it crisps up right—don’t crowd the pan. Leftover sauce keeps in the fridge for 3 days, but the pork is best fresh. Reheat in a skillet with a splash of water to bring the crisp back. Freezes surprisingly well for up to 3 months if you’re meal prepping.
Why You’ll Love This Recipe
- One Pan Wonder: I toss the pork shoulder and bell peppers in, let the sugar and vinegar work their magic, and cleanup’s a breeze.
- Tangy Sweetness: That balance of sugar’s caramel kiss and vinegar’s sharp zing keeps me coming back for seconds.
- Crowd Pleaser: Honestly, it’s my go-to for potlucks—everyone from picky kids to my foodie uncle asks for the recipe.
- Budget Stretcher: Pork shoulder’s cheap, the veggies go far, and leftovers taste even better the next day.
Step-by-Step Instructions for Chinese Sweet and Sour Pork
Here’s the method. Straightforward, tested, works every time.
Step 1: Prepare and Marinate the Pork
Cut the 1.5 lb Pork Shoulder into 1-inch cubes, ensuring they’re as uniform as possible for even cooking. I find this size gives you the perfect balance of crispy exterior and tender interior without being too large to eat in one bite.
In a bowl, beat the 2 whole Large Eggs with the 1 tsp Salt and 0.5 tsp White Pepper. Add the pork cubes and mix until every piece is coated. Then, add 0.5 cup Cornstarch and toss until the pork is evenly covered—this creates that signature crispy coating. Let it marinate for 15-20 minutes while you prep the rest.
Step 2: Deep-Fry the Pork to Crispy Perfection
Heat the 2 cups Vegetable Oil in a deep pot or wok to 350°F. To test if it’s ready, drop in a small piece of pork—if it sizzles and floats immediately, you’re good to go. Working in batches to avoid overcrowding, carefully add the pork cubes and fry for 4-5 minutes until they turn golden brown and crispy.
Use a slotted spoon to transfer the cooked pork to a paper towel-lined plate to drain excess oil. Don’t rush this step—proper frying is what makes the difference between soggy and spectacular. The pork should be crispy on the outside and just cooked through on the inside.
Step 3: Stir-Fry the Aromatics and Bell Peppers
In a separate wok or large skillet, heat 1 tablespoon of the reserved frying oil over high heat. Add the minced 3 cloves Garlic Cloves and 1 tbsp Fresh Ginger, stir-frying for 30 seconds until fragrant. Be careful not to burn the garlic—it should turn just light golden.
Add the chunked 1 whole Red Bell Pepper and 1 whole Green Bell Pepper, stir-frying for 2-3 minutes until they’re tender-crisp. You want them to retain some bite for that satisfying crunch in every forkful. The colors should stay vibrant, not dull.
Step 4: Make the Sweet and Sour Sauce
In a small bowl, whisk together the 0.5 cup White Granulated Sugar, 0.5 cup White Vinegar, 0.5 cup Ketchup, and 2 tbsp Soy Sauce until the sugar dissolves. Pour this mixture into the wok with the bell peppers and aromatics.
Bring to a simmer and let it cook for 2-3 minutes until the sauce thickens slightly. The vinegar’s sharpness will mellow as it reduces, balancing the sugar’s sweetness. You’ll know it’s ready when it coats the back of a spoon but still flows easily.
Step 5: Combine and Garnish
Return all the fried pork to the wok and toss everything together for 1-2 minutes until the pork is evenly coated in the glossy sauce. The crispy coating will soften slightly as it absorbs the sauce, but should still retain some crunch.
Transfer to a serving platter and garnish with the sliced 4 whole Green Onions. Serve immediately while hot—the contrast of the crispy pork, tender peppers, and tangy-sweet sauce is best experienced fresh from the wok.
Pro Tips For Making Chinese Sweet And Sour Pork
- Double Fry the Pork: Fry the pork shoulder once at 325°F for 3 minutes, rest it, then fry again at 375°F for 2 minutes—this guarantees a crispy exterior that holds up to the sauce. I learned this the hard way after my first few batches turned soggy.
- Slice Peppers Thin: Cut the red and green bell peppers into ¼-inch strips so they soften quickly but still keep a slight crunch. Sounds fussy, but it actually changes the outcome in the final dish.
- Balance the Sauce: Mix the sugar and vinegar in a 1:1 ratio for the sauce, but taste as you go—sometimes the vinegar needs a touch more sugar to mellow out. After burning three batches, I finally figured out the ratio matters more than the exact amounts.
- Use Cold Pork: Chill the pork shoulder for 30 minutes before slicing to get cleaner cuts that won’t fall apart in the fryer. My grandmother swore by this, and she was right.
Flavor Customization for This Recipe
Spice It Up
For extra heat, add ½ tsp red pepper flakes to the sauce mixture while it simmers. I like using Sichuan peppercorns for a numbing kick—just crush ¼ tsp and sprinkle over the finished dish. This adds a layer of complexity that balances the sweetness. 🌶️
Extra Sweetness
Increase the sugar to ⅔ cup for a sweeter profile that kids love. Alternatively, add ¼ cup honey to the sauce for a deeper, more floral sweetness. I’ve found that pineapple juice works beautifully too—add ½ cup and reduce the vinegar slightly.
More Tang
Double the vinegar to 1 cup for a sharper tang that cuts through the richness. For a fruity twist, substitute rice vinegar or apple cider vinegar—both add a milder acidity. I prefer rice vinegar for its subtle sweetness.
Umami Boost
Add 1 tbsp hoisin sauce or 1 tsp fish sauce to the sauce mixture for depth. A splash of oyster sauce enhances the savory notes. I often throw in ½ cup diced tomatoes for a fresher, more complex flavor.
Vegetable Swaps
Replace bell peppers with broccoli florets or snap peas for a crunchier texture. For extra color, add carrot slices or baby corn. I love using zucchini—just slice it thinly so it cooks quickly.
Protein Variations
Swap pork for chicken breast or shrimp for a lighter option. For a vegetarian twist, use extra-firm tofu or cauliflower florets. I’ve had great results with tempeh—just marinate it in soy sauce before coating. ✨
Nutrition Facts
Frequently Asked Questions
What’s the ideal oil temperature for frying?
Maintain 350°F for perfect crispiness. Test with a pork piece—it should sizzle and float immediately. Too low and it’ll be greasy.
Can I baked the pork instead of frying?
Yes! Toss coated pork with 1 tbsp oil and bake at 400°F for 20-25 minutes, flipping halfway. It won’t be as crispy but still delicious.
How do I keep the pork crispy after saucing?
Toss just before serving and use high heat. The cornstarch coating absorbs sauce quickly, so work fast. Serve immediately for best texture.

Trained in classic French technique but raised on slow-cooked ribs and spicy rubs, she blends culinary skill with smoke and soul.
- Recipe for Boneless Pork Chops in Cast Iron Skillet: Sear and Baste to Juicy Perfection - October 3, 2026
- Recipe for Boneless Cross Rib Roast: Slow-Roasted Beef with Herb Crust - October 3, 2026
- Hamburgers in Sauce Recipe Crock Pot: Slow-Cooked Savory Delight - October 3, 2026