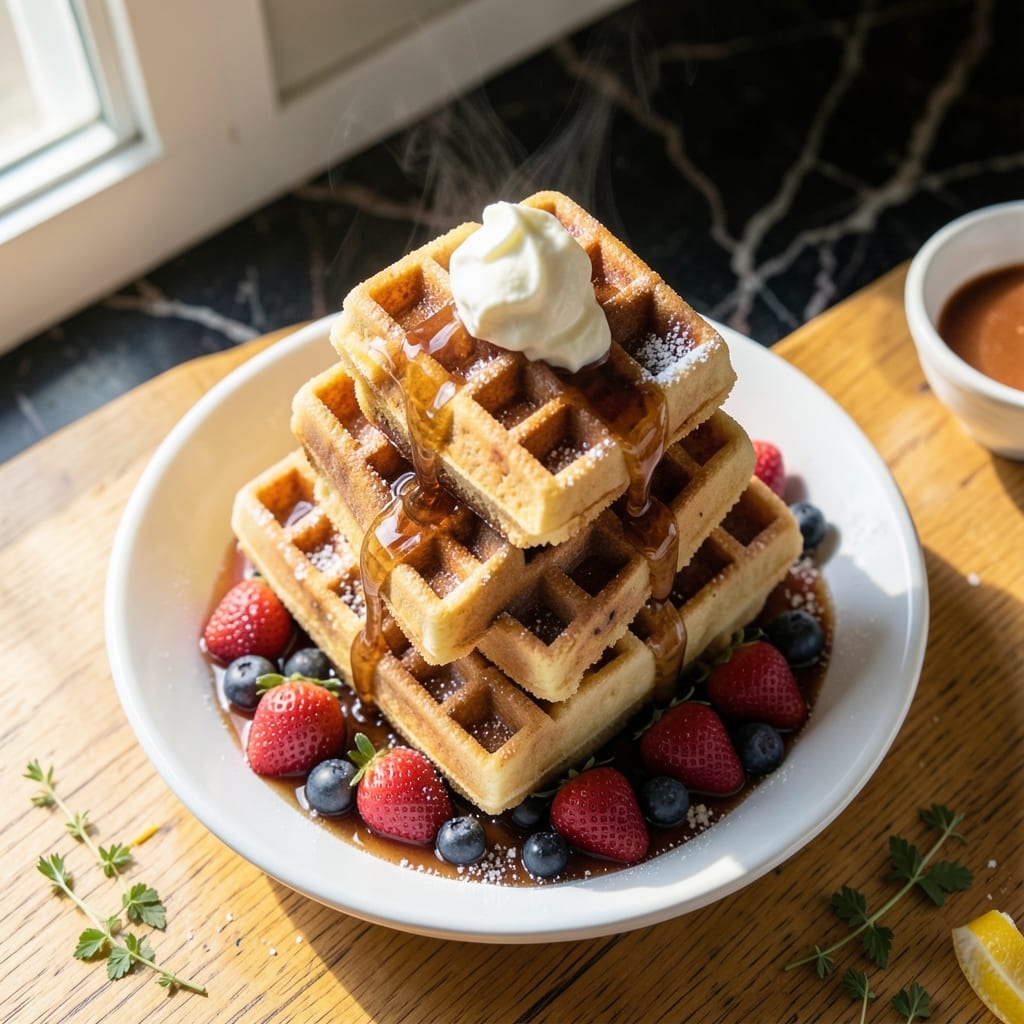
Recreating that iconic diner waffle experience at home is simpler than you might think. This recipe captures the essence of those golden grids with a texture that’s crispy outside and fluffy inside.
I’ve refined this method to achieve the same lightness and structure that makes IHOP’s version so beloved. The batter comes together quickly with pantry staples, and a hot waffle iron ensures that signature caramelized crust.
Each bite delivers that familiar sweetness and richness, with a tender crumb that holds up to syrup and toppings. No special equipment is needed—just a reliable waffle maker and a little patience.
The result is a breakfast that tastes like a weekend treat, any day of the week.
Ingredients for Ihop Waffle
Pantry staples meet careful technique for that iconic crispy yet fluffy grid texture at home.
| Ingredient | Amount | Notes |
|---|---|---|
| All-Purpose Flour 🌾 | 2 cups | Sifted for lighter texture |
| Granulated Sugar 🍚 | 2 tbsp | Fine white sugar preferred |
| Baking Powder 🧂 | 2 tbsp | Ensures proper rise |
| Salt 🧂 | ½ tsp | Fine table salt |
| Large Eggs 🥚 | 2 whole | Separated, whites whipped |
| Whole Milk 🥛 | 1 ¾ cups | Full-fat for richness |
| Vegetable Oil 🫒 | ½ cup | Neutral flavor, like canola |
| Vanilla Extract 🌿 | 1 tsp | Pure vanilla for best flavor |
| Butter 🧈 | 4 tbsp | Melted, unsalted |
| Cinnamon 🌿 | ½ tsp | Ground, optional for warmth |
[recipe_ingredient_scaler]
The flour is foundational—King Arthur or Gold Medal deliver consistent results. Use fresh baking powder (less than 6 months old) to guarantee the lift this recipe demands. For the milk, whole milk provides the richness that defines IHOP’s signature taste. The eggs must be separated; their whipped whites create that airy interior. Most supermarkets carry all you need, but Whole Foods has excellent organic options if that’s your preference.
No buttermilk on hand? Whole milk with 1 tsp lemon juice per cup works as a substitute. Short on eggs? One additional egg plus 2 tbsp water can stretch the batter. If avoiding dairy, swap the milk for oat milk and butter for coconut oil, though texture may vary slightly. The cinnamon is optional but adds that familiar diner warmth—Ceylon for subtle spice.
The batter keeps in the fridge for 24 hours—give it a quick whisk before using. Pre-melted butter can sit at room temp during prep. Leftover waffles freeze beautifully for up to 3 months; reheat in a toaster for that fresh-off-the-iron crispness.
Why You’ll Love This Recipe
- One Bowl Wonder: I just dump the flour, sugar, baking powder, salt, and eggs in a single bowl—no fuss, no extra dishes.
- Crispy Golden Magic: That perfect balance of fluffy inside and crispy outside comes from the baking powder working its magic.
- Breakfast or Dessert: Honestly, I serve these for lazy Sunday mornings or as a late-night treat with fruit and whipped cream.
- Budget Breakfast Win: A bag of flour and a few eggs make a stack that feeds my family for days—cheaper than takeout.
Step-by-Step Instructions for Fluffy Grid Iron Waffles
Master the technique that delivers that signature crisp exterior and airy interior.
Step 1: Combine Dry Ingredients for Maximum Rise
In a large mixing bowl, whisk together the 2 cups All-Purpose Flour, 2 tbsp Granulated Sugar, 2 tbsp Baking Powder, 0.5 tsp Salt, and 0.5 tsp Cinnamon until no lumps remain. The baking powder is your leavening workhorse here—it’s what creates those characteristic air pockets.
Sift the dry ingredients if you notice any clumps, as this ensures even distribution of the leavening agents. Properly combined dry ingredients prevent dense spots in your waffles and guarantee a consistent rise across the entire grid.
Step 2: Create the Wet Mixture with Precision
In a separate bowl, beat the 2 whole Large Eggs lightly before adding the 1.75 cups Whole Milk, 0.5 cup Vegetable Oil, and 1 tsp Vanilla Extract. The oil adds tenderness while the milk provides richness—both crucial for that classic diner texture.
Whisk the wet ingredients until fully emulsified but don’t overbeat. You want the eggs incorporated without creating too many bubbles. The vanilla adds that subtle depth of flavor that makes these taste authentic.
Step 3: Fold in Melted Butter and Combine Batter
Pour the wet mixture into the dry ingredients and stir gently with a silicone spatula. As you mix, slowly drizzle in the 4 tbsp Butter that you’ve previously melted and cooled slightly. The butter should be warm but not hot to avoid cooking the eggs prematurely.
Mix just until the flour is incorporated and no dry streaks remain—small lumps are fine and will dissolve during cooking. Overmixing develops gluten, which would make your waffles tough rather than tender. The batter should be thick but pourable.
Step 4: Cook to Golden Perfection
Preheat your waffle iron to medium-high heat. Lightly grease the grids if your iron isn’t nonstick. Pour about ½ cup of batter onto the center of the lower grid, spreading slightly toward the edges but leaving room for expansion.
Close the lid and cook for 3-4 minutes until the waffle is golden brown and releases easily from the iron. Avoid opening the iron too soon—this can tear the waffle and prevent proper cooking. The waffle is done when steam stops escaping and the exterior is crisp.
Step 5: Serve Immediately for Peak Texture
Transfer the cooked waffle to a wire rack rather than stacking them—this prevents the steam from making them soggy. If you must hold them, place them in a 200°F oven on a wire rack for no more than 10 minutes.
Serve warm with your favorite toppings. The contrast between the crisp exterior and fluffy interior is most pronounced when eaten fresh from the iron. Each waffle should have a uniform grid pattern with deep pockets perfect for holding syrup and butter.
Pro Tips For Making Ihop Waffle
- Preheat the Iron: I learned this the hard way—crank your waffle iron to medium-high for at least 5 minutes before pouring batter. Cold irons make pale, soggy waffles that stick like crazy.
- Whip the Eggs: Separate the yolks and whites, then beat the whites to stiff peaks before folding them in. Sounds like extra work, but it makes the waffles light and fluffy, just like IHOP’s.
- Skip Overmixing: Stir the batter just until the flour disappears—lumps are fine. Overmixing develops gluten, and you’ll end up with tough, chewy waffles instead of tender ones.
- Use Melted Butter: Swap the oil for melted butter (about 1/3 cup) in the batter. It adds richness and that classic IHOP flavor—yes, it’s worth the extra dish.
Best Sauces and Condiments for These Flavors
Classic Maple Syrup
The ultimate companion to these waffles is pure maple syrup—I prefer Grade A Amber Rich for its balanced sweetness. Warm it slightly before serving to enhance its pourability and aroma. Use about ¼ cup per waffle for that perfect diner-style saturation. 💛
Fresh Berry Compotes
Simmer 1 cup mixed berries with 2 tbsp sugar and 1 tsp lemon juice for 5-7 minutes to create a quick compote. Strawberries, blueberries, or raspberries all work beautifully. The fruit’s acidity cuts through the waffle’s richness.
Whipped Cream Topping
Lightly sweetened whipped cream adds a luxurious touch. Whip 1 cup heavy cream with 1 tbsp powdered sugar and ½ tsp vanilla until soft peaks form. Dollop generously over warm waffles for a textural contrast.
Nutty Butter Spreads
For extra decadence, spread 2 tbsp peanut butter or almond butter between waffle layers. I love Smucker’s Natural for its clean ingredient list. The nutty flavor pairs especially well with chocolate chips embedded in the batter.
Citrus-Infused Options
A squeeze of fresh lemon juice brightens the dish, while a dusting of powdered sugar adds visual appeal. For a tropical twist, top with sliced bananas and a drizzle of honey. The citrus lifts the buttery richness beautifully.
Savory Contrast
For a breakfast-for-dinner approach, try crispy bacon or sausage crumbles on top. The salty-sweet combination is a classic diner favorite. I recommend thick-cut applewood-smoked bacon for maximum flavor impact.
Nutrition Facts
Frequently Asked Questions
Can I make the batter the night before?
Yes, the batter keeps well in the fridge for 24 hours. Just give it a quick whisk before using, as the ingredients may separate slightly overnight.
Why do my waffles turn out dense?
Overmixing the batter develops gluten, making waffles tough. Stir just until combined—small lumps are fine. Also, ensure your baking powder is fresh for proper rise.
How do I keep waffles warm without sogginess?
Place cooked waffles on a wire rack in a 200°F oven for up to 10 minutes. This prevents steam buildup that makes them limp.
Can I use a different type of milk?
Whole milk gives the richest flavor, but 2% or oat milk work in a pinch. Avoid skim milk as it lacks the fat needed for that signature tenderness.

Trained in classic French technique but raised on slow-cooked ribs and spicy rubs, she blends culinary skill with smoke and soul.
- Recipe for Boneless Pork Chops in Cast Iron Skillet: Sear and Baste to Juicy Perfection - October 3, 2026
- Recipe for Boneless Cross Rib Roast: Slow-Roasted Beef with Herb Crust - October 3, 2026
- Hamburgers in Sauce Recipe Crock Pot: Slow-Cooked Savory Delight - October 3, 2026