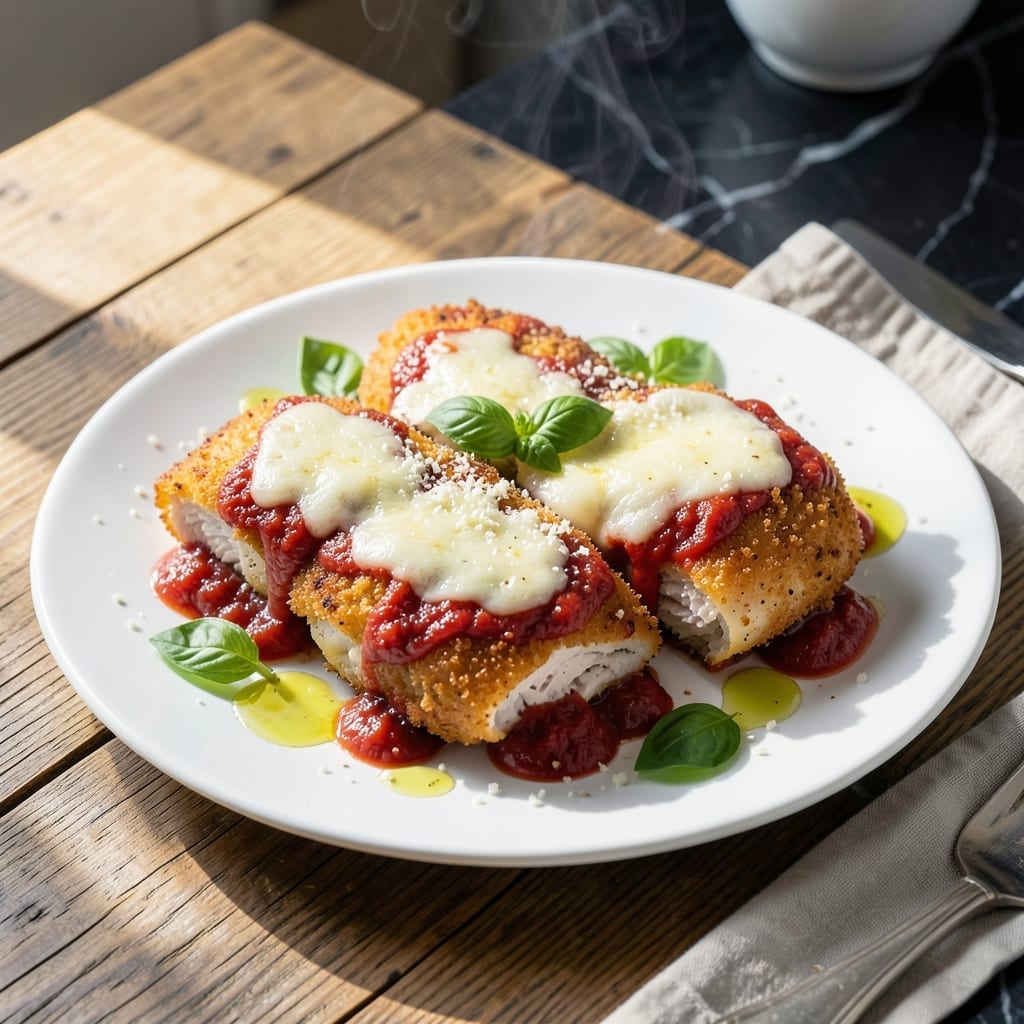
This chicken parmesan delivers crispy breaded cutlets smothered in marinara and melty mozzarella. I’ve refined the technique to ensure the coating stays golden and crunchy, even under the cheese.
The key is a two-step breading process with seasoned flour, beaten eggs, and panko breadcrumbs. Pan-frying the cutlets first guarantees that crispy texture before baking with sauce and cheese.
What you get is tender chicken with a perfectly browned crust, rich tomato sauce, and gooey melted cheese. It’s a classic dish that feels special without complicated steps.
Serve with pasta or a fresh salad for a complete meal. Here’s how to make it right every time.
Ingredients for Ina Garten Chicken Parmesan
Pantry staples and fresh ingredients create this classic dish with perfect crispy texture.
| Ingredient | Amount | Notes |
|---|---|---|
| Chicken Breasts 🍗 | 1 ½ lb | Boneless, skinless, pounded thin |
| All-Purpose Flour 🌾 | 1 cup | For dredging chicken |
| Large Eggs 🥚 | 2 whole | Beaten for egg wash |
| Panko Breadcrumbs 🍞 | 1 ½ cups | For crispy coating |
| Parmesan Cheese 🧀 | 1 cup | Freshly grated from block |
| Marinara Sauce 🍅 | 2 cups | Homemade or quality jarred |
| Mozzarella Cheese 🧀 | 8 oz | Fresh mozzarella, sliced |
| Fresh Basil Leaves 🌿 | ¼ cup | Chopped, for garnish |
| Garlic Cloves 🧄 | 3 cloves | Minced for sauce |
| Olive Oil 🫒 | ½ cup | For frying chicken |
| Kosher Salt 🧂 | 1 tsp | Diamond Crystal preferred |
| Black Pepper 🌶️ | ½ tsp | Freshly ground preferred |
| Dried Oregano 🍃 | 1 tsp | For seasoning flour |
[recipe_ingredient_scaler]
The chicken quality matters here. Boneless, skinless breasts from Whole Foods or your local butcher ensure tender results. Pound them to even thickness so they cook uniformly. Panko breadcrumbs from Kikkoman provide that signature crunch—regular breadcrumbs won’t give the same texture. For the Parmesan, freshly grated is non-negotiable; pre-grated contains anti-caking agents that affect meltability.
No panko? Crush plain breadcrumbs with a rolling pin for a similar texture. Fresh mozzarella can be swapped for low-moisture block mozzarella, but avoid pre-shredded (it’s coated in starch). For the marinara, Rao’s or Victoria jarred sauces are excellent shortcuts. If you’re out of basil, dried oregano at half the amount works in a pinch. The olive oil should be neutral-flavored for frying.
Store raw chicken in the coldest part of your fridge and use within 2 days. The breaded cutlets can be prepped a day ahead and refrigerated. Leftovers keep for 4 days in the fridge or freeze for up to 3 months. Reheat in the oven to maintain crispiness.
Why You’ll Love This Recipe
- No-Fuss Coating: Honestly, the panko and parmesan mix sticks to the chicken like a dream—no messy breading battles here.
- Crispy, Cheesy Bliss: That first bite with the crunchy panko shell and melty parmesan? Ridiculously good.
- Crowd-Pleasing Star: I’ve served this at Sunday dinner and casual weeknights—always disappears first.
- Leftovers? Even Better: Tastes just as great the next day in a sandwich. Between us, I make extra for exactly this reason.
Step-by-Step Instructions for Chicken Parmesan
Here’s the method. Straightforward, tested, works every time.
Step 1: Bread the Chicken for Maximum Crispiness
Start by pounding the 1.5 lb Chicken Breasts to an even ¼-inch thickness between plastic wrap. This ensures even cooking and prevents dry spots. Season both sides with 1 tsp Kosher Salt, 0.5 tsp Black Pepper, and 1 tsp Dried Oregano.
Set up a breading station: place the 1 cup All-Purpose Flour in one shallow dish, beat the 2 whole Large Eggs in another, and combine the 1.5 cups Panko Breadcrumbs with 1 cup Parmesan Cheese in a third. Dredge each piece in flour, shaking off excess, then dip in egg, letting excess drip off, and finally press into the panko mixture, coating completely.
Step 2: Pan-Fry to Golden Perfection
Heat 0.5 cup Olive Oil in a large skillet over medium-high heat until shimmering. Working in batches, add the breaded chicken and cook for 3-4 minutes per side until golden brown and crispy. Don’t crowd the pan—this lowers the oil temperature and leads to soggy breading.
Transfer the cooked chicken to a paper towel-lined plate to drain excess oil. The cutlets should be firm to the touch and evenly browned. Keep the oil hot but not smoking between batches.
Step 3: Layer with Sauce and Cheese
Preheat your oven to 375°F. Spread 1 cup Marinara Sauce on the bottom of a baking dish. Arrange the fried chicken in a single layer, then top each piece with 2 tablespoons of remaining marinara, a slice of 8 oz Mozzarella Cheese, and a sprinkle of extra parmesan if desired.
Bake for 15-20 minutes until the cheese is fully melted and bubbly. The edges of the mozzarella should be lightly golden brown and the sauce should be heated through. This step melts the cheese while keeping the breading crispy.
Step 4: Garnish and Serve Immediately
Remove from the oven and let rest for 2 minutes to allow the cheese to set slightly. Garnish with chopped 0.25 cup Fresh Basil Leaves and any remaining parmesan. The basil adds a fresh, aromatic contrast to the rich, cheesy topping.
Serve hot with extra marinara on the side. The breading should remain crispy, the chicken juicy, and the cheese perfectly melted. For best results, avoid letting it sit too long before serving, as the breading can soften.
Pro Tips For Making Ina Garten Chicken Parmesan
- Pound the Chicken: Use a meat mallet or rolling pin to pound the chicken breasts to an even 1/2-inch thickness—this guarantees they cook through at the same rate without drying out.
- Dry the Cutlets: Pat the pounded chicken completely dry with paper towels before dredging; any moisture will prevent the panko-Parmesan crust from sticking properly.
- Skip Cold Eggs: Take the eggs out of the fridge 10 minutes before breading so the wash isn’t icy cold, which can make the coating slide off during frying.
- Toast the Panko: I learned this the hard way—lightly toasting the panko in a dry pan for 2 minutes before mixing with Parmesan gives the finished dish a nuttier crunch without extra effort.
Storing and Reheating This Recipe
Refrigerator Storage
Let your dish cool for 30 minutes before storing. Place leftovers in airtight containers with parchment between layers to prevent sticking. It’ll keep for 4 days in the fridge. I find the flavors deepen overnight, making it taste even better the next day. ❄️
Freezer Storage
For longer storage, wrap individual portions tightly in plastic wrap and then in aluminum foil. Freeze for up to 3 months without losing quality. Label with the date so you don’t forget—trust me, it’s easy to lose track!
Oven Reheating
Preheat your oven to 350°F. Place the dish on a baking sheet and cover loosely with foil. Heat for 15-20 minutes, then uncover and bake for another 5 minutes to crisp the breading. This method keeps the texture just right. 🔥
Microwave Reheating
For a quick meal, microwave individual portions on 70% power for 2-3 minutes. Add a splash of water to the container and cover with a damp paper towel to prevent drying out. Stir halfway through for even heating.
Pro Tips
Avoid stacking leftovers in the fridge—this can make the breading soggy. If freezing, portion it out before freezing so you can thaw only what you need. I always use my local butcher shop’s containers for storage; they’re perfect for this.
Nutrition Facts
Frequently Asked Questions
Can I use chicken tenders instead of breasts?
Yes! Chicken tenders work well and cook faster. Reduce frying time to 2-3 minutes per side and baking to 10-12 minutes. They’re naturally thinner, so keep an eye on them to prevent overcooking.
Why did my breading fall off?
This usually happens if the chicken wasn’t dry before breading or if the oil wasn’t hot enough. Pat the cutlets thoroughly with paper towels and ensure the oil reaches 350°F before frying. Press the panko mixture firmly onto the chicken.
What’s the best way to keep it crispy when reheating?
Use the oven method: 350°F for 15-20 minutes covered, then 5 minutes uncovered. The microwave works in a pinch but tends to soften the breading. Avoid stacking leftovers to maintain texture.

Trained in classic French technique but raised on slow-cooked ribs and spicy rubs, she blends culinary skill with smoke and soul.
- Recipe for Boneless Pork Chops in Cast Iron Skillet: Sear and Baste to Juicy Perfection - October 3, 2026
- Recipe for Boneless Cross Rib Roast: Slow-Roasted Beef with Herb Crust - October 3, 2026
- Hamburgers in Sauce Recipe Crock Pot: Slow-Cooked Savory Delight - October 3, 2026