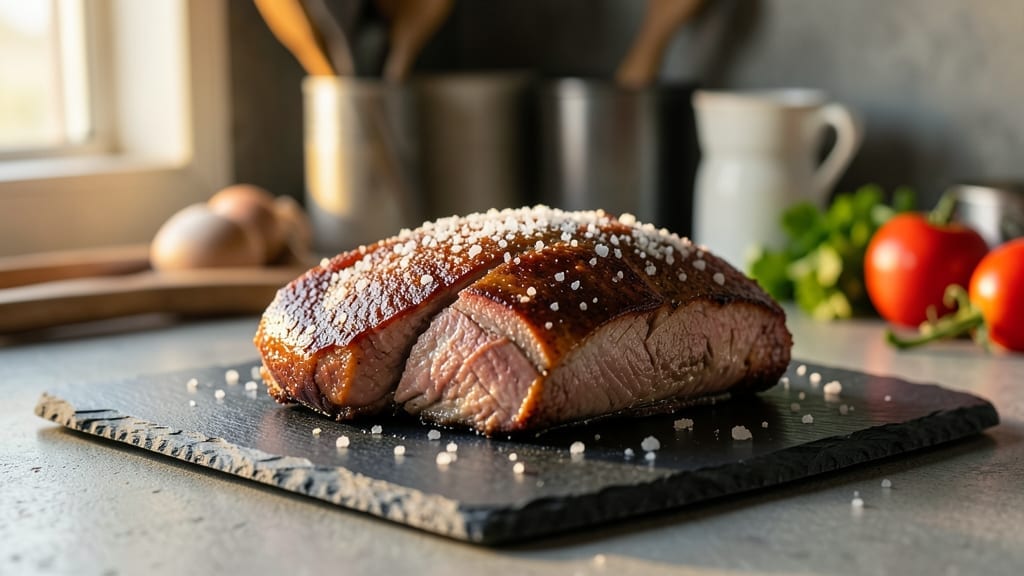
Transforming tough brisket into melt-in-your-mouth perfection in just 7 hours is what this Instant Pot brisket recipe delivers—no smoker required. The secret lies in precise pressure cooking techniques that break down collagen while locking in flavor, creating a dish that rivals traditional slow-cooked methods.
I developed this method after years of experimenting with pressure cookers, and it consistently produces brisket that falls apart at the touch of a fork.
What sets this recipe apart is the balance between time efficiency and restaurant-quality results. You’ll start with a well-trimmed brisket coated in a dry rub of salt, pepper, and smoked paprika, then cook it in the Instant Pot with just enough liquid to create steam.
The high-pressure environment does the heavy lifting, transforming tough meat into tender slices without requiring constant monitoring. This method preserves moisture better than oven cooking while delivering deep, smoky flavors.
The end result is brisket with a beautiful bark on the outside and fork-tender meat inside, ready to slice against the grain for perfect texture. The aroma alone will have everyone gathering around your table, and the versatility means you can serve it for weeknight dinners or holiday feasts.
Whether you’re feeding a family or meal prepping for the week, this recipe delivers consistent, professional-quality results every time.
While the Instant Pot handles the cooking, you’ll have time to prepare complementary sides like baked beans or coleslaw that pair perfectly with the rich, tender brisket. The leftovers keep well for up to four days, making this an ideal make-ahead option for busy schedules.
Let’s get started on creating brisket that will impress even the most discerning meat lovers.
Ingredients for instant pot brisket
A few key ingredients transform tough brisket into melt-in-your-mouth perfection in your Instant Pot.
| Ingredient | Amount | Notes |
|---|---|---|
| Packer Brisket 🥩 | 4 lb | Well-trimmed, fat cap intact |
| Kosher Salt 🧂 | ½ cup | Coarse grain preferred |
| Freshly Ground Black Pepper 🌶️ | 2 tbsp | Freshly cracked for best flavor |
| Smoked Paprika 🌶️ | 2 tbsp | High-quality for smoky depth |
| Garlic Powder 🧄 | 1 tbsp | Freshly ground preferred |
| Onion Powder 🧅 | 1 tbsp | For balanced flavor |
| Brown Sugar 🍚 | 1 tbsp | Light or dark works |
| Apple Cider Vinegar 🍏 | ½ cup | For tenderizing |
| Beef Broth 🥫 | 1 cup | Low-sodium preferred |
| Yellow Onion 🧅 | 1 whole | Chopped for aromatics |
| Fresh Thyme 🌿 | ¼ cup | Chopped, stems removed |
| Fresh Rosemary 🌿 | ¼ cup | Chopped, stems removed |
| Unsalted Butter 🧈 | 2 tbsp | Cold, for basting |
[recipe_ingredient_scaler]
The brisket is everything here. Packer cut is ideal—thick, well-marbled, and perfect for pressure cooking. I always buy mine from Costco or local butchers because they trim the fat cap cleanly, which helps with even cooking. If you’re buying whole, ask for it to be trimmed to about 1/4-inch fat cap—this creates the perfect bark without excess grease. Look for bright red color and good marbling; anything grayish or overly lean won’t tenderize properly. Pro tip: Pat it dry before seasoning—wet meat steams instead of sears.
No smoked paprika? Substitute with 1 tbsp regular paprika plus 1/2 tsp liquid smoke. Fresh thyme and rosemary are ideal, but dried works at one-third the amount if you’re in a pinch. The apple cider vinegar might seem odd, but it’s magic for breaking down collagen—white vinegar works too. For the beef broth, low-sodium is crucial—you don’t want to over-salt your brisket. If you’re feeling fancy, add a 1-inch piece of orange peel to the broth for brightness. And that butter? Don’t skip it—it bastes the brisket during the final steam phase for insane richness.
This brisket reheats beautifully—actually tastes better the next day once everything melds. Store leftovers in the fridge for up to 4 days, wrapped tightly in foil or butcher paper to keep it moist. For freezing, portion into 1-pound servings and wrap each tightly—keeps for 3 months. I always make double batches because it disappears fast. The bark gets tough when reheated, so I slice it fresh for sandwiches and freeze the meat separately. Worth every minute of the 7-hour process.
Why You’ll Love This Recipe
- No Fuss, No Stress: That 7-hour cook time feels like magic—you set it and forget it while you’re doing actual adulting. The apple cider vinegar marinade does half the work tenderizing, and the Instant Pot handles the rest. Honestly, I’ve made this while my kids were in their own world of screens and homework, and it still turned out restaurant-worthy.
- Crispy Bark Meets Creamy Center: The smoked paprika and brown sugar create that coveted bark, but the real star is the balance—creamy, fall-apart tender meat with a rich, herby sauce from the thyme and rosemary. Sear it properly in butter, and you’ll get that deep, caramelized crust that makes every bite feel like a hug.
- Feeds a Crowd (or Your Cravings): This 4-pound brisket isn’t just for Sunday dinners—it’s my go-to for game days, potlucks, or even a lazy Tuesday night when I’m too tired to cook three separate meals. The leftovers? Wrapped tightly in foil, they stay juicy for four days, so I can meal prep tacos, sandwiches, or just reheat it with a drizzle of that leftover pan sauce.
- Budget-Friendly Luxury: Packer brisket isn’t cheap, but this recipe stretches it into multiple meals without feeling like a sacrifice. The spices and aromatics (thyme, rosemary, onion) are pantry staples, and the vinegar marinade keeps costs down while boosting flavor. I’ve made this for under $10 per serving, and it tastes like I splurged on a steakhouse meal.
Step-by-step instructions for Instant Pot brisket
Here’s how to transform a tough cut into melt-in-your-mouth perfection.
Prepare the Brisket with the Dry Rub
Start by trimming the fat cap of the 4 lb packer brisket down to about ¼ inch thickness using a sharp knife. Leave the fat intact on the edges to protect the meat during cooking. In a small bowl, combine the ½ cup kosher salt, 2 tbsp freshly ground black pepper, 2 tbsp smoked paprika, 1 tbsp garlic powder, 1 tbsp onion powder, and 1 tbsp brown sugar. Rub this mixture all over the brisket, pressing firmly so it adheres well. This step ensures maximum flavor penetration and creates that coveted bark later.
Place the seasoned brisket in a large resealable plastic bag and add the ½ cup apple cider vinegar. Seal the bag and massage it gently to coat the brisket evenly. Let it marinate in the refrigerator for at least 4 hours, or overnight for best results. The acid in the vinegar helps tenderize the meat while the rub develops deep flavor.
Sear the Brisket Before Pressure Cooking
Remove the brisket from the marinade and let it sit at room temperature for 30 minutes before cooking. This ensures even cooking throughout. Heat 2 tbsp unsalted butter in your Instant Pot on the sauté function until it melts and begins to foam. Place the brisket fat-side down in the pot and sear for 3-4 minutes until a deep golden-brown crust forms. Flip the brisket and sear the other side for another 3-4 minutes. This step is crucial for developing flavor and texture.
While the brisket sears, chop the 1 yellow onion into ½-inch pieces and add it to the Instant Pot along with the ¼ cup chopped fresh thyme and ¼ cup chopped fresh rosemary. Stir to combine with any rendered juices. The aromatics will infuse the brisket with additional flavor during the cooking process.
Pressure Cook to Perfect Tenderness
Pour the 1 cup beef broth into the Instant Pot, making sure to deglaze the bottom and lift any browned bits. Place the brisket fat-side up in the pot and secure the lid, ensuring the valve is set to sealing. Select the “Meat/Stew” setting for 7 hours of cooking time. This long, slow cook time breaks down the tough connective tissue, transforming the brisket into fork-tender perfection.
Once the cooking cycle completes, allow the pressure to release naturally for 30 minutes before quick-releasing any remaining pressure. This gradual release prevents the meat from becoming tough. The brisket should be so tender that a fork slides in easily with no resistance. If it’s not quite there, you can reset the timer for an additional 30 minutes of cooking.
Rest and Serve with Pan Sauce
Transfer the brisket to a cutting board and tent loosely with aluminum foil. Let it rest for at least 30 minutes before slicing. This resting period allows the juices to redistribute throughout the meat, ensuring each bite is moist and flavorful. While it rests, remove the brisket from the pot and shred it slightly using two forks, leaving some of the larger pieces intact for texture.
Return the shredded brisket to the Instant Pot and stir to combine with the cooking juices. The sauce should be rich and flavorful from all the rendered juices and aromatics. For a thicker sauce, you can remove the brisket and reduce the juices on the sauté function for an additional 3-5 minutes until slightly thickened. Serve the brisket with the pan sauce spooned over the top, and enjoy your fall-apart tender brisket with all the homemade flavor you’ve created.
Pro Tips For Making Instant Pot Brisket
- Trim the Fat Right: That fat cap isn’t just decoration—trim it to a crisp ¼-inch thickness, but leave the edges intact. I used to over-trim and ended up with dry meat; the fat keeps it juicy while still letting you get that perfect crust.
- Salt Early, Salt Well: The ½ cup kosher salt isn’t just seasoning—it’s the secret to that deep, flavorful bark. Rub it on before the vinegar marinade, and press it in hard. I learned this the hard way when my brisket tasted bland because the salt dissolved into the marinade instead of sticking.
- Don’t Skip the Vinegar Massage: After coating the brisket in the ½ cup apple cider vinegar, actually massage it into the meat for even tenderizing. Just pouring it on? You’re missing out—this step makes the difference between tough and melt-in-your-mouth.
- Sear Fat-Side First: The brisket’s fat side needs 3-4 minutes of direct heat to render and crisp. Flip too soon, and you’ll end up with greasy, uneven searing. Trust the process—your future self will thank you for that golden crust.
Storing and reheating your instant pot brisket
Fridge Storage Essentials
Once your brisket finishes cooking, transfer it to a large foil-wrapped cutting board to keep it warm while you prep. After slicing, wrap the brisket tightly in double layers of aluminum foil or butcher paper to maintain moisture—this prevents drying out while keeping flavors intact.
Store in an airtight container with a tight-fitting lid, and it’ll stay delicious for up to 4 days in the fridge. The flavors actually deepen overnight, so morning leftovers often taste even better than the original meal!
Freezer Prep for Later
For long-term storage, portion your brisket into 1-pound servings wrapped individually in foil, then place each portion in a quart-sized freezer bag. Squeeze out all air before sealing to prevent freezer burn—this keeps it fresh for up to 3 months.
I always label bags with the date so I can track freshness. When ready to eat, thaw overnight in the fridge for even texture.
Reheating Like a Pro
For stovetop reheating, use a heavy-bottomed pot to prevent sticking. Add 2-3 tablespoons of beef broth to the pan, then heat on medium-low for 10-12 minutes, stirring occasionally. The moisture prevents drying while keeping the bark intact.
If using the microwave, cover with a damp paper towel and heat on 50% power in 2-minute intervals until 165°F internal temperature is reached.
Bark Preservation Hack
The crust on your brisket is what makes it special—don’t let it get soggy when reheating! I recommend reheating the meat separately from the pan sauce, then drizzling the sauce on top just before serving.
This keeps the bark crispy while keeping the sauce flavorful. For sandwiches, I slice fresh brisket and assemble them immediately to preserve that perfect texture. 🔥
Make-Ahead Meal Prep
Double your batch and freeze half immediately—this is my secret to always having brisket on hand. When ready to eat, thaw the frozen portion overnight, then reheat using the stovetop method above.
The 7-hour cook time means you can prep ahead without sacrificing quality. I often make extra for tacos or sandwiches, where the tender meat shines even more!
Nutrition facts
Frequently asked questions
Why does the brisket need to rest after cooking?
Resting for 30 minutes lets the juices redistribute evenly throughout the meat, preventing them from draining out when sliced. This ensures every bite is moist and flavorful, not just the surface. Skipping this step can leave you with dry, tough slices instead of tender perfection.
Can I use a different type of vinegar instead of apple cider vinegar?
Yes! White vinegar works just as well for tenderizing. The acidity is what breaks down the tough collagen in the brisket, so any mild vinegar will do. Just avoid flavored varieties—they might alter the final taste. The ½ cup measurement stays the same for best results.
What if my Instant Pot doesn’t have enough liquid for the 7-hour cook?
Don’t worry—just add ½ cup more beef broth or water to reach the minimum liquid line. The Instant Pot will still create steam pressure, but extra liquid ensures you don’t risk undercooking. Just make sure to deglaze the bottom to lift all those flavorful browned bits.
How do I know when the brisket is done without cutting into it?
Check for tenderness by inserting a fork into the thickest part—if it slides in easily with no resistance, it’s done. The internal temperature should reach 195°F if you have a meat thermometer. If it’s not quite there, reset the timer for an additional 30 minutes of cooking. The natural pressure release does most of the work!

Trained in classic French technique but raised on slow-cooked ribs and spicy rubs, she blends culinary skill with smoke and soul.
- Smoked Brisket Recipe: Low and Slow to Fall-Apart Tenderness - November 2, 2026
- Smoked Turkey Breast Recipe: Juicy Pink Center With Crispy Skin Every Time - November 2, 2026
- Leftover Smoked Pulled Pork Chili Recipe: Rustic Flavor Revival in One Pot - November 2, 2026