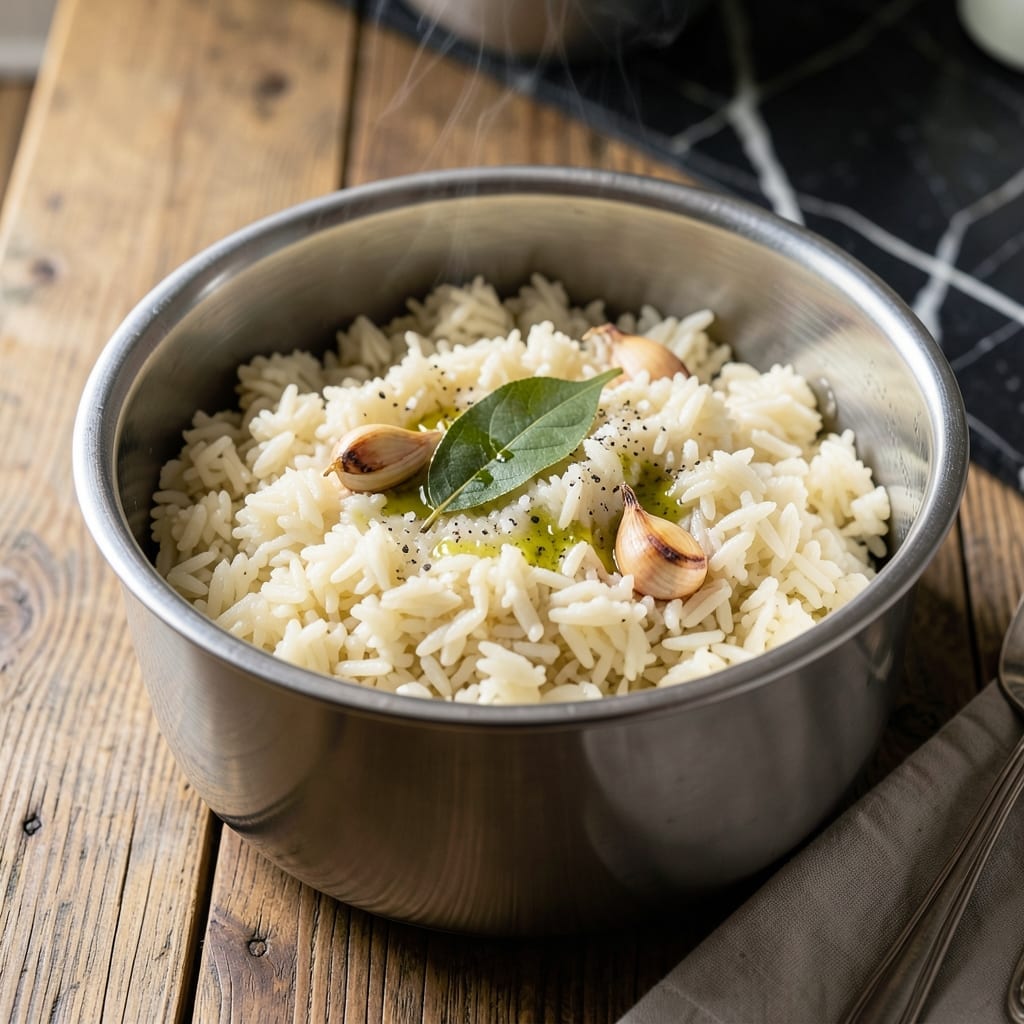
I’ve tested countless methods, and this Instant Pot approach delivers perfectly fluffy rice every time. No more guesswork or sticky results.
The key is the precise water-to-rice ratio and cooking time—just 1 cup rice to 1¼ cups water for ideal texture. High pressure for 3 minutes does the work.
Once the timer goes off, let the pressure release naturally for 10 minutes. This step ensures the grains stay light and separate, never mushy.
White or brown rice, this method adapts easily. You’ll have consistent, restaurant-quality results with minimal effort.
Ingredients for Instant Pot Rice Recipe 1 Cup
Pantry staples and a few optional extras make this foolproof pressure cooker rice.
| Ingredient | Amount | Notes |
|---|---|---|
| Long-Grain White Rice 🍚 | 1 cup | Rinsed until water runs clear |
| Water 💧 | 1 ¼ cups | Filtered for best texture |
| Kosher Salt 🧂 | ¼ tsp | Diamond Crystal preferred |
| Extra-Virgin Olive Oil 🫒 | 1 tbsp | Optional, for richness |
| Bay Leaf 🍃 | 1 whole | Optional, for aroma |
| Garlic Cloves 🧄 | 2 cloves | Minced, optional for flavor |
| Fresh Cilantro 🌿 | 2 tbsp | Chopped, for garnish |
| Lemon Juice 🍋 | 1 tsp | Freshly squeezed, optional |
[recipe_ingredient_scaler]
The rice itself matters most here. Jasmine or basmati give the fluffiest results—avoid instant rice (it’ll turn to mush). Whole Foods or any bulk section has great options. Rinse it well (until the water runs clear) to remove excess starch. That’s the difference between sticky and separate grains. Salt is non-negotiable—Diamond Crystal dissolves evenly without clumping.
No long-grain? Short-grain works but will be stickier—reduce water by 2 tbsp. Out of fresh herbs? Dried cilantro at half the amount works, or skip it. The oil is optional but adds richness (avocado oil if you’re avoiding olive). For brown rice, keep the 1:1.25 ratio but increase cook time to 22 minutes at high pressure.
Leftovers keep 4-5 days in the fridge—reheat with a splash of water to refresh. Freezes beautifully for 3 months (portion first). I make double batches and freeze in zip-tops for lazy dinners. Just thaw overnight before reheating.
Why You’ll Love This Recipe
- Set and Forget: I dump everything in, seal the lid, and walk away—no stirring, no watching, just perfect rice every time.
- Subtle Depth: The bay leaf and olive oil add just enough complexity to make this taste like it cooked all day.
- Meal Prep Staple: Honestly, I make a big batch Sunday and it pairs with everything from stir-fry to grilled chicken all week.
- Budget Friendly: A cup of rice, a few pantry staples, and I’ve got a side dish that fills us up without breaking the bank.
Step-by-Step Instructions for Instant Pot Rice
Here’s the method that guarantees perfectly fluffy rice with minimal effort every time.
Step 1: Rinse and Prep the Rice
Place the 1 cup Long-Grain White Rice in a fine-mesh strainer and rinse under cold water until the water runs completely clear. This removes excess starch that could make your rice gummy. I like to swirl the rice with my hand to help release the starch faster.
While the rice drains, mince the 2 cloves Garlic Cloves if using. The garlic isn’t essential but adds a subtle depth of flavor that complements the rice beautifully. Let the rice sit in the strainer for 1-2 minutes to drain thoroughly—excess water can throw off your cooking ratio.
Step 2: Sauté Aromatics in the Instant Pot
Set your Instant Pot to the Sauté function and add the 1 tbsp Extra-Virgin Olive Oil. Once hot, add the minced garlic and the 1 whole Bay Leaf, stirring constantly for 30-45 seconds until the garlic becomes fragrant and just starts to turn light golden.
Be careful not to let the garlic burn—it can go from perfect to bitter in seconds. If your garlic starts to brown too quickly, add the rice immediately to lower the temperature. This quick aromatics step infuses the oil with flavor that will distribute throughout the rice as it cooks.
Step 3: Add Rice, Water, and Salt
Add the drained 1 cup Long-Grain White Rice to the Instant Pot and stir to coat the grains in the flavored oil. Then pour in the 1.25 cups Water and add the 0.25 tsp Kosher Salt. Stir everything together, making sure to scrape up any browned bits from the bottom of the pot.
These browned bits are pure flavor (the fond), and incorporating them into your rice adds complexity. Give the mixture a final stir and make sure the rice is evenly distributed. Don’t skip this step—it prevents uneven cooking and potential burning.
Step 4: Pressure Cook to Perfection
Secure the lid on your Instant Pot and set the valve to Sealing. Cook on High Pressure for 3 minutes for white rice. Yes, just 3 minutes—the Instant Pot’s pressure cooking works that fast. The cooker will take about 10-15 minutes to come to pressure before the timer starts.
Once the cooking cycle completes, let the pressure release naturally for 10 minutes, then quick-release any remaining pressure. The natural release allows the rice to steam gently, which is key for achieving that perfect fluffy texture. Don’t be tempted to quick-release immediately—this is the secret to avoiding mushy rice.
Step 5: Fluff and Finish
Carefully open the lid and remove the Bay Leaf. Use a fork to fluff the rice gently, separating any clumps. The grains should be tender and distinct, not sticking together. This is where you check your texture—if there’s any excess liquid at the bottom, let the rice sit covered for another 2-3 minutes to absorb it.
If using, stir in the 2 tbsp Fresh Cilantro and 1 tsp Lemon Juice for a bright, fresh finish. These final touches add a pop of color and a zesty note that balances the richness of the rice. Serve immediately while hot and fluffy—the rice will continue to firm up slightly as it cools.
Pro Tips For Making Instant Pot Rice Recipe 1 Cup
- Rinse the Rice: Always rinse your long-grain white rice until the water runs clear—this removes excess starch so your grains stay separate and fluffy.
- Use the Right Ratio: For 1 cup of rice, use 1 ¼ cups water—any more and you’ll end up with mushy rice, any less and it’ll be undercooked.
- Skip the Peek: Once the Instant Pot starts cooking, resist the urge to open the lid—releasing the pressure too soon will leave you with unevenly cooked rice.
- Let It Rest: After cooking, let the rice sit covered for 5-10 minutes—this lets the steam redistribute and gives you perfectly tender grains every time.
Storing and Reheating This Recipe
Fridge Storage
Let your rice cool for no more than 2 hours before transferring to airtight containers. I use glass containers with snap-tight lids. Store at 40°F or below for up to 4-5 days. The texture stays fluffy if you add a splash of water before reheating. ❄️
Freezer Storage
For longer storage, portion your rice into freezer bags or containers. Squeeze out excess air to prevent freezer burn. It freezes beautifully for up to 3 months without losing texture. Label with the date—I always forget when I stored things.
Microwave Reheating
Place a portion in a microwave-safe dish and sprinkle with 1-2 tbsp water. Cover with a damp paper towel and heat on 70% power for 1-2 minutes. Stir and repeat until reaching 165°F. This prevents drying out. 🔥
Stovetop Reheating
My preferred method for larger batches. Heat in a skillet with 2 tbsp water or broth over medium-low heat for 5-7 minutes, stirring occasionally. This revives the texture better than a microwave and adds a slight crispness to the bottom layer.
Avoiding Dryness
Rice tends to dry out when reheated, so moisture is key. For each cup of cooked rice, add 1-2 tbsp liquid before reheating. Water works, but chicken or vegetable broth adds extra flavor. Covering while reheating traps steam for best results.
Nutrition Facts
Frequently Asked Questions
What’s the best rice-to-water ratio?
Use 1 cup rice to 1¼ cups water for fluffy white rice. This prevents sticky or mushy results. For brown rice, keep the same ratio but increase cook time to 22 minutes.
Can I double the recipe?
Yes, but never exceed ½ full capacity in your Instant Pot. For 2 cups rice, use 2½ cups water and maintain the same 3-minute cook time. The pressure release time remains 10 minutes.
Why is my rice undercooked?
This usually happens if you quick-release immediately. Always let the pressure release naturally for 10 minutes first. Also check that your lid valve is properly sealed before cooking.
How do I prevent the burn notice?
Deglaze the pot after sautéing and ensure all rice is submerged in water. Avoid using less than 1 cup rice, as smaller amounts are more prone to burning. Stir the rice-water mixture well before sealing.

Trained in classic French technique but raised on slow-cooked ribs and spicy rubs, she blends culinary skill with smoke and soul.
- Recipe for Boneless Pork Chops in Cast Iron Skillet: Sear and Baste to Juicy Perfection - October 3, 2026
- Recipe for Boneless Cross Rib Roast: Slow-Roasted Beef with Herb Crust - October 3, 2026
- Hamburgers in Sauce Recipe Crock Pot: Slow-Cooked Savory Delight - October 3, 2026