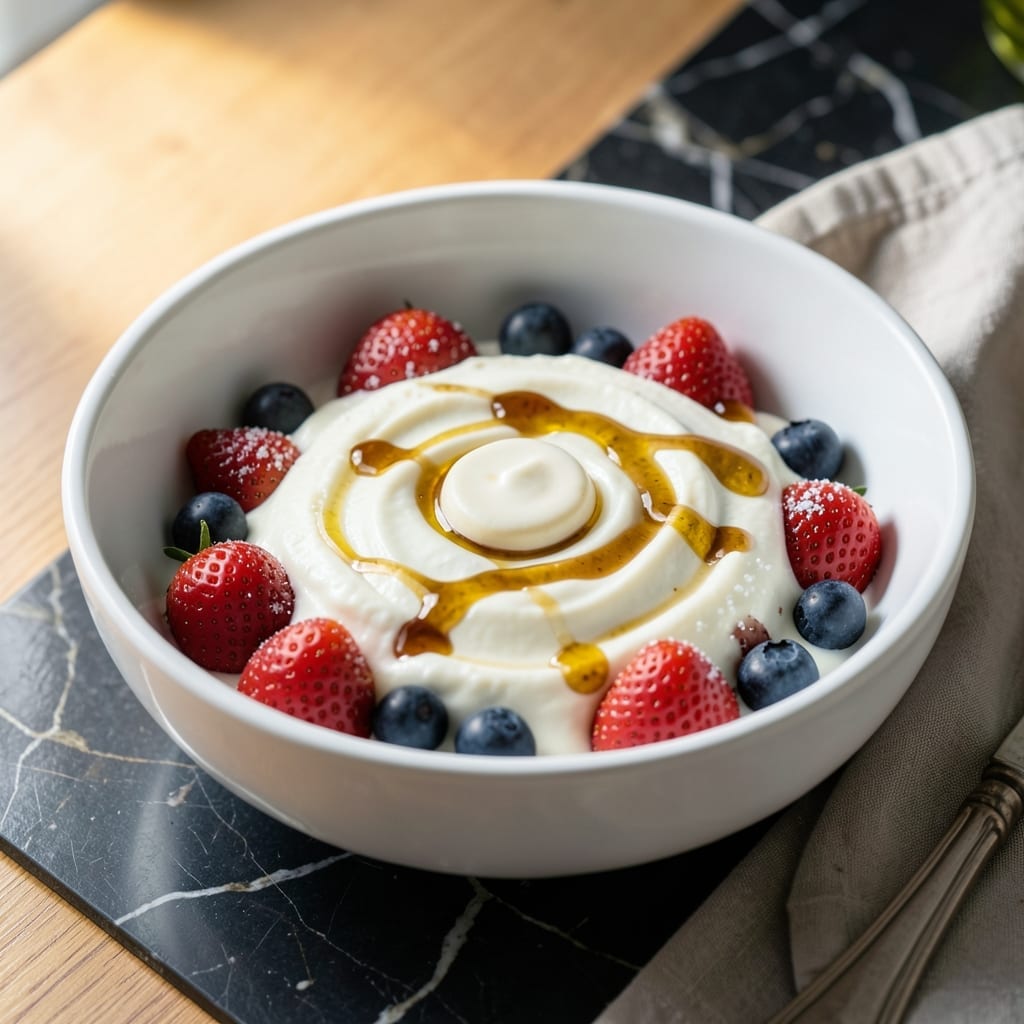
Achieving homemade yogurt with perfect texture is simpler than you think. The Instant Pot’s yogurt function takes the guesswork out of temperature control, ensuring consistent results every time.
This method delivers creamy, tangy yogurt without special equipment. Just milk, a starter culture, and patience transform basic ingredients into something extraordinary.
You’ll love how this process requires minimal hands-on time. The machine handles the incubation, while you get thick, rich yogurt that rivals store-bought versions.
Customize with flavors or sweeteners after culturing. The possibilities are endless with this reliable technique.
Ingredients for Instant Pot Yogurt Recipe with Yogurt Button
Just milk and a starter transform into creamy homemade yogurt with minimal effort.
| Ingredient | Amount | Notes |
|---|---|---|
| Whole Milk 🥛 | ½ gallons | Ultra-pasteurized preferred for longer shelf life |
| Plain Yogurt with Live Cultures 🥣 | 2 tbsp | Store-bought or previous batch as starter |
| Granulated Sugar 🍚 | 1 tbsp | Optional for sweeter yogurt |
| Vanilla Extract 🌿 | 1 tsp | Pure extract for best flavor |
| Honey 🍯 | 2 tbsp | Optional for natural sweetness |
| Fresh Berries 🍓 | 1 cup | For topping after culturing |
| Granola 🥣 | ½ cup | For serving as topping |
[recipe_ingredient_scaler]
The milk is everything here. Ultra-pasteurized whole milk (like Organic Valley or Darigold) gives the creamiest results and keeps longer. Avoid raw milk—it needs different handling. I grab mine from Whole Foods or Trader Joe’s. The starter can be any plain yogurt with live cultures (check the label). Greek yogurt works too, but regular is fine.
No yogurt starter? A few tablespoons of buttermilk or even a probiotic capsule (opened) can work in a pinch. Want it thicker? Strain through cheesecloth for Greek-style. The sugar and vanilla are totally optional—add them after culturing if you prefer sweet yogurt. Skip the honey if you’re going savory.
Fresh yogurt keeps for about 2 weeks in the fridge. The longer it sits, the tangier it gets. I make a big batch and portion it into jars—perfect for breakfast all week. Freezing works too, but texture changes slightly (best for smoothies).
Why You’ll Love This Recipe
- Set and Forget: The yogurt button does all the work—I just pour the whole milk in, press a button, and let the Instant Pot handle the culturing.
- Creamy Dreamy: That rich, velvety texture from whole milk, sweetened just right with a touch of honey and vanilla, is honestly hard to beat.
- Meal Prep Magic: I make a big batch on Sunday and portion it out for smoothies, parfaits, or quick breakfasts all week long.
- Pennywise Perfection: Between us, a gallon of whole milk and a spoonful of plain yogurt costs less than store-bought and makes twice as much.
Step-by-Step Instructions for Instant Pot Yogurt With Yogurt Button
This method delivers thick, creamy results with minimal hands-on time—your Instant Pot does most of the work.
Step 1: Pasteurize the Whole Milk
Pour the 0.5 gallons Whole Milk into the Instant Pot insert. Secure the lid, set the valve to “Sealing,” and select the “Yogurt” function, then press “Adjust” until it displays “Boil.” This pasteurization step ensures a clean environment for the live cultures to thrive.
The milk should reach 180°F—you’ll see steam rising and the display will switch to “Yogt” when complete. This process kills any competing bacteria and denatures proteins for a thicker final product. I always use ultra-pasteurized milk here for the creamiest texture.
Step 2: Cool the Milk to Culturing Temperature
Once pasteurization is complete, carefully remove the insert from the Instant Pot and let it cool to 110°F. This typically takes 30-45 minutes at room temperature. You can speed this up by placing the insert in a cold water bath, stirring occasionally to distribute the heat.
I check the temperature with an instant-read thermometer—you want it warm to the touch but not hot. If it’s too cool (below 105°F), the cultures won’t activate properly. If it’s too hot (above 115°F), you’ll kill the live cultures before they can do their job.
Step 3: Add Starter and Incubate
In a small bowl, whisk together the 2 tbsp Plain Yogurt with Live Cultures, 1 tbsp Granulated Sugar, and 1 tsp Vanilla Extract. This sweetens the yogurt slightly and adds depth of flavor. Pour about 1 cup of the cooled milk into this mixture and stir until smooth.
Add this back to the Instant Pot insert and whisk gently to combine. Secure the lid again, set the valve to “Sealing,” and select “Yogurt” function—this time, set it for 8-10 hours. The longer incubation time yields a tangier, thicker yogurt. I’ve found 9 hours hits the perfect balance of creaminess and mild tartness.
Step 4: Chill and Sweeten to Taste
After incubation, transfer the yogurt to airtight containers and refrigerate for at least 4 hours to halt the culturing process and thicken it further. The texture will firm up significantly as it chills—don’t be alarmed if it seems thin when warm.
Before serving, stir in the 2 tbsp Honey if you prefer it sweeter. This step is optional, so taste first and adjust to your liking. The honey adds a natural sweetness that complements the tangy yogurt beautifully.
Step 5: Serve with Fresh Toppings
Spoon the chilled yogurt into bowls and top with the 1 cup Fresh Berries and 0.5 cup Granola. The berries add a bright, fruity contrast, while the granola provides a satisfying crunch.
This is where it gets fun—mix and match your toppings based on what’s in season or your mood. The yogurt itself will keep in the refrigerator for up to 2 weeks, though I doubt it’ll last that long once you taste how rich and creamy it is. Serve it for breakfast, as a snack, or even as a light dessert.
Pro Tips For Making Instant Pot Yogurt Recipe With Yogurt Button
- Boil Milk First: Always pasteurize the milk by boiling it to 180°F before cooling—this kills unwanted bacteria and gives the yogurt cultures a clean slate to work their magic. I learned this the hard way after a batch turned out thin and tangy.
- Use Ultra-Filtered Milk: Splurge on ultra-filtered whole milk if you can—it has more protein and less water, so your yogurt sets thicker without needing to strain it. Sounds weird, but it works.
- Skip the Metal Spoon: Stir in your starter yogurt with a plastic or wooden spoon to avoid any reaction with the metal that could interfere with the cultures. After ruining a batch with a metal utensil, I finally switched.
- Warm the Starter: Take your plain yogurt starter out of the fridge 15 minutes before using it—cold starter can shock the cultures and slow down fermentation. My grandmother swore by this, and she was right.
Serving Suggestions for instant pot yogurt recipe with yogurt button
Breakfast Bowls
Layer your yogurt with ½ cup granola and ¼ cup fresh berries for a balanced morning meal. I love adding a drizzle of local honey for extra sweetness. The crunch from granola contrasts beautifully with the creamy texture. 🥣
Smoothie Base
Blend 1 cup yogurt with ½ cup berries and 1 tbsp honey for a protein-packed smoothie. Add ice for a frosty treat. This makes a quick, satisfying breakfast on busy mornings.
Savory Option
Skip the sweet toppings and use your yogurt as a base for tzatziki by adding cucumber, garlic, and dill. Perfect with pita or as a veggie dip. I often make this for summer gatherings.
Parfait Layers
Create elegant layers in a glass with yogurt, berries, and granola. Repeat for 3-4 layers and finish with a honey drizzle. This presentation wows guests at brunch.
Frozen Treat
Freeze yogurt in popsicle molds with berries for a healthy summer snack. Mix in 1 tsp vanilla before freezing for extra flavor. Kids and adults alike love these refreshing pops.
Dessert Topping
Use as a topping for warm desserts like apple crisp or brownies. The cool, tangy yogurt balances the sweetness. I always keep a batch ready for impromptu dessert upgrades. ✨
Nutrition Facts
Frequently Asked Questions
What kind of milk works best?
Use ultra-pasteurized whole milk for the creamiest results. It produces a thicker texture and keeps longer. Avoid raw milk as it requires different handling.
How do I make thicker yogurt?
Strain the finished yogurt through cheesecloth for 30-60 minutes. This removes whey, creating a Greek-style consistency. The longer you strain, the thicker it gets.
Can I use a different starter?
Yes! Use 2 tablespoons of any plain yogurt with live cultures. In a pinch, buttermilk or a probiotic capsule works too. Just ensure it’s fresh and active.
Why did my yogurt turn out runny?
This usually happens if the milk was too hot or too cool when adding the starter. Aim for 110°F and ensure proper incubation time. Chilling helps thicken it further.

Trained in classic French technique but raised on slow-cooked ribs and spicy rubs, she blends culinary skill with smoke and soul.
- Beef Brisket Beer Recipe: Smoky, Beer-Braised Beauty in 6 Hours - October 15, 2026
- Smoked Whitefish Recipe: Wood-Fired Flakes with Herbed Butter Drizzle - October 15, 2026
- Smoked Teriyaki Beef Jerky Recipe: Umami-Deep Flavor in Every Chewy Bite - October 15, 2026