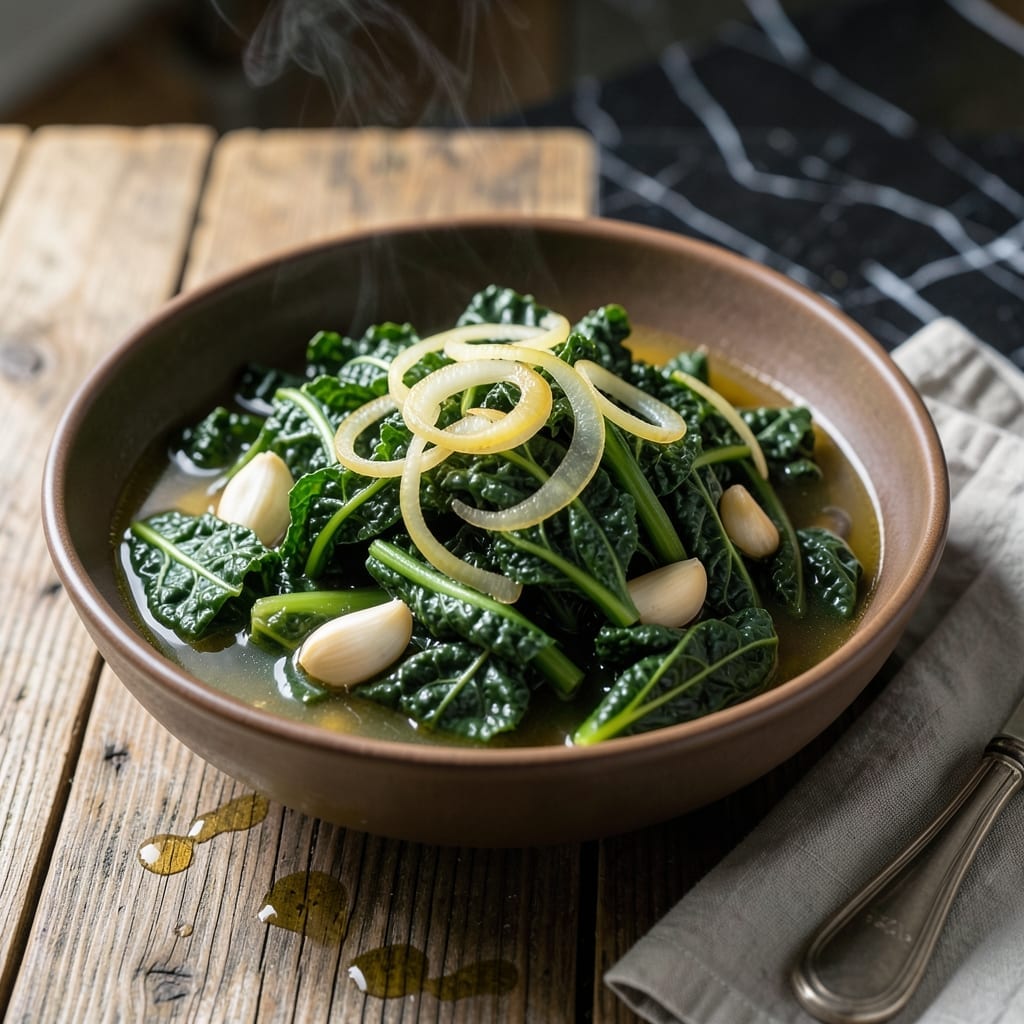
There’s an art to achieving perfectly tender greens that melt in your mouth. This method transforms tough leaves into silky, flavorful bites through slow braising.
I developed this approach by combining classic Southern techniques with my professional training. The key is patience—allowing the greens to cook low and slow in a well-seasoned pot.
What emerges is a dish with deep, savory notes and a texture that’s anything but tough. The braising liquid reduces to a rich, flavorful sauce that coats every leaf.
The result is a side dish that elevates any meal with its tender consistency and complex flavor profile.
Ingredients for Kale Collard Greens
Pantry staples and fresh greens combine for a dish that’s anything but boring.
| Ingredient | Amount | Notes |
|---|---|---|
| Kale 🥬 | 1 lb | Stems removed, chopped into ribbons |
| Collard Greens 🥬 | 1 lb | Stems removed, chopped into ribbons |
| Yellow Onion 🧅 | 1 whole | Medium, finely diced |
| Garlic Cloves 🧄 | 4 cloves | Minced for depth of flavor |
| Vegetable Broth 🥫 | 2 cups | Low-sodium preferred for control |
| Apple Cider Vinegar 🍏 | 2 tbsp | Balances the richness |
| Olive Oil 🫒 | 2 tbsp | Extra-virgin for richness |
| Smoked Paprika 🌶️ | 1 tsp | Adds Southern smokiness |
| Dried Thyme 🌿 | 1 tsp | Earthy backbone flavor |
| Red Pepper Flakes 🔥 | ½ tsp | Adjust to heat preference |
| Sea Salt 🧂 | 1 tsp | Diamond Crystal preferred |
| Black Pepper 🌶️ | ½ tsp | Freshly ground for best flavor |
| Liquid Smoke 💨 | ½ tsp | Optional for extra smokiness |
| Maple Syrup 🍁 | 1 tbsp | Balances bitterness of greens |
[recipe_ingredient_scaler]
The greens are the star here. Farmers market kale and collards have the best texture—look for vibrant, firm leaves without yellowing. Most supermarkets carry pre-washed bunches. I grab mine from Whole Foods when I want organic, but regular grocery store greens work perfectly fine. Don’t skip removing the stems (that’s where the toughness hides).
No apple cider vinegar? White wine vinegar or lemon juice works in a pinch. Smoked paprika not in your spice drawer? Regular paprika plus a pinch of cumin gets you close. Liquid smoke can be skipped entirely if you’re not into that flavor. For the broth, Better Than Bouillon vegetable base is my go-to—dissolve it in hot water for instant depth.
Leftovers keep beautifully in the fridge for about 4-5 days and actually taste better the next day. Freeze portions for up to 3 months (the texture softens slightly but the flavor holds). Reheat gently on the stove with a splash of water or broth.
Why You’ll Love This Recipe
- One Pot Wonder: I just dump everything in a single pot and let the garlic and onion work their magic.
- Deep Southern Flavor: The slow-cooked collards and kale soak up the vegetable broth like a dream.
- Meal Prep Hero: I make a big batch on Sunday and it tastes even better by Wednesday.
- Budget Stretcher: Honestly, a pound of greens costs pennies and feeds us for days.
Step-by-Step Instructions for Kale and Collard Greens
Here’s the method I swear by for perfectly tender, flavorful greens every time.
Step 1: Prep the Greens and Aromatics
Start by thoroughly washing the 1 lb Kale and 1 lb Collard Greens to remove any grit. I fill a clean sink with cold water, submerge the greens, and let the dirt settle to the bottom. Repeat this process 2-3 times until the water runs clear.
Remove the tough stems from both greens by folding each leaf in half and slicing along the stem with a sharp knife. Stack the leaves and chop them into 1-inch ribbons. Finely dice the 1 whole Yellow Onion and mince the 4 cloves Garlic Cloves—this builds the flavor foundation.
Step 2: Sauté the Aromatics and Bloom the Spices
Heat the 2 tbsp Olive Oil in a large, heavy pot or Dutch oven over medium heat. Add the diced onion and cook for 5 minutes until it turns translucent and fragrant. Stir in the minced garlic and cook for another 30 seconds—just until it releases its aroma but doesn’t brown.
Add the 1 tsp Smoked Paprika, 1 tsp Dried Thyme, 0.5 tsp Red Pepper Flakes, 1 tsp Sea Salt, and 0.5 tsp Black Pepper to the pot. Stir constantly for 20-30 seconds to bloom the spices, which deepens their flavors and fills your kitchen with an intoxicating scent.
Step 3: Braise the Greens to Tenderness
Add the chopped kale and collard greens to the pot in batches, stirring each addition until it wilts slightly. This prevents overcrowding and ensures even cooking. Pour in the 2 cups Vegetable Broth, 2 tbsp Apple Cider Vinegar, and 0.5 tsp Liquid Smoke.
Bring the mixture to a gentle simmer, then reduce the heat to low. Cover the pot and let it cook for 45-60 minutes, stirring occasionally. The greens are done when they’re tender and silky—not mushy—and the liquid has reduced slightly.
Step 4: Finish with Sweetness and Serve
Stir in the 1 tbsp Maple Syrup and cook for another 2-3 minutes to balance the bitterness of the greens. Taste and adjust the seasoning if needed, though the combination of smoky, spicy, and sweet should be perfectly harmonious.
Remove from heat and let the greens rest for 5 minutes before serving. This allows the flavors to meld together beautifully. Serve warm as a side dish, or alongside cornbread for a classic Southern meal. The greens should glisten with a light, flavorful broth that’s just begging to be sopped up.
Pro Tips For Making Kale Collard Greens
- Massage the Greens: Rub kale and collard leaves with a pinch of salt for 1-2 minutes before cooking to break down tough fibers—this softens them faster and makes the texture way more pleasant.
- Sweat the Onions: Cook the yellow onion low and slow in a little oil until translucent (about 5-7 minutes) before adding garlic, or you’ll end up with harsh, raw onion flavor in the final dish.
- Skip the Crowded Pot: I learned this the hard way—if you dump all the greens in at once, they’ll steam instead of sauté. Add them in batches so they wilt down properly.
- Use Warm Broth: Pouring cold vegetable broth into hot greens drops the temperature and slows cooking. Heat the broth first, then add—it keeps the momentum going.
Common Mistakes When Making kale collard greens
Skipping the Wash
Greens often carry grit from the field, so skipping the wash step results in that unpleasant crunch. I fill my sink with cold water and soak the leaves 2-3 times, letting the dirt settle to the bottom each time. Even pre-washed greens benefit from a quick rinse. 💡
Overcrowding the Pot
Adding all the greens at once creates uneven cooking and steaming rather than proper braising. I add them in batches, stirring each addition until it wilts slightly before adding more. This ensures every leaf gets equal attention.
Rushing the Cook
These greens need time to transform from tough to tender. I maintain a gentle simmer at low heat for 45-60 minutes, checking occasionally. The texture should be silky, not mushy—this is where patience pays off.
Underseasoning the Liquid
The braising liquid reduces as it cooks, concentrating flavors. I taste after 30 minutes and adjust with more sea salt or smoked paprika if needed. The final dish should have a well-balanced, savory depth.
Skipping the Rest
After cooking, I let the greens rest for 5 minutes off heat. This allows the flavors to meld together and the liquid to thicken slightly. Serving immediately can leave the dish watery and less cohesive.
Ignoring the Stems
Those tough stems can ruin the texture of your final dish. I always remove them by folding each leaf and slicing along the stem. Chopping the leaves into 1-inch ribbons ensures even cooking and a consistent bite. ✨
Nutrition Facts
Frequently Asked Questions
Can I use frozen greens instead of fresh?
Yes, but thaw and drain them well first. Frozen greens work in a pinch, though fresh will give you the best texture. Reduce cooking time by about 15-20 minutes since they’re pre-blanched.
Why do my greens turn out bitter?
Undercooking or skipping the maple syrup can leave them bitter. The 45-60 minutes braising time mellows the bitterness, while the syrup adds balance. Taste and adjust sweetness at the end.
Can I make this ahead of time?
The flavor improves after 1-2 days in the fridge. Reheat gently on the stove with a splash of broth or water. They freeze well for up to 3 months too.
What if I don’t have smoked paprika?
Use regular paprika plus a pinch of cumin for depth. For extra smokiness, add 0.5 tsp liquid smoke to the braising liquid. The flavor will still be rich and satisfying.

Trained in classic French technique but raised on slow-cooked ribs and spicy rubs, she blends culinary skill with smoke and soul.
- Recipe for Fully Cooked Spiral Ham: Sweet Glaze and Effortless Elegance - October 3, 2026
- Recipe for Cream of Rice: Silky Smooth Breakfast Comfort - October 3, 2026
- Old Fashioned Beef and Noodles Recipe Crock Pot: Set-It-and-Forget-It Hearty Meal - October 3, 2026