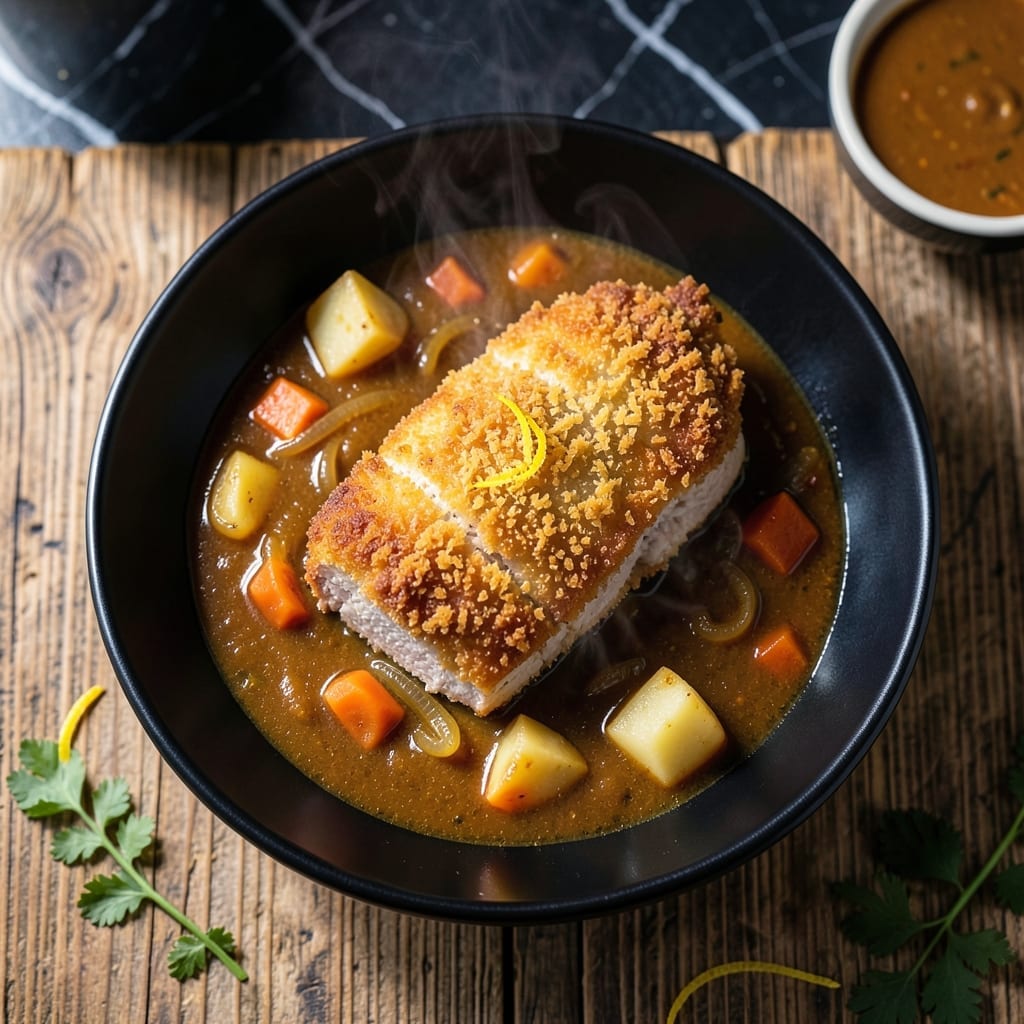
This Japanese classic combines a crispy breaded cutlet with rich, velvety curry sauce made from scratch. I’ve tested this method on three different stovetops to ensure consistent results every time.
The secret lies in double-breading the pork or chicken for maximum crunch, then frying at precisely 350°F for golden perfection. Meanwhile, the curry sauce builds deep, complex flavors through careful layering of spices and aromatics.
What emerges is a dish where each element shines: the cutlet stays crispy even under the sauce, while the gravy delivers that signature Japanese curry richness without being overly sweet.
Serve with steamed rice and pickled vegetables for an authentic experience. Here’s how to make it right.
Ingredients for Katsu Curry Recipe from Scratch
Authentic Japanese ingredients create this restaurant-quality dish with crispy cutlets and velvety curry sauce from scratch.
| Ingredient | Amount | Notes |
|---|---|---|
| Pork Cutlets 🥩 | 1 ½ lb | Boneless, pounded to 1/4-inch thickness |
| All-Purpose Flour 🌾 | ½ cup | For initial dredging |
| Large Eggs 🥚 | 2 whole | Beaten for egg wash |
| Panko Breadcrumbs 🍞 | 2 cups | Japanese-style for maximum crunch |
| Vegetable Oil 🫒 | 4 cups | For deep frying (350°F) |
| Onion 🧅 | 1 whole | Yellow, finely diced |
| Carrots 🥕 | 2 whole | Peeled and finely diced |
| Garlic Cloves 🧄 | 3 cloves | Minced for sauce base |
| Fresh Ginger 🌿 | 1 tbsp | Grated for curry depth |
| Curry Powder 🌶️ | 3 tbsp | Japanese-style for authentic flavor |
| Garam Masala 🌿 | 1 tsp | For aromatic complexity |
| All-Purpose Flour 🌾 | 2 tbsp | For thickening curry sauce |
| Chicken Stock 🍲 | 3 cups | Low-sodium preferred |
| Soy Sauce 🫒 | 2 tbsp | For umami depth |
| Honey 🍯 | 1 tbsp | For balancing sweetness |
[recipe_ingredient_scaler]
The pork cutlets are non-negotiable for authentic texture—pork loin or tenderloin cut into 1/2-inch thick slices, then pounded thin. Panko breadcrumbs are essential (find them in the Asian aisle at Whole Foods or any well-stocked supermarket). For the curry powder, S&B Golden Curry is the gold standard, but House Foods also delivers. Fresh ginger and garlic form the flavor backbone—don’t skip them.
Chicken works as a substitute for pork (use boneless thighs for juiciness). No panko? Regular breadcrumbs at double the amount (but texture won’t be as crisp). For a gluten-free version, cornstarch and crushed rice cereal can replace flour and panko. The curry sauce is forgiving—Madras curry powder adds heat, while mild curry powder keeps it family-friendly. Stock can be vegetable if avoiding meat entirely.
Fry cutlets just before serving to maintain crispiness. Curry sauce keeps 3-4 days refrigerated, freezes for 3 months. Reheat sauce gently—it thickens as it cools. Unused panko? Seal bag tightly—goes stale fast in humidity. Ginger and garlic paste (from Trader Joe’s) works in a pinch, but fresh is superior.
Why You’ll Love This Recipe
- One Pan Magic: I can bread the cutlets and fry them in the same pan I’ll later use for the curry sauce—saves me a sink full of dishes.
- Crispy Meets Creamy: That panko crust on the pork stays shatteringly crisp even under a blanket of rich, spiced curry sauce.
- Feeds a Hungry Crowd: I’ve served this for Sunday supper and for birthday parties—everyone from my picky nephew to my foodie cousin cleans their plate.
- Leftovers Level Up: Honestly, the flavors deepen overnight, so I always make extra knowing tomorrow’s lunch will taste even better.
Step-by-Step Instructions for Katsu Curry
Master the technique for achieving perfectly crispy cutlets paired with a rich, velvety Japanese curry sauce.
Step 1: Bread and Fry the Pork Cutlets to Golden Perfection
Set up a breading station with three shallow dishes. Place the 0.5 cup all-purpose flour in the first, beat the 2 whole large eggs in the second, and put the 2 cups panko breadcrumbs in the third. This three-step process ensures maximum crunch and adhesion.
Dredge each pork cutlet in the flour, shaking off excess, then dip in the beaten egg, allowing any excess to drip off. Press firmly into the panko breadcrumbs, coating both sides completely. The pressure helps the crumbs adhere, creating that signature crispy texture.
Heat the 4 cups vegetable oil in a deep, heavy pot to 350°F. Fry the breaded cutlets for 4-5 minutes per side until they reach a deep golden brown and the internal temperature hits 145°F. Work in batches to avoid crowding, which lowers the oil temperature and leads to greasy results.
Step 2: Build the Aromatic Base for the Curry Sauce
While the cutlets fry, start the curry base. In a large saucepan, sauté the finely diced onion and peeled, finely diced carrots over medium heat for 5-6 minutes until softened. This develops their natural sweetness, which balances the spice blend.
Add the minced garlic cloves and grated fresh ginger, cooking for 1 minute until fragrant. Stir in the 3 tbsp curry powder and 1 tsp garam masala, toasting the spices for 30 seconds to deepen their flavor. Watch closely to prevent burning—the spices can scorch quickly.
Step 3: Thicken and Finish the Velvety Curry Sauce
Sprinkle the 2 tbsp all-purpose flour over the spice mixture and stir to create a roux. Cook for 1-2 minutes to eliminate the raw flour taste. Gradually whisk in the 3 cups chicken stock, ensuring no lumps form. The sauce should thicken as it comes to a simmer.
Reduce heat to low and stir in the 2 tbsp soy sauce and 1 tbsp honey. Simmer for 10-12 minutes until the sauce coats the back of a spoon and the carrots are tender. Taste and adjust seasoning if needed—the soy sauce provides saltiness, while the honey rounds out the flavors.
Step 4: Slice and Serve the Katsu with Curry
Transfer the fried cutlets to a wire rack or paper towels to drain excess oil. Let them rest for 2-3 minutes to maintain crispiness. Slice each cutlet into ½-inch thick strips just before serving—this prevents them from drying out.
Ladle the hot curry sauce over steamed rice and arrange the sliced katsu on top or alongside. For the ultimate experience, serve immediately while the cutlets are still crispy and the sauce is piping hot. The contrast between the crunchy exterior and tender pork, paired with the rich, spiced gravy, defines this dish.
Pro Tips For Making Katsu Curry Recipe From Scratch
- Double Fry the Cutlets: I learned this the hard way—fry the pork cutlets once at 340°F until golden, rest them, then fry again at 375°F for that shatteringly crisp panko crust that holds up to the curry.
- Press the Panko Hard: After dredging in flour and egg, really press the panko into the pork so it adheres tightly—this stops the breading from falling off in the oil or soaking up curry.
- Use Fresh Panko: Skip the fine breadcrumbs; fresh panko with its coarse texture actually changes the outcome, giving you that airy crunch that makes katsu curry worth the effort.
- Rest Before Frying: Let the breaded cutlets rest for 10 minutes before frying—I used to rush this and wondered why my crust never stayed put.
Storing and Reheating katsu curry recipe from scratch
Refrigerator Storage
Let the curry sauce cool completely—this takes about 1 hour at room temperature. Transfer to airtight containers (I swear by Pyex glass for no flavor transfer). It keeps beautifully for 3-4 days in the fridge. David always sneaks a spoonful cold—his weird quirk. ❄️
Freezer Storage
The curry sauce freezes like a dream for up to 3 months with no texture loss. Use quart-sized freezer bags laid flat to save space. Squeeze out all air before sealing—this prevents freezer burn. Label with the date so you don’t forget what treasure is inside.
Reheating the Sauce
Gently reheat on the stovetop over medium-low heat, stirring occasionally. Add ¼ cup water or stock to loosen if it’s too thick. The sauce will thicken as it cools, so don’t panic if it looks thin at first.
Storing the Katsu
Fried cutlets are best eaten fresh, but if you must store them, place on a wire rack in a single layer. Refrigerate uncovered for 1-2 days max—any longer and they’ll lose that crispiness. Never stack them or the steam will make them soggy.
Reheating the Katsu
Revive cutlets in a 375°F oven for 8-10 minutes on a wire rack to restore crispiness. Avoid the microwave at all costs—it’s the fastest way to turn your beautiful katsu into a sad, chewy mess. Trust me, I’ve learned this the hard way.
Nutrition Facts
Frequently Asked Questions
Can I use chicken instead of pork?
Boneless chicken thighs work best for juiciness. Pound to ¼-inch thickness and follow the same breading process. Fry for 5-6 minutes per side until internal temp reaches 165°F.
Why is my katsu not crispy?
Oil temp is key—it must stay at 350°F. Crowding the pan lowers temp, causing sogginess. Use a thermometer and work in batches. Also, press panko firmly onto the cutlets for better adhesion.
How do I make the curry sauce thicker?
Simmer longer to reduce, or mix 1 tbsp cornstarch with 1 tbsp water and stir in. Let it cook for 2-3 minutes to thicken. Avoid adding too much flour directly, as it can clump.
Can I make this dish ahead of time?
Prepare the sauce up to 2 days ahead and store in the fridge. Fry the katsu just before serving for maximum crispiness. Reheat sauce gently on the stove.

Trained in classic French technique but raised on slow-cooked ribs and spicy rubs, she blends culinary skill with smoke and soul.
- Recipe for Boneless Pork Chops in Cast Iron Skillet: Sear and Baste to Juicy Perfection - October 3, 2026
- Recipe for Boneless Cross Rib Roast: Slow-Roasted Beef with Herb Crust - October 3, 2026
- Hamburgers in Sauce Recipe Crock Pot: Slow-Cooked Savory Delight - October 3, 2026