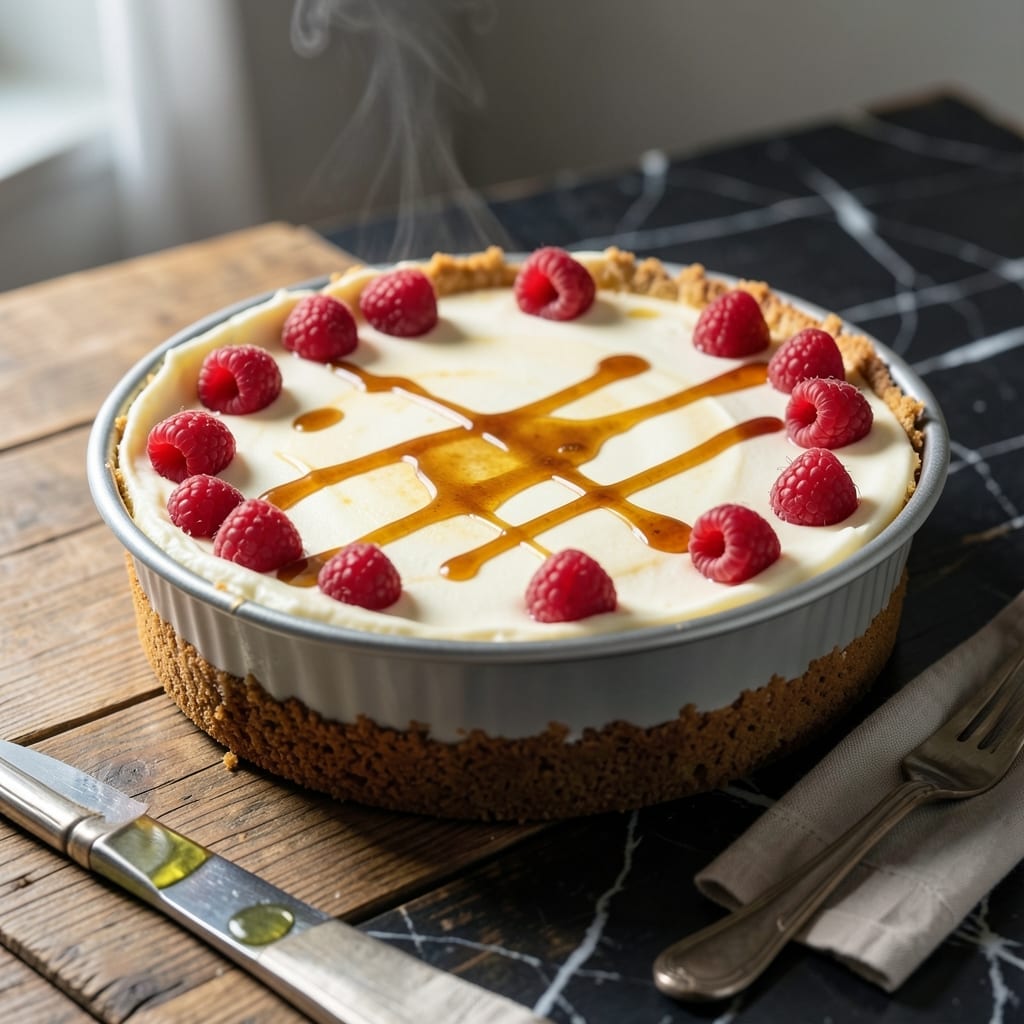
This cheesecake delivers a buttery Keebler crust foundation with a velvety filling that sets perfectly every time. No water bath needed—just simple mixing and baking for professional results.
The pre-made crust saves time without sacrificing quality, while the filling combines cream cheese, sugar, and vanilla for that classic rich flavor. Bake at 325°F for 40 minutes until the edges are set but the center still jiggles slightly.
What emerges is a dessert with a crisp, golden base and a smooth, creamy top that holds its shape when sliced. Chill for at least 4 hours to let the textures fully develop before serving.
Perfect for holidays, potlucks, or whenever you need a guaranteed crowd-pleaser. This method never fails.
Ingredients for Keebler Crust Cheesecake
A pre-made graham crust plus rich, creamy filling ingredients for foolproof results every time.
| Ingredient | Amount | Notes |
|---|---|---|
| Keebler Graham Cracker Crust 🍪 | 1 package | Pre-made, ready-to-use crust |
| Full-Fat Cream Cheese 🧀 | 4 packages | 8 oz each, softened to room temperature |
| Granulated Sugar 🧈 | 1 cup | Fine white granulated |
| Pure Vanilla Extract 🌿 | 1 tsp | High quality, not imitation |
| Large Eggs 🥚 | 3 whole | Room temperature, for smooth texture |
| Heavy Whipping Cream 🥛 | ½ cup | Cold, for creamy consistency |
| All-Purpose Flour 🌾 | 2 tbsp | For structural stability |
| Salt 🧂 | ¼ tsp | Fine table salt |
| Unsalted Butter 🧈 | 2 tbsp | Melted, for crust sealing |
| Sour Cream 🥄 | ½ cup | Full-fat, for tangy richness |
| Lemon Juice 🍋 | 1 tbsp | Freshly squeezed, for brightness |
[recipe_ingredient_scaler]
The cream cheese is critical here. Philadelphia brand offers consistent fat content and smooth texture, which ensures the filling sets properly without cracking. Avoid low-fat versions—they lack the richness needed for that velvety consistency. The Keebler crust provides a buttery, crisp base that saves prep time without compromising quality. Find both at any standard grocery store.
No graham crust? Crush 1.5 cups of graham crackers with 6 tbsp melted butter and press into the pan. Out of sour cream? Greek yogurt at equal volume works well, though the tang may be slightly sharper. For a lighter texture, replace the heavy cream with whipped egg whites (from 2 additional eggs), though the flavor will be less decadent.
This cheesecake keeps beautifully in the fridge for up to 5 days when stored in an airtight container. For longer storage, freeze for 2-3 months—thaw overnight in the refrigerator before serving. Always chill the full 4 hours to achieve the perfect sliceable texture.
Why You’ll Love This Recipe
- I’ll be real: this cheesecake keeps beautifully for up to a week, so leftovers are a win, not a worry.
- No-Fuss Base: That Keebler crust means zero crushing, pressing, or measuring—just unwrap and go.
- Velvety Dream: Full-fat cream cheese blended with vanilla and sugar bakes into that rich, smooth bite we all crave.
- Feeds the Freezer: I’ll be real: this cheesecake keeps beautifully for up to a week, so leftovers are a win, not a worry.
Step-by-Step Instructions for Keebler Crust Cheesecake
Here’s the method. Straightforward, tested, works every time.
Step 1: Prepare the Graham Cracker Crust
Remove the 1 package Keebler Graham Cracker Crust from its packaging and place it in a 9-inch springform pan. Press it evenly into the bottom using the back of a spoon or a measuring cup, creating a firm, uniform layer that extends slightly up the sides.
Brush the crust with 2 tbsp Unsalted Butter melted to room temperature. This step seals the crust, preventing the filling from seeping in and creating a crisp barrier. Place the pan in the freezer while you prepare the filling—this chilling prevents over-baking of the edges.
Step 2: Beat the Cream Cheese and Sugar
In a stand mixer fitted with the paddle attachment, beat the 4 packages Full-Fat Cream Cheese on medium speed for 2 minutes until smooth and creamy. Scrape down the sides of the bowl with a silicone spatula to ensure even mixing.
Gradually add the 1 cup Granulated Sugar and continue beating for another 2-3 minutes until the mixture is light and fluffy. The sugar should be fully incorporated, and the cream cheese should have no lumps. This creaming process incorporates air, which gives the finished cheesecake its velvety texture.
Step 3: Incorporate Remaining Wet Ingredients
Add the 1 tsp Pure Vanilla Extract, 3 whole Large Eggs (one at a time), 0.5 cup Heavy Whipping Cream, 0.5 cup Sour Cream, and 1 tbsp Lemon Juice. Mix on low speed just until each ingredient is fully combined—over-beating at this stage can incorporate too much air, leading to cracks.
Sift in the 2 tbsp All-Purpose Flour and 0.25 tsp Salt to prevent clumping. Mix on the lowest setting for 15-20 seconds until just combined. The batter should be smooth and satiny, with no visible streaks of flour.
Step 4: Bake in a Water Bath
Pour the batter over the chilled crust, smoothing the top with a spatula. Tap the pan gently on the counter 3-4 times to release any air bubbles trapped in the batter. This prevents unsightly tunnels in the finished cheesecake.
Place the springform pan in a larger roasting pan and fill the roasting pan with hot water until it reaches halfway up the sides of the springform pan. Bake at 325°F for 55-65 minutes until the edges are set but the center still has a slight wobble when gently shaken. The water bath regulates the oven temperature, ensuring even baking.
Step 5: Cool Gradually and Chill
Turn off the oven and crack the door open 2 inches. Allow the cheesecake to cool in the oven for 1 hour. This gradual cooling prevents the sudden temperature change that causes cracks.
After 1 hour, remove the cheesecake from the oven and water bath, then run a thin knife around the edge to loosen it from the pan. Cool completely at room temperature for 1 hour, then refrigerate for at least 4 hours (preferably overnight). The chilling time is essential for the filling to set properly and develop its full flavor.
Pro Tips For Making Keebler Crust Cheesecake
- Room Temp Cream Cheese: Pull your full-fat cream cheese out at least 2 hours before mixing—I learned this the hard way after my first three cheesecakes came out lumpy.
- Press the Crust: Use the bottom of a glass to firmly press the Keebler crust into the pan, especially up the sides, or it’ll crumble when you slice it.
- Skip Overmixing Eggs: Add your large eggs one at a time and mix just until combined—overbeating adds air that can cause cracks during baking.
- Cool Gradually: After baking, turn off the oven, crack the door, and let the cheesecake sit inside for an hour to prevent sudden temperature drops that lead to splits.
Serving Suggestions for This Dish
Classic Presentation
Serve this cheesecake on a cake stand for an elegant touch. The golden graham crust provides a beautiful contrast against the pale filling. I like to dust the top with a light sprinkle of powdered sugar just before serving. 💛
Fruit Toppings
A berry compote makes the perfect complement—simmer 2 cups mixed berries with ¼ cup sugar and 1 tbsp lemon juice for 10 minutes. Fresh strawberries or raspberries arranged in a circular pattern add visual appeal and a bright, tangy contrast.
Sauce Drizzles
Drizzle with caramel sauce or chocolate ganache for a decadent finish. Warm the sauce slightly so it flows smoothly over the chilled cheesecake. I recommend Ghirardelli caramel for its rich, buttery flavor.
Whipped Cream Accents
Top with a dollop of homemade whipped cream—whip 1 cup heavy cream with 2 tbsp powdered sugar and ½ tsp vanilla until soft peaks form. Add a sprinkle of graham cracker crumbs for texture and a nod to the crust flavor.
Garnish Ideas
For a restaurant-worthy touch, garnish with fresh mint leaves or edible flowers. A light dusting of cocoa powder through a stencil creates an artistic finish. These small details elevate the presentation without overpowering the dessert. ✨
Serving Temperature
Always serve chilled—remove from the fridge 15-20 minutes before slicing to let it soften slightly. Use a hot knife (dipped in hot water and wiped dry) for clean, professional slices that showcase the creamy texture.
Nutrition Facts
Frequently Asked Questions
Can I use a different pre-made crust?
Yes, any graham cracker or shortbread crust works. The baking time remains the same at 325°F for 55-65 minutes. Just ensure it fits your springform pan properly.
Why does my cheesecake crack on top?
Cracks usually happen from overmixing or cooling too quickly. Avoid beating the batter after adding eggs, and always cool gradually in the turned-off oven for 1 hour first.
How do I know when it’s done baking?
The edges should be set but the center still jiggle slightly when shaken. It will finish setting during the cooling and chilling time. Remove it at 55-65 minutes.
Can I make this without a water bath?
Yes, but the edges may bake faster. Place a pan of water on the lower rack instead. The water bath method ensures even baking at 325°F.

Trained in classic French technique but raised on slow-cooked ribs and spicy rubs, she blends culinary skill with smoke and soul.
- Recipe for Boneless Pork Chops in Cast Iron Skillet: Sear and Baste to Juicy Perfection - October 3, 2026
- Recipe for Boneless Cross Rib Roast: Slow-Roasted Beef with Herb Crust - October 3, 2026
- Hamburgers in Sauce Recipe Crock Pot: Slow-Cooked Savory Delight - October 3, 2026