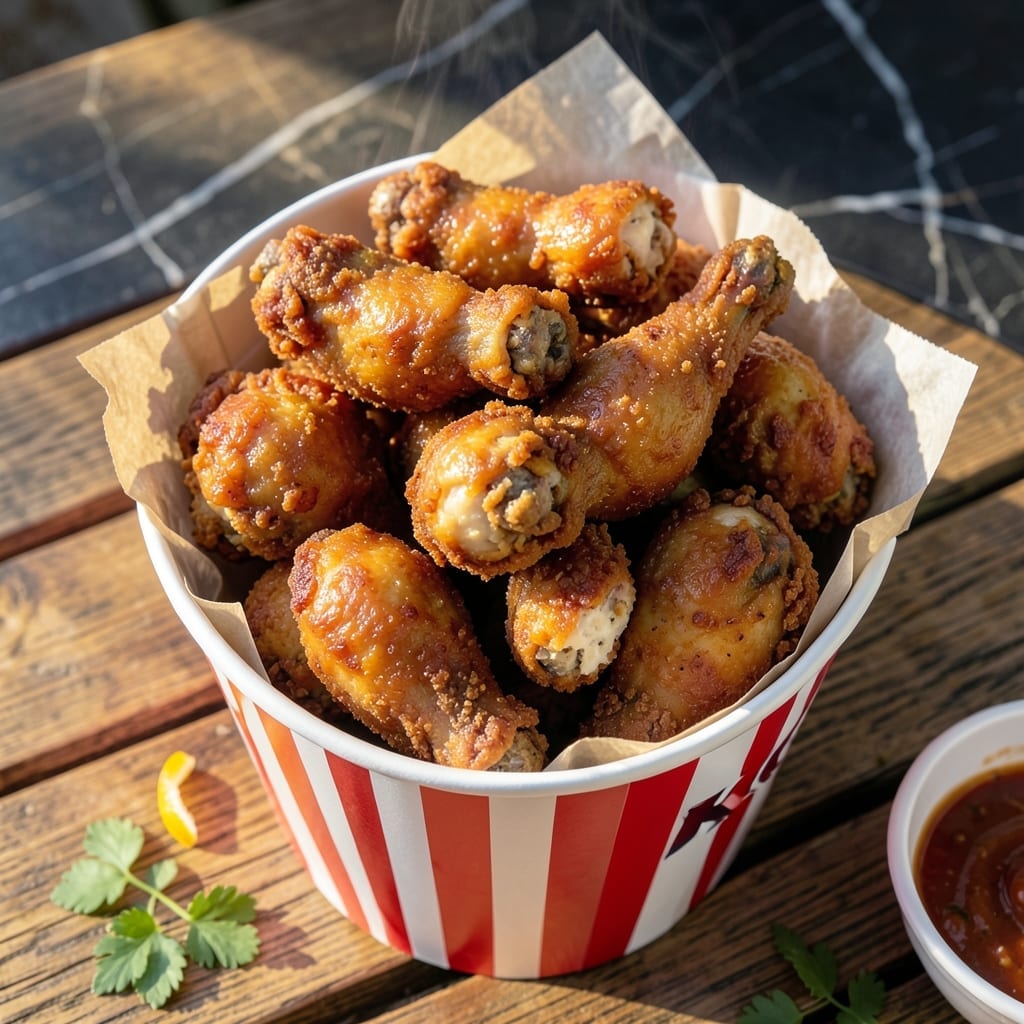
I’ve spent years perfecting this fried chicken recipe to replicate that signature KFC flavor at home. The secret lies in the precise blend of 11 herbs and spices and a two-step coating process that creates that unmistakable crunch.
Unlike other recipes, this method uses a buttermilk marinade followed by a seasoned flour dredge and a final dip in egg wash before coating. The result is chicken that’s juicy inside with a crispy, golden exterior that shatters with every bite.
Frying at 350°F ensures even cooking without burning the coating. The aroma alone will transport you to your favorite KFC location, but the taste proves you’ve mastered the original.
This recipe delivers the full bucket experience. The spices create complex layers of flavor that build with each piece you eat.
Ingredients for Kfc Original Recipe Chicken Bucket
Eleven herbs and spices plus a few pantry staples bring this iconic bucket to life.
| Ingredient | Amount | Notes |
|---|---|---|
| Chicken Pieces 🍗 | 3 ½ lb | Mixed dark and white meat |
| Buttermilk 🥛 | 2 cups | Full-fat for best results |
| All-Purpose Flour 🌾 | 3 cups | For dredging and coating |
| Large Eggs 🥚 | 2 whole | Beaten for egg wash |
| Salt 🧂 | 1 tbsp | Fine grain table salt |
| Black Pepper 🌶️ | 1 tsp | Freshly ground preferred |
| Dried Thyme 🍃 | 1 tsp | Rubbed between fingers |
| Dried Basil 🌿 | 1 tsp | Crushed for better flavor |
| Dried Oregano 🍃 | 1 tsp | Mediterranean variety preferred |
| Celery Salt 🧂 | 1 tsp | Key for authentic flavor |
| Garlic Powder 🧄 | 1 tsp | Not garlic salt |
| Onion Powder 🧅 | 1 tsp | Fine powder texture |
| Dried Mustard 🌿 | 1 tsp | Powdered form required |
| Ground Ginger 🌶️ | ½ tsp | Freshly ground if possible |
| Paprika 🌶️ | 1 tsp | Sweet or smoked variety |
| White Pepper 🌶️ | ½ tsp | Subtle heat and aroma |
| Vegetable Oil 🫒 | 4 cups | For deep frying, 350°F |
[recipe_ingredient_scaler]
The spice blend is non-negotiable here. Penzeys or McCormick are solid for the dried herbs—just make sure they’re fresh (if your oregano smells like dust, replace it). Celery salt is the secret weapon; Lawry’s makes a great one. For the chicken, thighs and drumsticks stay juicier than breasts during frying. Grab them skin-on, bone-in—you’ll remove the skin after marinating anyway.
No buttermilk? Whole milk plus 1 tbsp vinegar per cup works in a pinch. Short on a spice? Skip the ginger or white pepper if you must, but don’t omit the celery salt—it’s essential. For the flour, all-purpose is ideal, but self-rising in a 1:1 swap adds extra crisp. The oil needs to hit 350°F—use a thermometer (or test with a wooden chopstick; bubbles mean it’s ready).
Fry in batches to avoid crowding—keeps the oil temp steady. Leftovers? They won’t last, but if they do, reheat in a 400°F oven for 10 minutes to revive the crunch. Best eaten fresh, honestly. Oil can be strained, cooled, and reused once if you’re frying more later.
Why You’ll Love This Recipe
- I’ll be real: the chicken stays crispy even the next day if you reheat it in the oven.
- One Bowl Wonder: I mix the buttermilk, eggs, and flour in a single bowl—no fancy prep, just dump and coat.
- That Crispy Crunch: The buttermilk soak makes the coating stick perfectly, and the salt brings out the juiciest, most flavorful chicken.
- Feeds a Crowd: Honestly, it’s my go-to for Sunday dinner when the whole family’s over and I need something hearty.
Step-by-Step Instructions for KFC Original Recipe Chicken Bucket
Here’s how I recreate that famous crispy, flavorful chicken using the classic 11-herb and spice blend.
Step 1: Marinate the Chicken in Buttermilk
Place all 3.5 lb Chicken Pieces in a large bowl. Pour in the 2 cups Buttermilk and ensure each piece is fully coated. I like to press down gently to help the buttermilk penetrate.
Cover and refrigerate for at least 4 hours, but overnight is best. This step tenderizes the chicken and helps the coating adhere. The buttermilk’s acidity breaks down proteins, guaranteeing juicy meat inside that crispy shell.
Step 2: Prepare the 11-Herb and Spice Flour Coating
In a large bowl, combine the 3 cups All-Purpose Flour, 1 tbsp Salt, 1 tsp Black Pepper, 1 tsp Dried Thyme, 1 tsp Dried Basil, 1 tsp Dried Oregano, 1 tsp Celery Salt, 1 tsp Garlic Powder, 1 tsp Onion Powder, 1 tsp Dried Mustard, 0.5 tsp Ground Ginger, 1 tsp Paprika, and 0.5 tsp White Pepper.
Whisk until everything is evenly distributed. The key here is balance—each spice plays a role in that signature flavor. I always rub the dried herbs between my fingers to release their oils for maximum impact.
Step 3: Coat the Chicken with Flour and Egg Wash
Remove the chicken from the buttermilk, letting any excess drip off. Dredge each piece thoroughly in the spiced flour, pressing firmly to create a thick, even coating. Shake off any loose flour.
Next, dip each piece in a beaten mixture of the 2 whole Large Eggs, then dredge in the flour again. This double-coating technique is what gives the chicken its extra-crispy texture. Let the coated pieces rest for 10 minutes to help the coating set.
Step 4: Deep-Fry the Chicken to Golden Perfection
Heat the 4 cups Vegetable Oil in a large, heavy-bottomed pot to 350°F. Use a deep-fry thermometer to monitor the temperature—it’s critical for even cooking and that perfect golden crust.
Working in batches to avoid overcrowding, carefully lower the chicken into the hot oil. Fry for 12-15 minutes, turning occasionally, until the chicken is deep golden brown and the internal temperature reaches 165°F. The coating should be crispy and the juices inside should run clear.
Step 5: Drain and Rest Before Serving
Transfer the fried chicken to a wire rack set over a baking sheet to drain excess oil. This keeps the coating crispy instead of soggy. Let it rest for 5 minutes before serving.
I always serve it hot, straight from the rack. The outside should be shatteringly crisp, and the inside tender and juicy with that unmistakable blend of herbs and spices in every bite. This is the closest you’ll get to the original bucket at home.
Pro Tips For Making Kfc Original Recipe Chicken Bucket
- Double Dredge: Dip the chicken in buttermilk, then flour, then back in buttermilk and flour again—I learned this the hard way, but that second coat is what gives it that signature KFC crunch.
- Heat the Oil: Use a deep fry thermometer and keep the oil at 350°F. After burning three batches, I finally figured out that guessing just doesn’t cut it.
- Rest the Chicken: Let the coated chicken sit for 5-10 minutes before frying—my grandmother swore by this, and it actually helps the crust stick better.
- Season Generously: Mix more salt into the flour than you think you need, especially if using unsalted butter in the buttermilk. Sounds weird, but it works.
Make-Ahead Tips for This Recipe
Prep the Spice Mix
Mix all 11 spices with the flour the night before and store in an airtight container. This lets the flavors meld together. I use a large mason jar for easy shaking and storage. 💡
Marinate Ahead
Combine chicken and buttermilk in a gallon-sized ziplock bag up to 24 hours before cooking. The longer it marinates, the more tender and flavorful your meat will be.
Pre-Coat Chicken
Dredge the chicken in the spice mix after marinating, then refrigerate on a wire rack for up to 8 hours. This creates a dry base layer that ensures maximum crispiness.
Double-Coat Strategy
Complete the full coating process (flour → egg wash → flour) up to 2 hours before frying. Keep coated pieces on a rack in the fridge to prevent sogginess.
Oil Management
Pre-measure your 4 cups vegetable oil and store in a cool, dark place. I prefer Crisco for its high smoke point. Let it come to room temperature before frying for even heating.
Batch Planning
Portion your chicken into serving sizes and store separately. This makes frying in batches more organized. I use parchment paper between layers to prevent sticking. ⏰
Nutrition Facts
Frequently Asked Questions
Can I use chicken breasts instead of dark meat?
You can, but dark meat stays juicier during frying. If using breasts, reduce cooking time to 10-12 minutes to prevent dryness. Brining them first in saltwater helps maintain moisture.
Why does the chicken need to rest after coating?
Resting for 10 minutes lets the coating adhere better and prevents it from falling off during frying. It also helps the flour absorb moisture, creating a crispier crust.
What’s the best oil for frying?
Use oils with a high smoke point like vegetable, canola, or peanut oil. Avoid olive oil—it burns at 350°F. Peanut oil adds a subtle flavor that complements the spices.
How do I keep the chicken warm while frying batches?
Place finished pieces on a wire rack in a 200°F oven. This keeps them crispy without overcooking. Never stack them—steam will make the coating soggy.

Trained in classic French technique but raised on slow-cooked ribs and spicy rubs, she blends culinary skill with smoke and soul.
- Sanjeev Kapoor Egg Biryani Recipe: Fragrant Spiced Rice With Boiled Eggs - October 3, 2026
- Recipe for French Pork Spread Gorton: Savory Gallic Flavors in a Spreadable Delight - October 3, 2026
- Recipe for Pan Fried: Golden Crust with Savory Depth - October 3, 2026